Lifestyle

Top 10 Things to do in Lompoc, CA

In my mind, California’s central coast is one of the most beautiful and underrated regions in the state. When my husband and I had the chance to visit Lompoc one weekend with Explore Lompoc, we jumped at the opportunity! This area was first inhabited by the native Chumash people, and the name “Lompoc” is derived from the Purisimeño language meaning “lagoon.” Since then, the city was incorporated in 1888, and became known for its flowers, art, diatomite mine, Vanderberg Air Force base and wine.Lompoc-Flowers-4From our weekend in Lompoc, here were our top 10 favorite things to do:


  1. VISIT THE HISTORIC LA PURISIMA MISSION

Mission-10This beautiful mission is part of the La Purisima State Historic Park, which covers 1,928 acres of land. The mission was originally built in 1787 near the southern part of Lompoc city, but after an earthquake destroyed in the mission in 1812, it was relocated a few miles northeast. The mission was rebuilt in linear fashion to better withstand future earthquakes, making it the only California mission not designed in a quadrangle. This beautiful and uncrowded mission is my favorite in the state!


  1. TAKE A SCENIC HIKE UP BODGER TRAIL

Bodger-Trail-4Bodger Trail is the top-rated hike in Lompoc. This steep 0.7 mile incline leads to a breathtaking panoramic view of the city and the flower fields, making it a short but sweet climb to a beautiful vantage point.


  1. GAZE UPON THE STUNNING LOMPOC FLOWER FIELDS

Lompoc-Flowers-5Speaking of flower fields! Lompoc is known as the “City of Arts and Flowers,” and also is known as the flower seed capital of the world. If you’re visiting between April and September, chances are you will see some beautiful blooms somewhere in the city—whether they be wildflowers or commercial flower fields. Be sure to check out Lompoc’s Flower Tracker before you go!


  1. WANDER OLD TOWN LOMPOC’S MURALS


There are 40 murals distributed throughout this adorable small town, and a map for that can be found here. The murals highlight Lompoc’s heritage, and are a great way to learn more about the history, economy and culture of this adorable place. Swing by the Lompoc Valley Chamber of Commerce & Visitor’s Bureau to grab a map and tips on what to do/see along the route!


  1. SUNBATHE AT JALAMA BEACH


Do the 30-minute drive from Lompoc town through some beautiful vineyards and rolling hills to get to Jalama Beach and catch some waves, nap in the sun, stroll along the coast or explore sea caves. You can also bring your furry friends ($3/dog) or try camping (starting at $30/night) here!


  1. GO WINE TASTING IN THE WINE GHETTO

Montemar-Wines-7Taste some of the best wine that the Sta Rita Valley has to offer. Lompoc’s wines are delicious, and you can be sure that you’ll have some great conversations and meet wonderful people as you explore Lompoc’s Wine Ghetto! Our favorite winery is Montemar Wines, which has some amazing pinots/syrahs and a large outdoor patio complete with games, live music and an organic garden. Also, this spot features the first ever wine barrel ceiling!


  1. GRAB A COFFEE AT SOUTHSIDE CAFÉ


This local favorite café features adorable, colorful art and some delicious coffee options. My favorite from here is the dark chocolate mocha with lavender! Southside Café sits right in the heart of Old Town Lompoc, and is a great starting point as you embark on your mural hunt.


  1. EAT A TASTY MEAL AT HANGAR 7


Also located in the heart of Old Town Lompoc, Hangar 7 is a charming gastropub that has delicious flatbreads (all of which you can sub gluten-free crust for at no additional charge!) and local wine/beer options. The aviation theme is apparent all throughout the lounge, and you might even find a helmet signed by Elon Musk.


  1. LOUNGE BY THE POOL


Lompoc has incredibly temperate climate and never really gets too hot or too cold. This is part of why it’s so ideal for growing flowers, and also makes the town a great place for a pool day! We enjoyed an afternoon lounging at the Hilton Garden Inn.


  1. SWING BY THE OLD DRIVE-IN

Lompoc-Drive-InThis now abandoned drive-in theater is a great place to swing by for a quick photo on your way to the mission. Fun Fact: this drive-in was heavily featured in the 2004 film SIDEWAYS, starring Paul Giamatti, Thomas Haden Church, Sandra Oh and Virginia Madsen.


BONUS: VISIT THE AMERICAN WILD HORSE SANCTUARY
We unfortunately didn’t have time to do this in our whirlwind weekend, but Lompoc’s Return to Freedom horse sanctuary is dedicated to preserving America’s wild horse population through conservation, advocacy and education. These 5,000 acres span four different locations and are home to over 500 horses and 42 burros. You can tour the sanctuary by reserving a photo safari in advance!


Lompoc is a beautiful and underrated California gem, and I hope I’ve helped convince you to add it to your list the next time you drive up the central coast!


This guide is written in partnership with Explore Lompoc. All thoughts and opinions are my own. Thank you so much to the City of Lompoc for making our weekend here a trip to remember!


Lifestyle

The Ultimate Santa Barbara Weekend Getaway

Known as the American Riviera, Santa Barbara is a quintessential California coastal city filled with natural wonders and Spanish-style architectural charm. Whether for a fun girls’ trip or a romantic couples’ escape, you can bet Santa Barbara will be the perfect place to spend a relaxing weekend.

Continue reading “The Ultimate Santa Barbara Weekend Getaway”

Lifestyle

Hotel Review: Hilton Santa Barbara Beachfront Resort

Few things make me sing, “California, here we come,” more than driving up the 101 to Santa Barbara. The ocean views, swaying palm trees and blue skies will draw you in, but staying at a place like the Hilton Santa Barbara Beachfront Resort really seals the deal and makes you never want to leave this beautiful coastal town.

Continue reading “Hotel Review: Hilton Santa Barbara Beachfront Resort”

Lifestyle

24 Hours in Death Valley National Park

I am so excited to share with you guys about Death Valley, and truly don’t know why it took me so long to finally visit. We were only here for 24 hours, but even so, this strange destination left such an impact on me. Few places have made me feel more like I’m on another planet than this jaw-dropping landscape.

zabriskie-point-death-valley-view-couple-goals-california-usa

This desert national park located on the border of California and Nevada is truly otherworldly, has become one of my favorite road trips to take from Southern California. The harsh climate and fascinating history from the Native American inhabitants to the craze of the Gold Rush and mining colonies make this land lost in time a fascinating place, and exploring the scattered ghost towns or ruins will cause you to feel like you’re in the Wild West.

Continue reading “24 Hours in Death Valley National Park”

Lifestyle

Hotel Review: Skylodge Adventure Suites

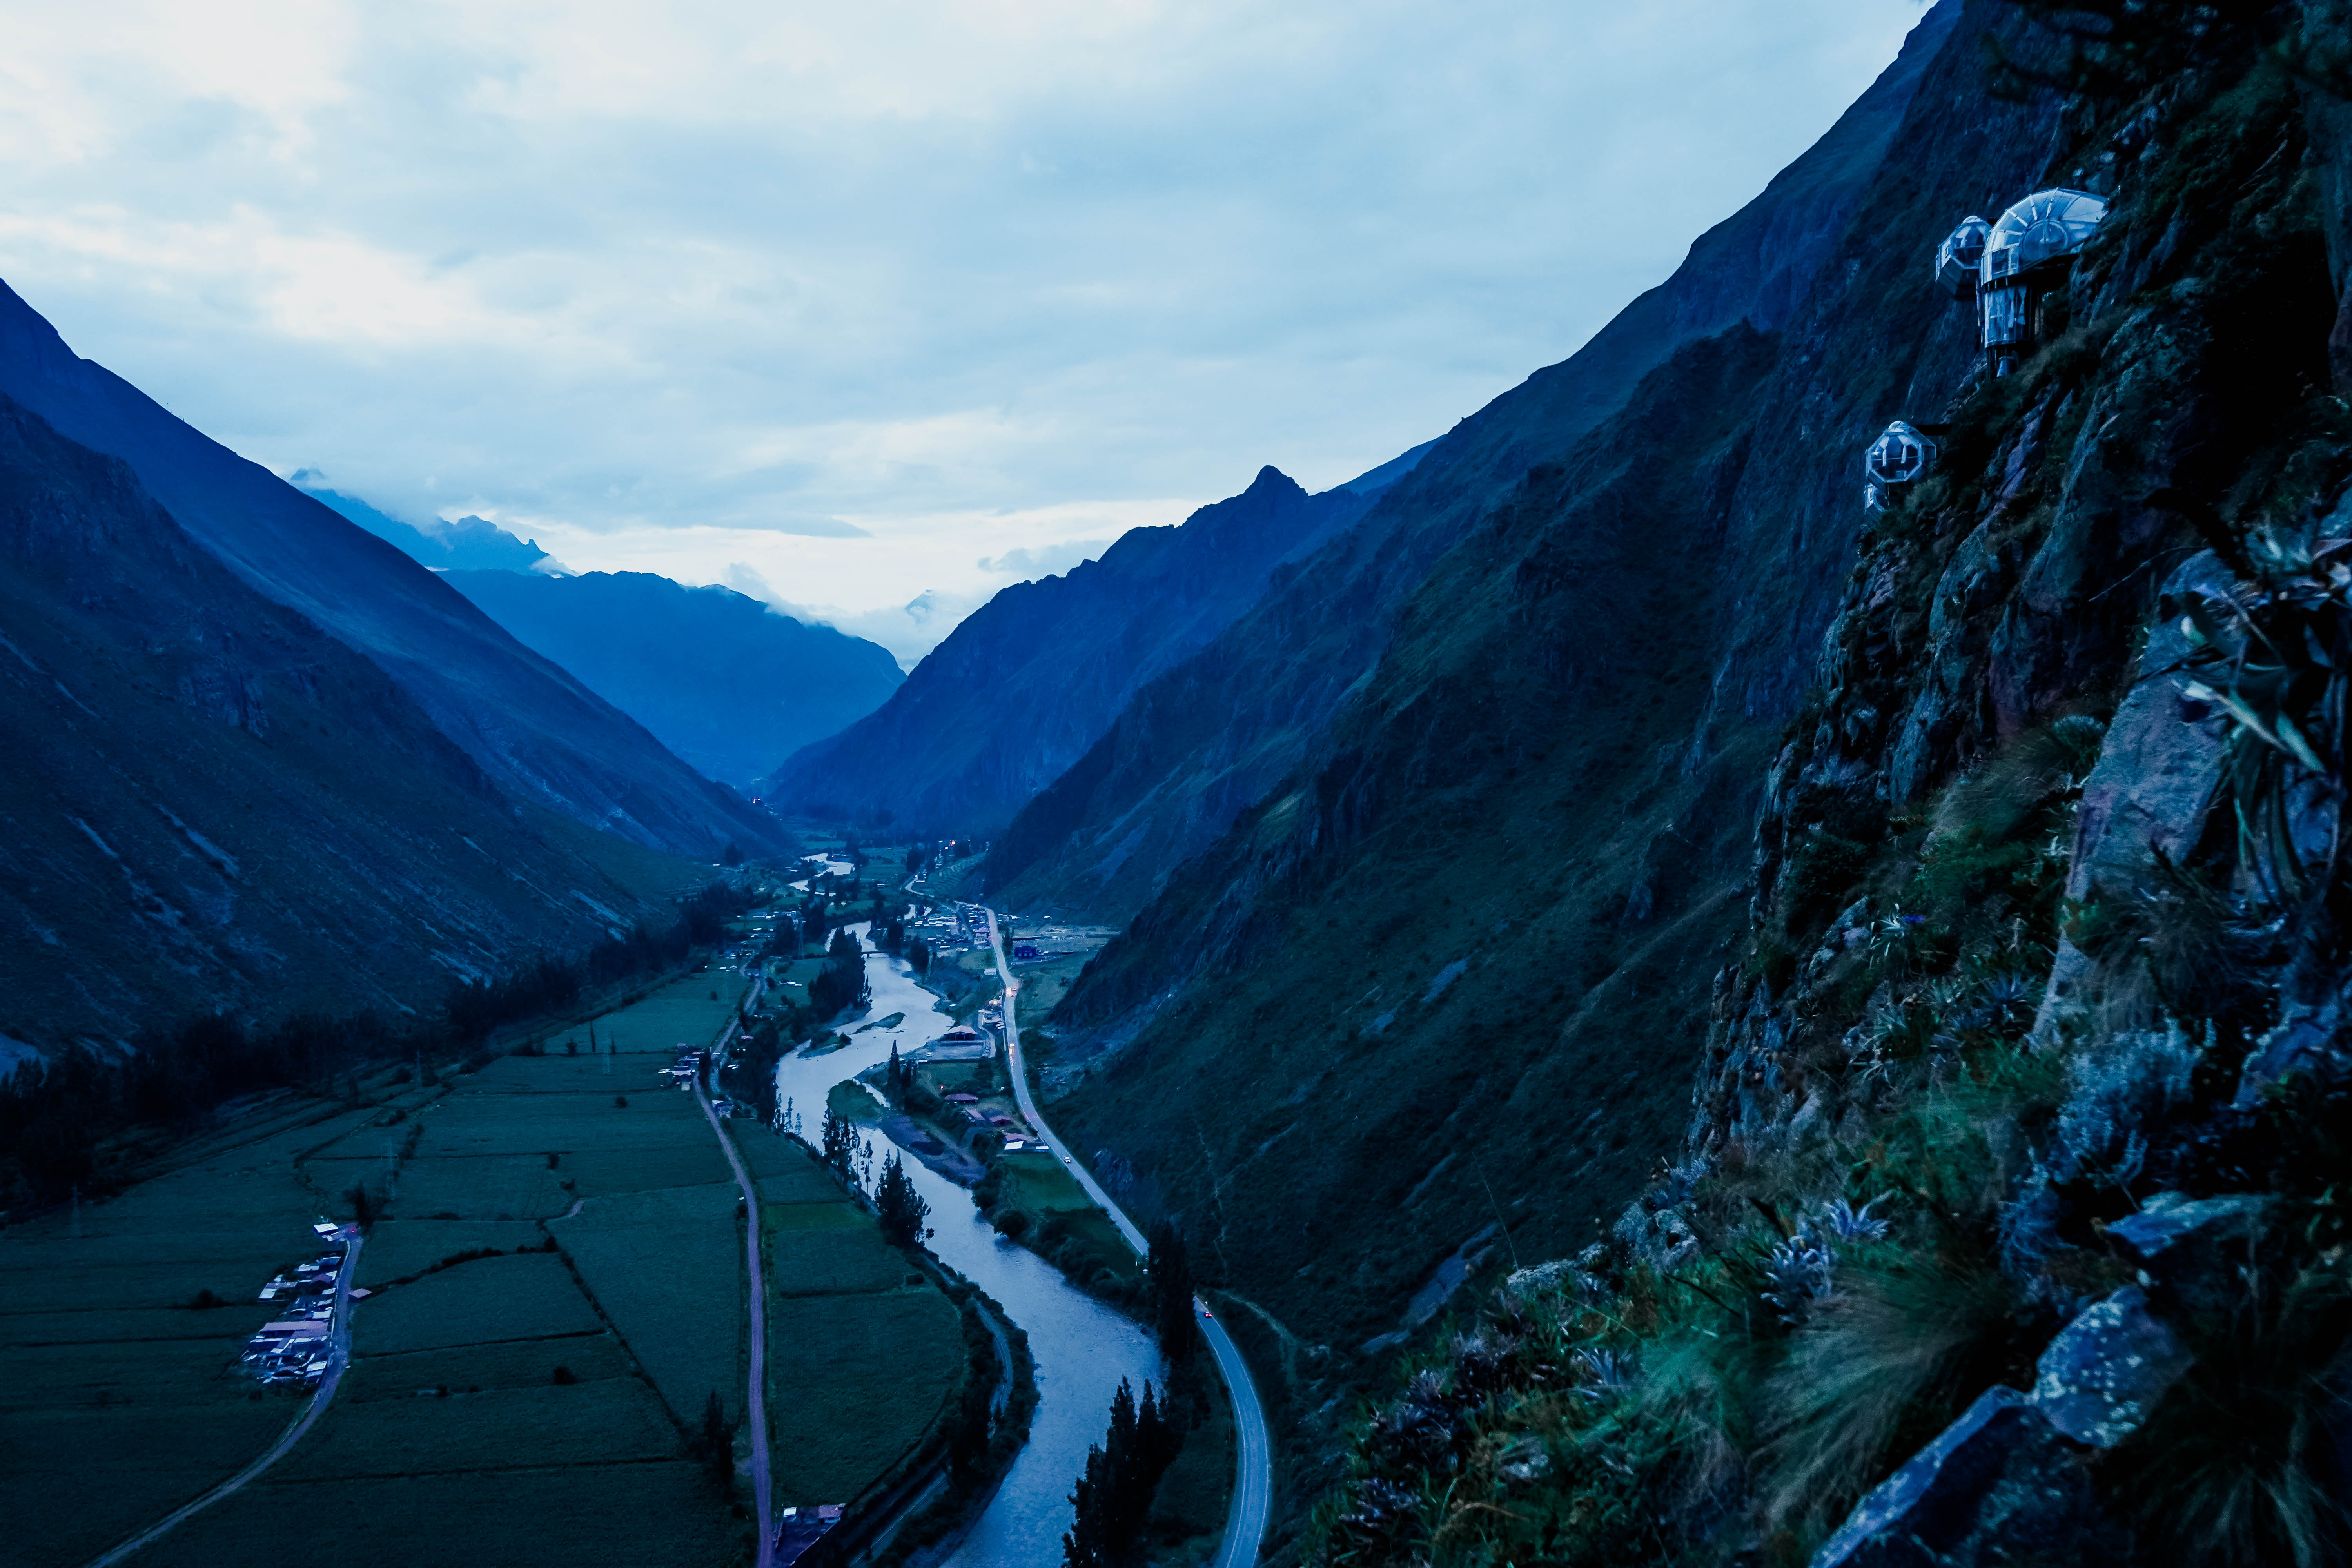
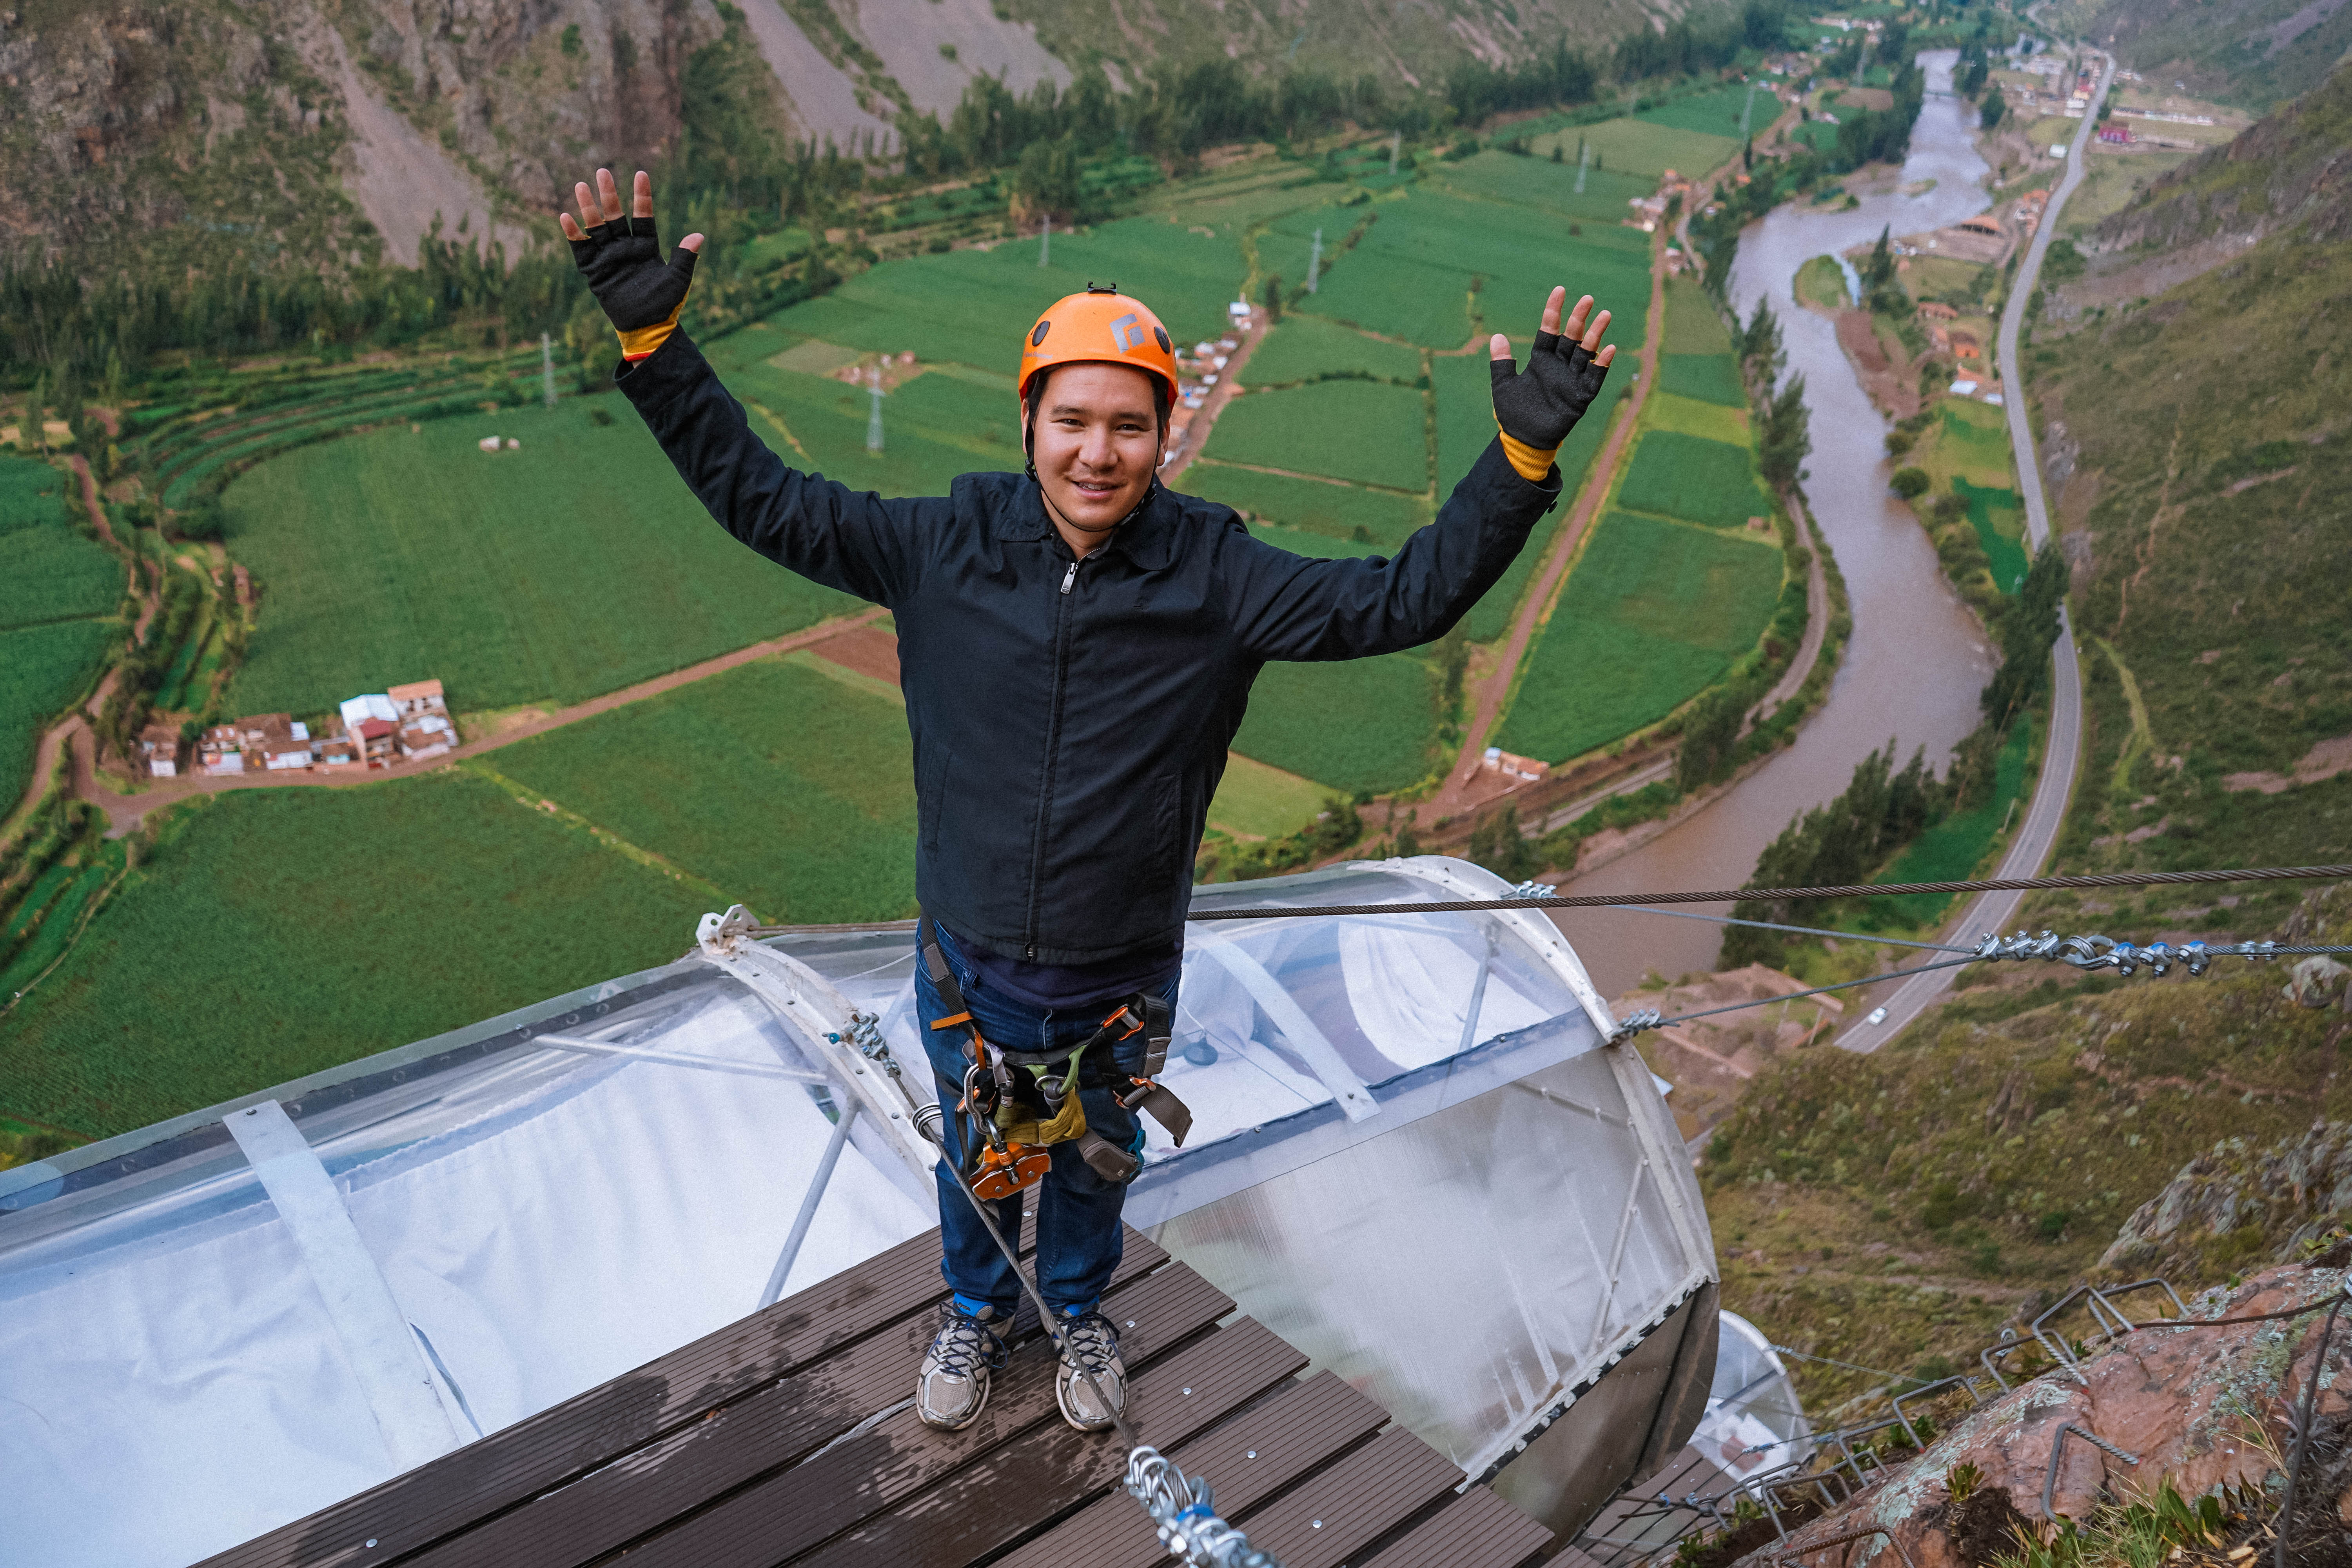
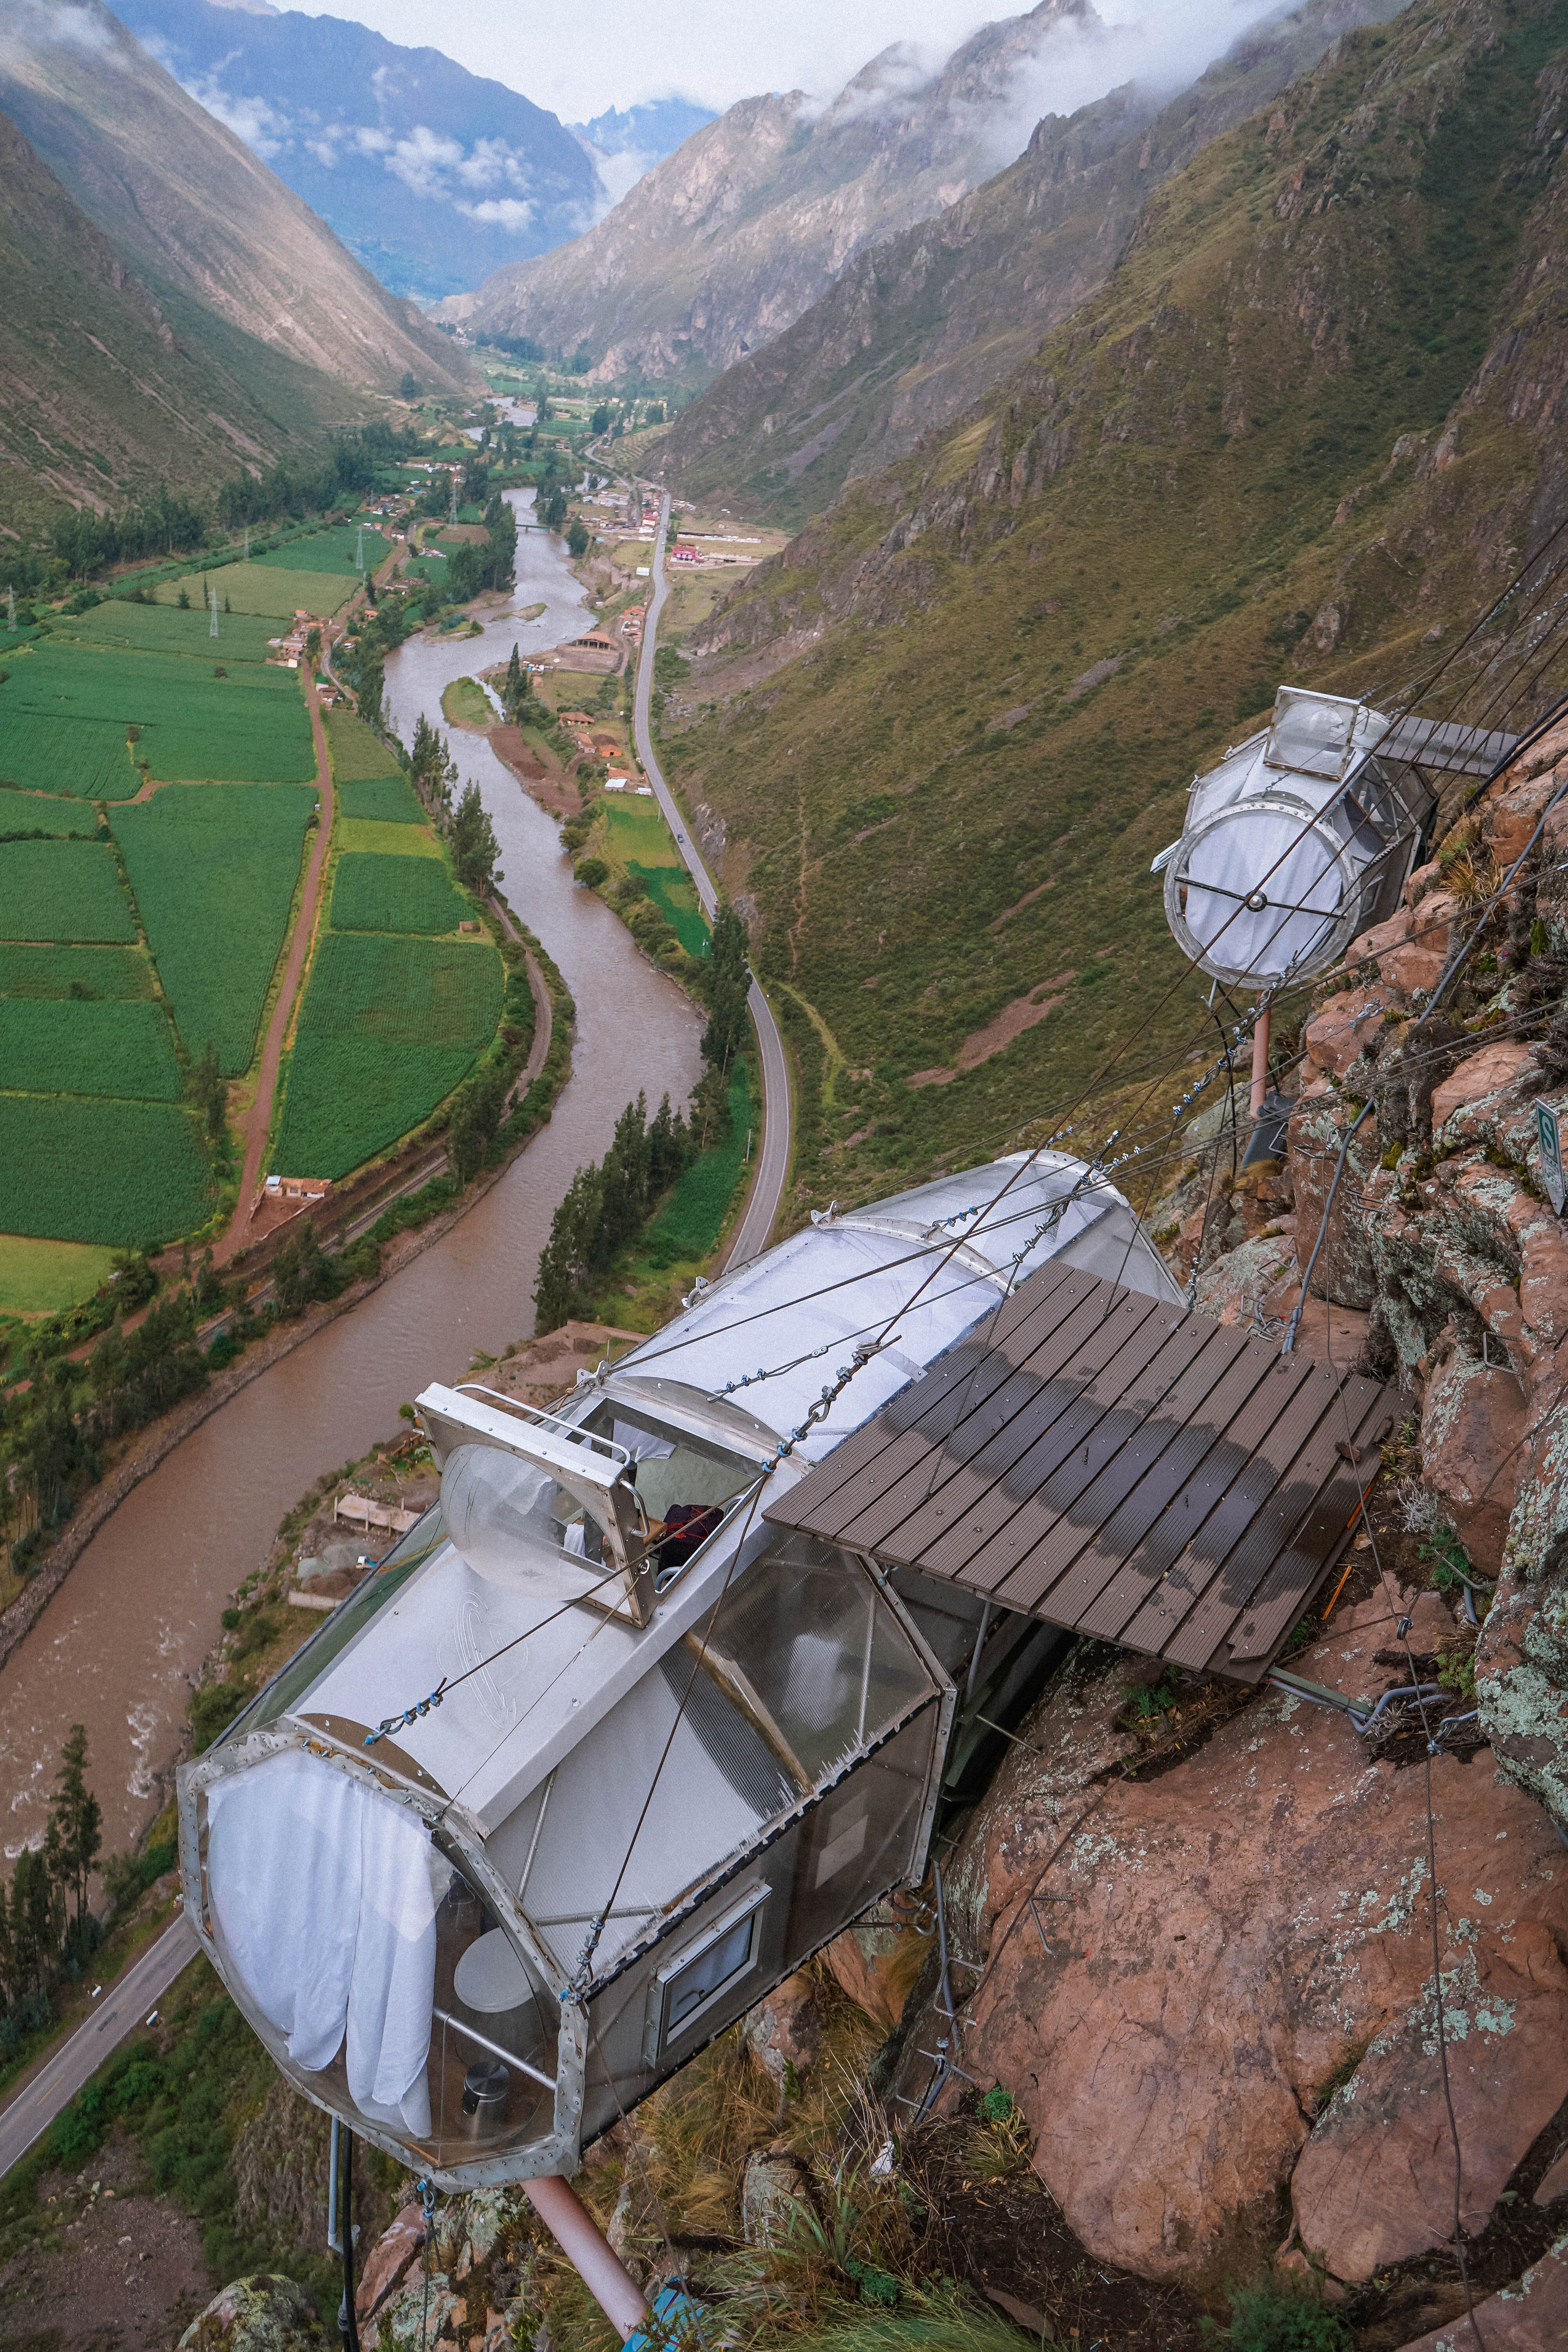
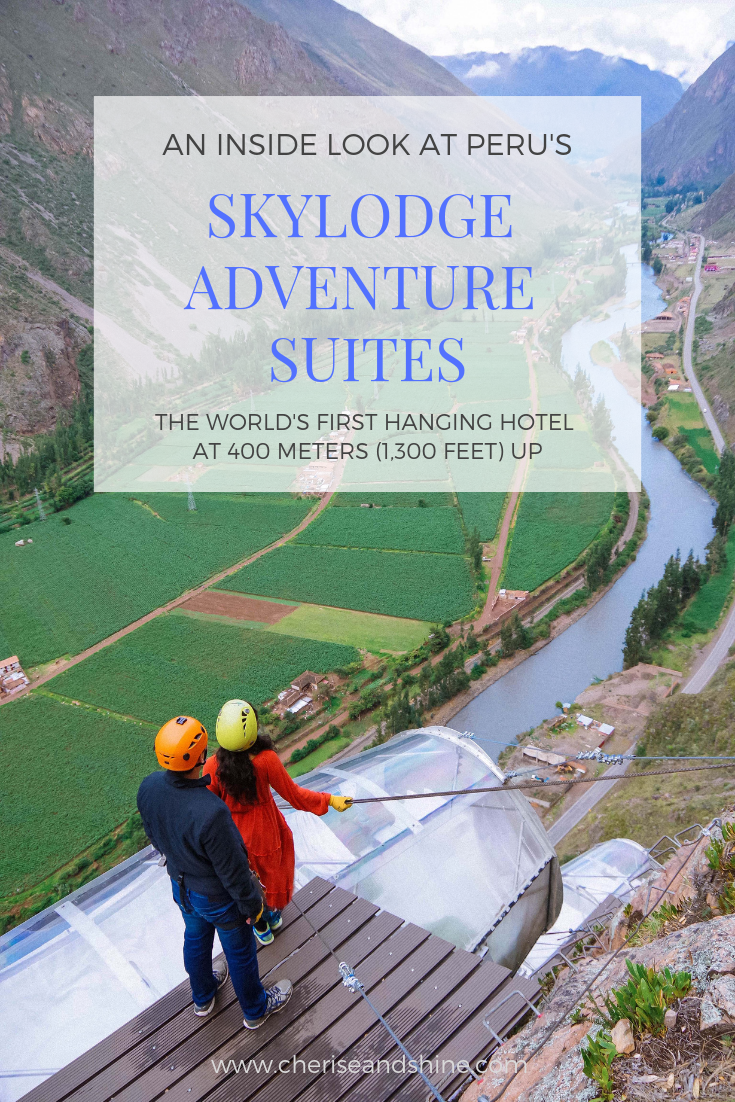
If you’ve ever wanted to sleep suspended high up from a cliff in a transparent pod, look no further. Tucked away in the Sacred Valley of Peru and just a couple hours drive away from Cusco, this one-of-a-kind experience will take you cliffside above the Urubamba River.

views-of-peru-skylodge-adventure-suites-sacred-valley

Chances are you’ve seen this unique hotel somewhere on Facebook, Instagram or Buzzfeed if you enjoy perusing unique travel experiences. I can’t remember the exact platform on which I first saw this hotel, but just a quick video of the world’s first-ever “hanging lodge,” and I was immediately sold. My husband and I decided if we were ever going to Peru, we simply HAD to do this.

skylodge-via-ferrata-climb-peru-sacred-valley.jpg

So let’s be honest—the experience is not cheap. We paid something like $445 USD per person, plus $85 USD for the photo package. But let’s break down what it includes:

  • Pickup in Cusco
  • Transportation to Urubamba’s Sacred Valley
  • A quick Via Ferrata lesson
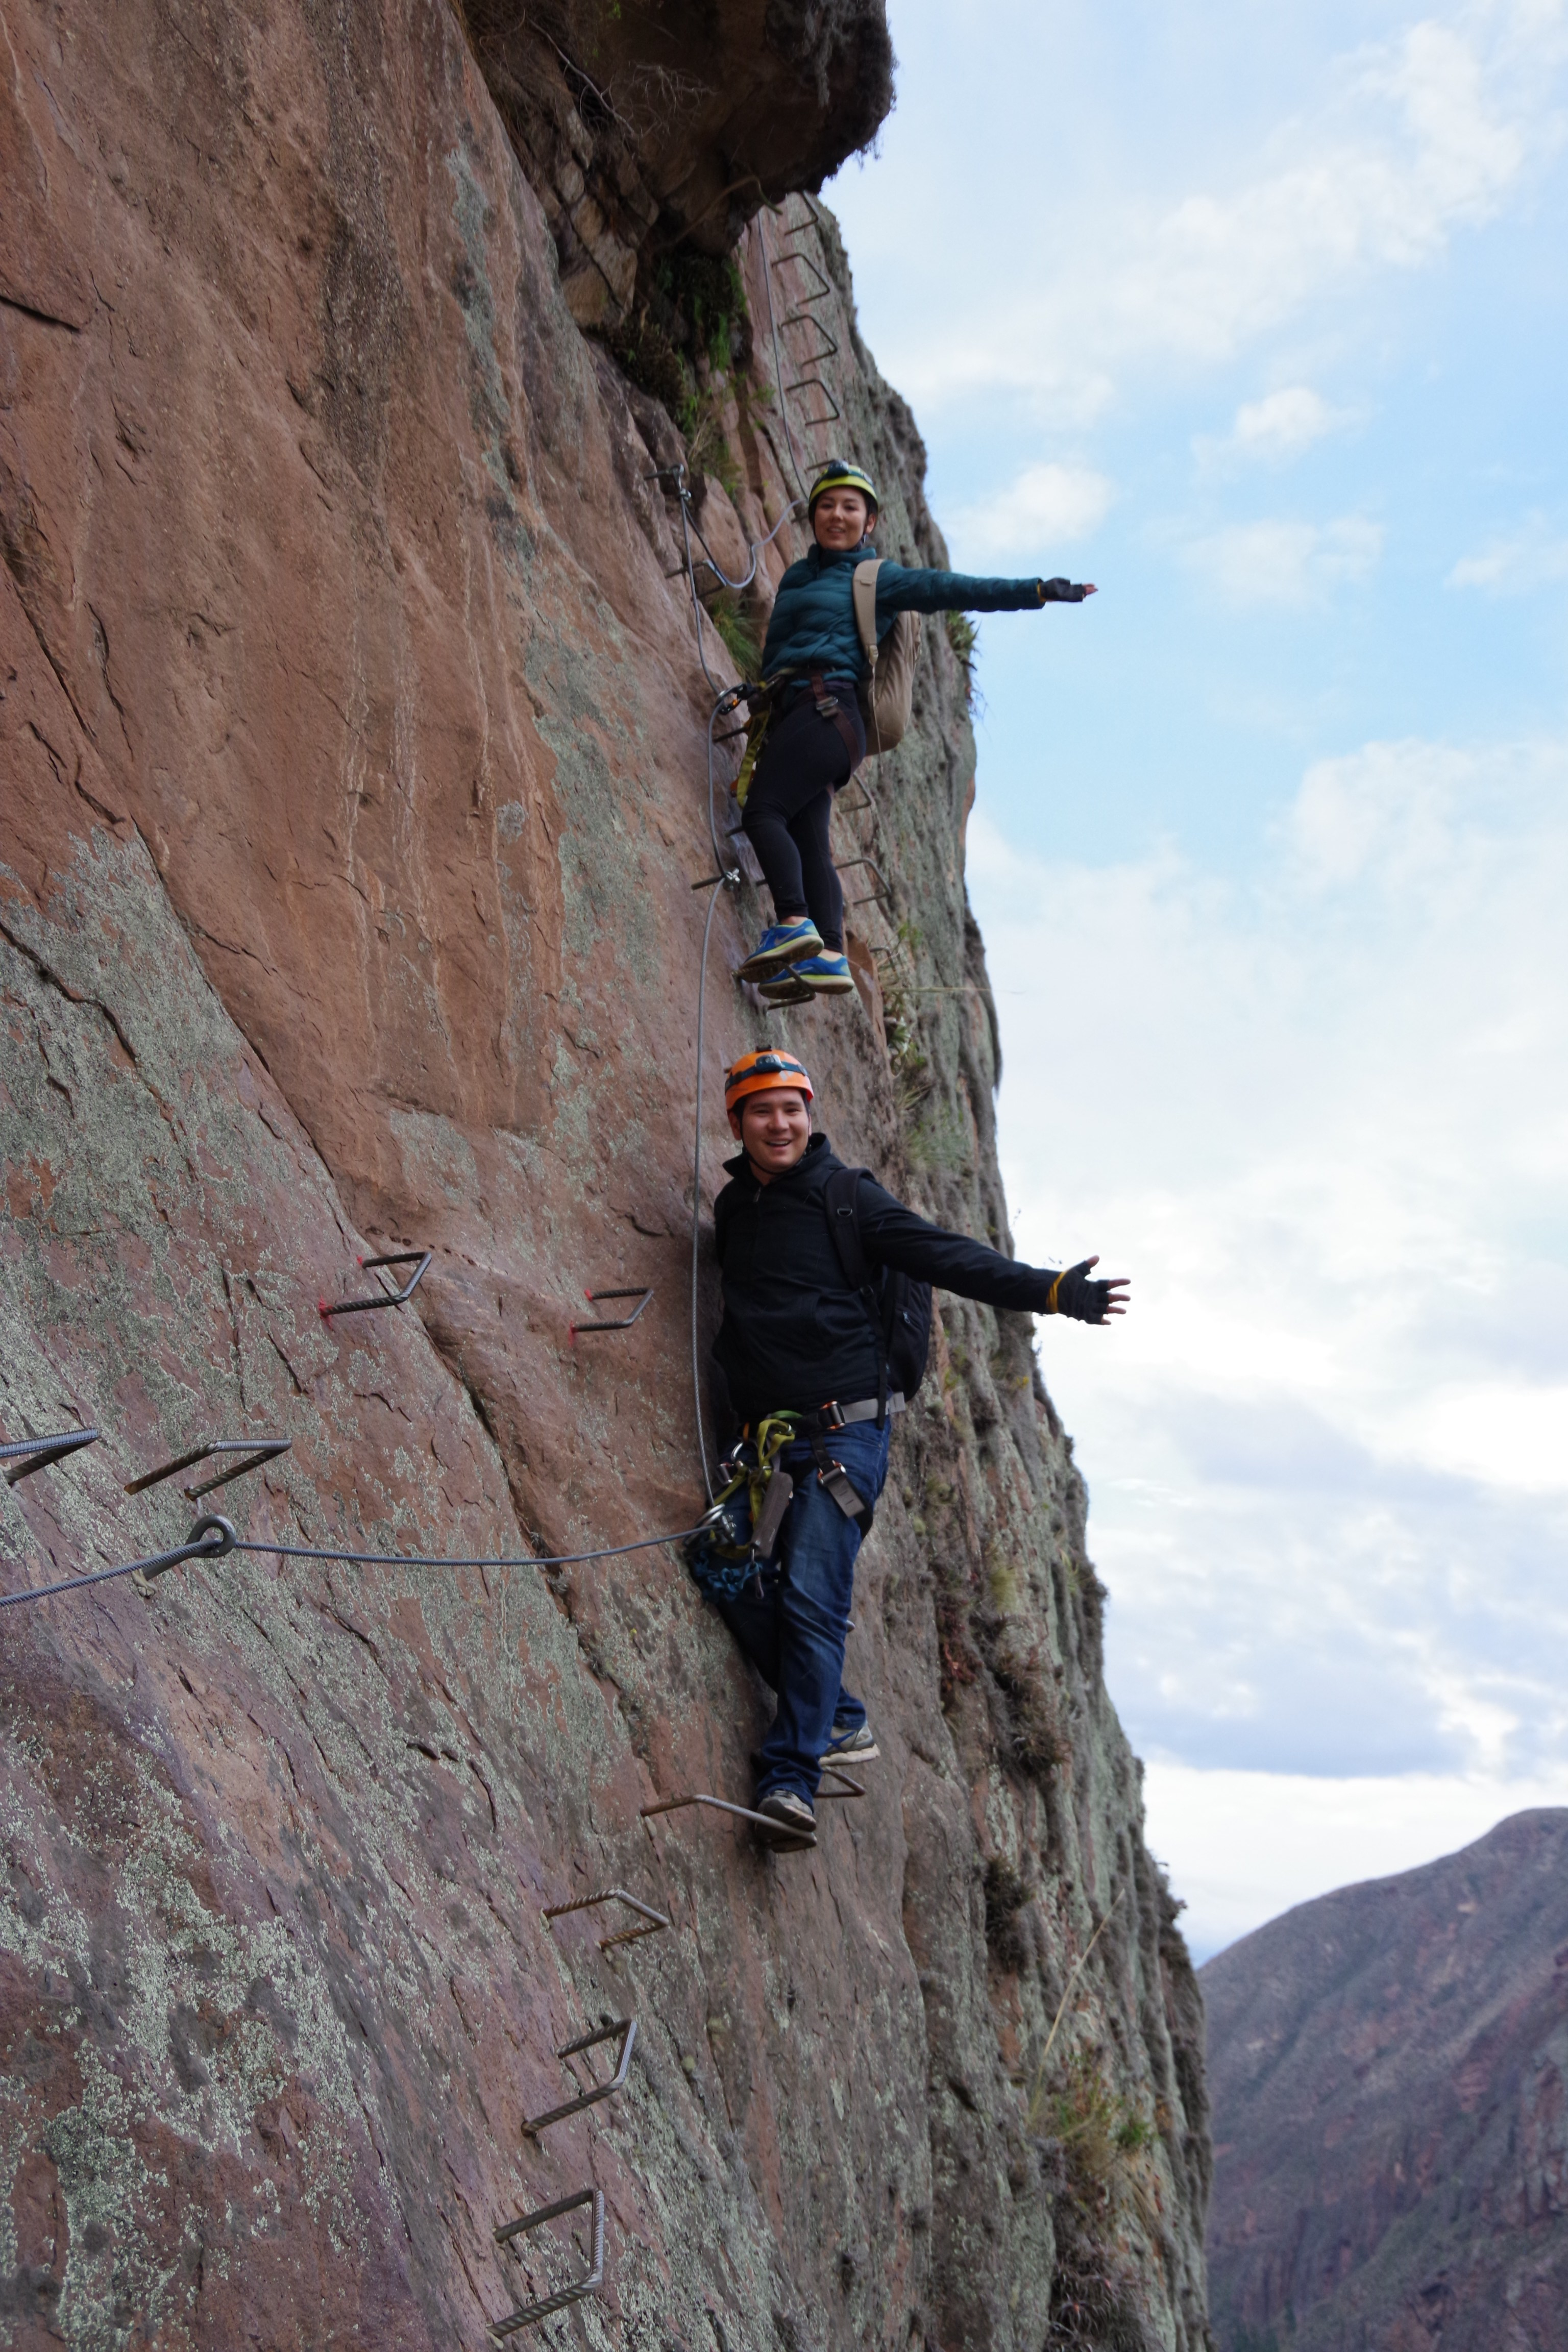
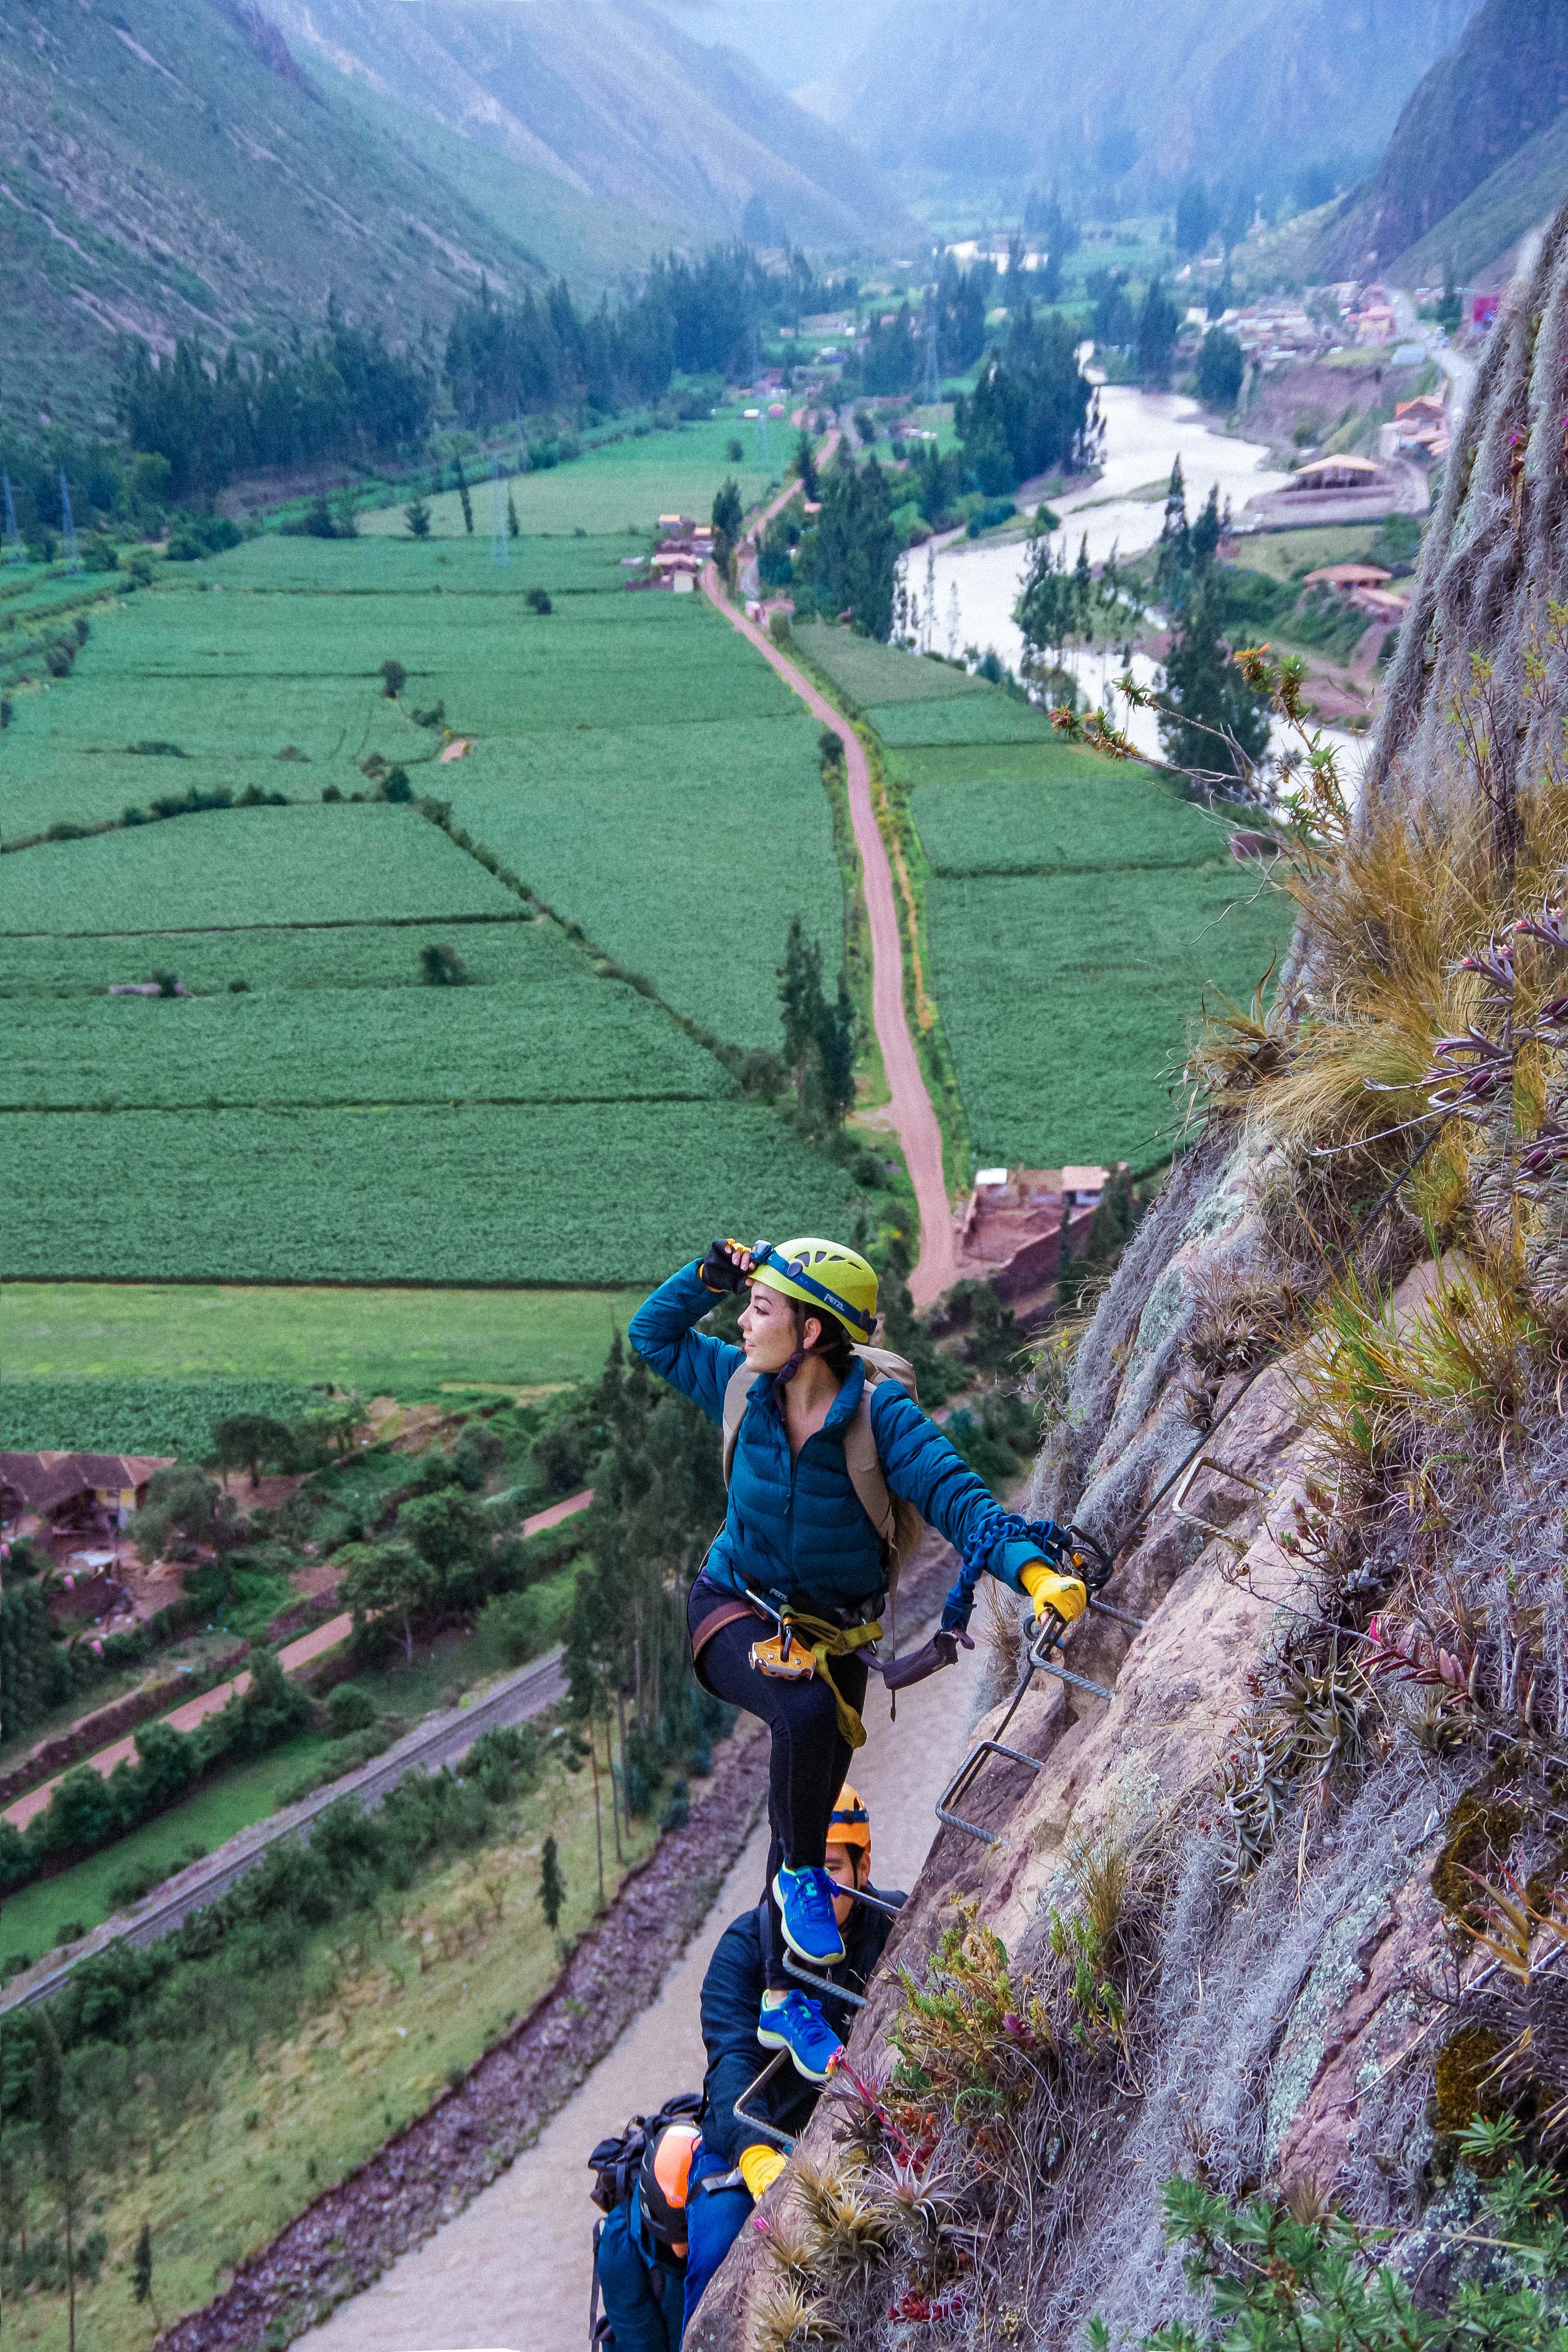
  • Gear/equipment to climb 400 meters up the mountain
  • A delicious multi-course dinner, complete with wine
  • Overnight stay
  • Breakfast with coffee
  • Ziplining down the mountain
  • Transportation to wherever you’re going next (most people get driven back to Cusco, but we asked to be transported to the Ollantaytambo train station as we were continuing on to Machu Picchu)

skylodge-adventure-suites-view-urubamba-peru-valley

And as far as the photo package is concerned, it’s 100% worth the splurge. Our photographer, Diego, would speedily climb past us and hang off of cliffs to get the photos of us. It’s worth capturing the memories for this once-in-a-lifetime experience, and also a lot safer than (and not nearly as stressful as) trying to take photographs yourself!

skylodge-adventure-suites-views-peru-sacred-valley

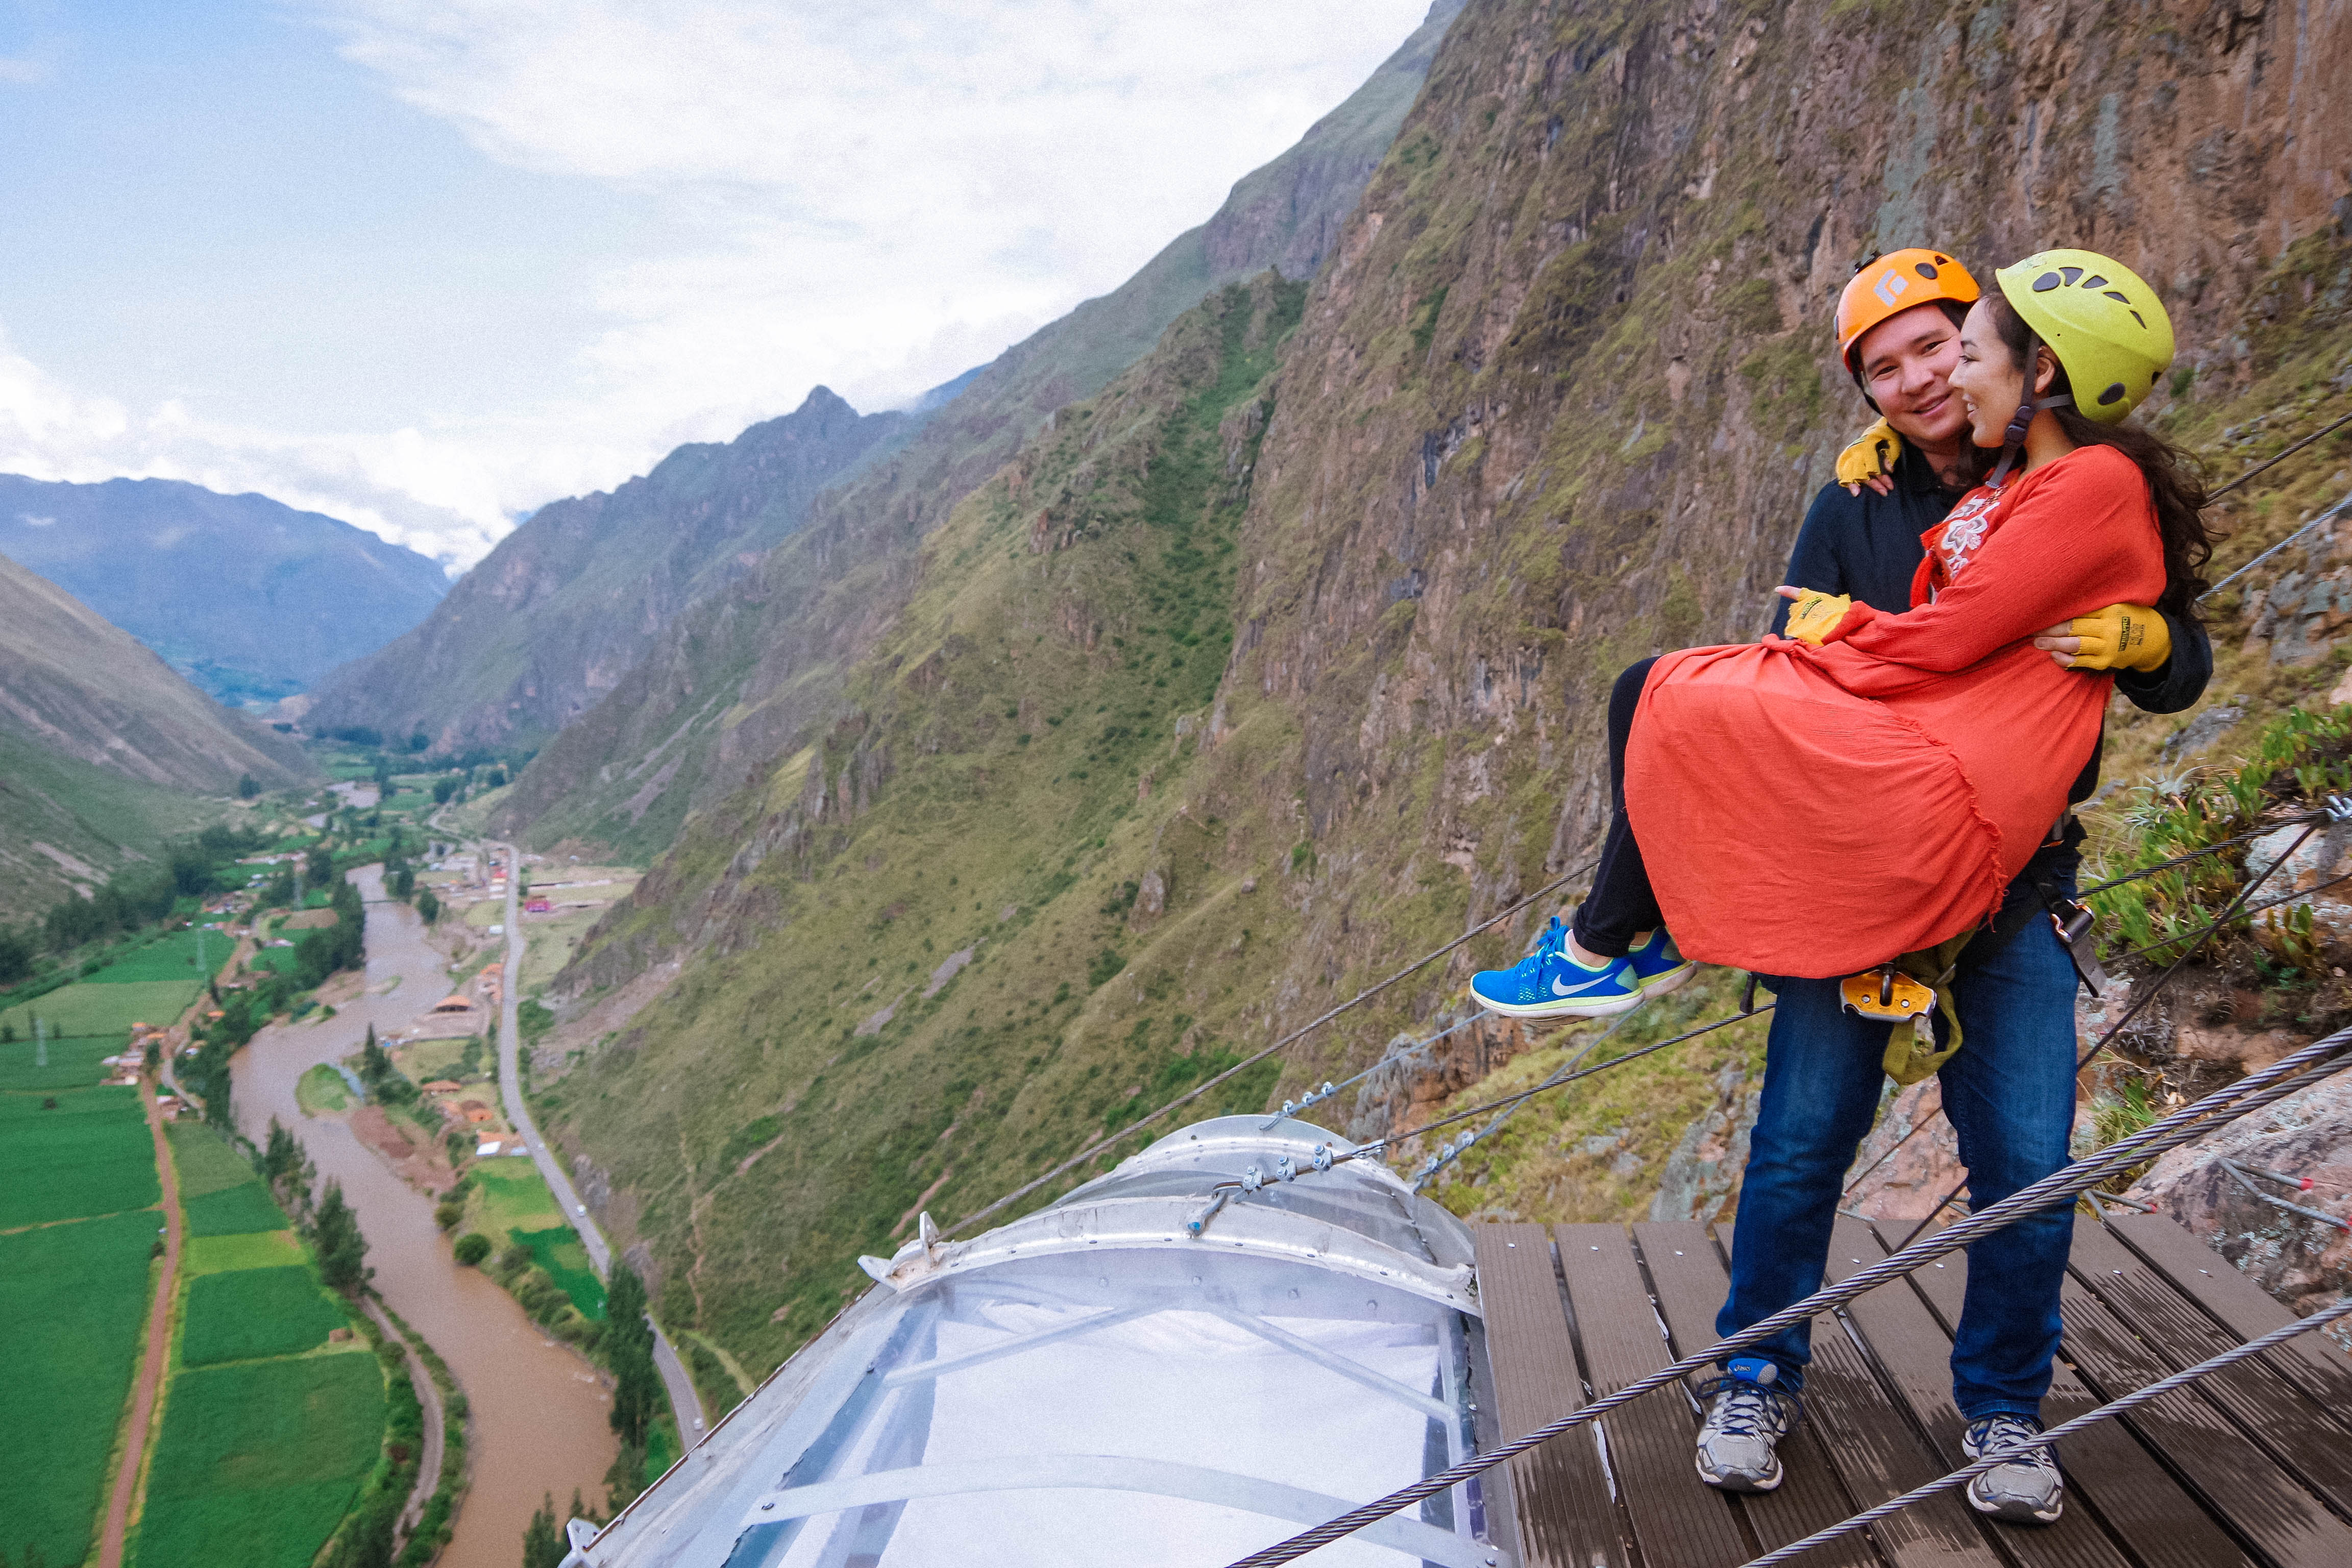
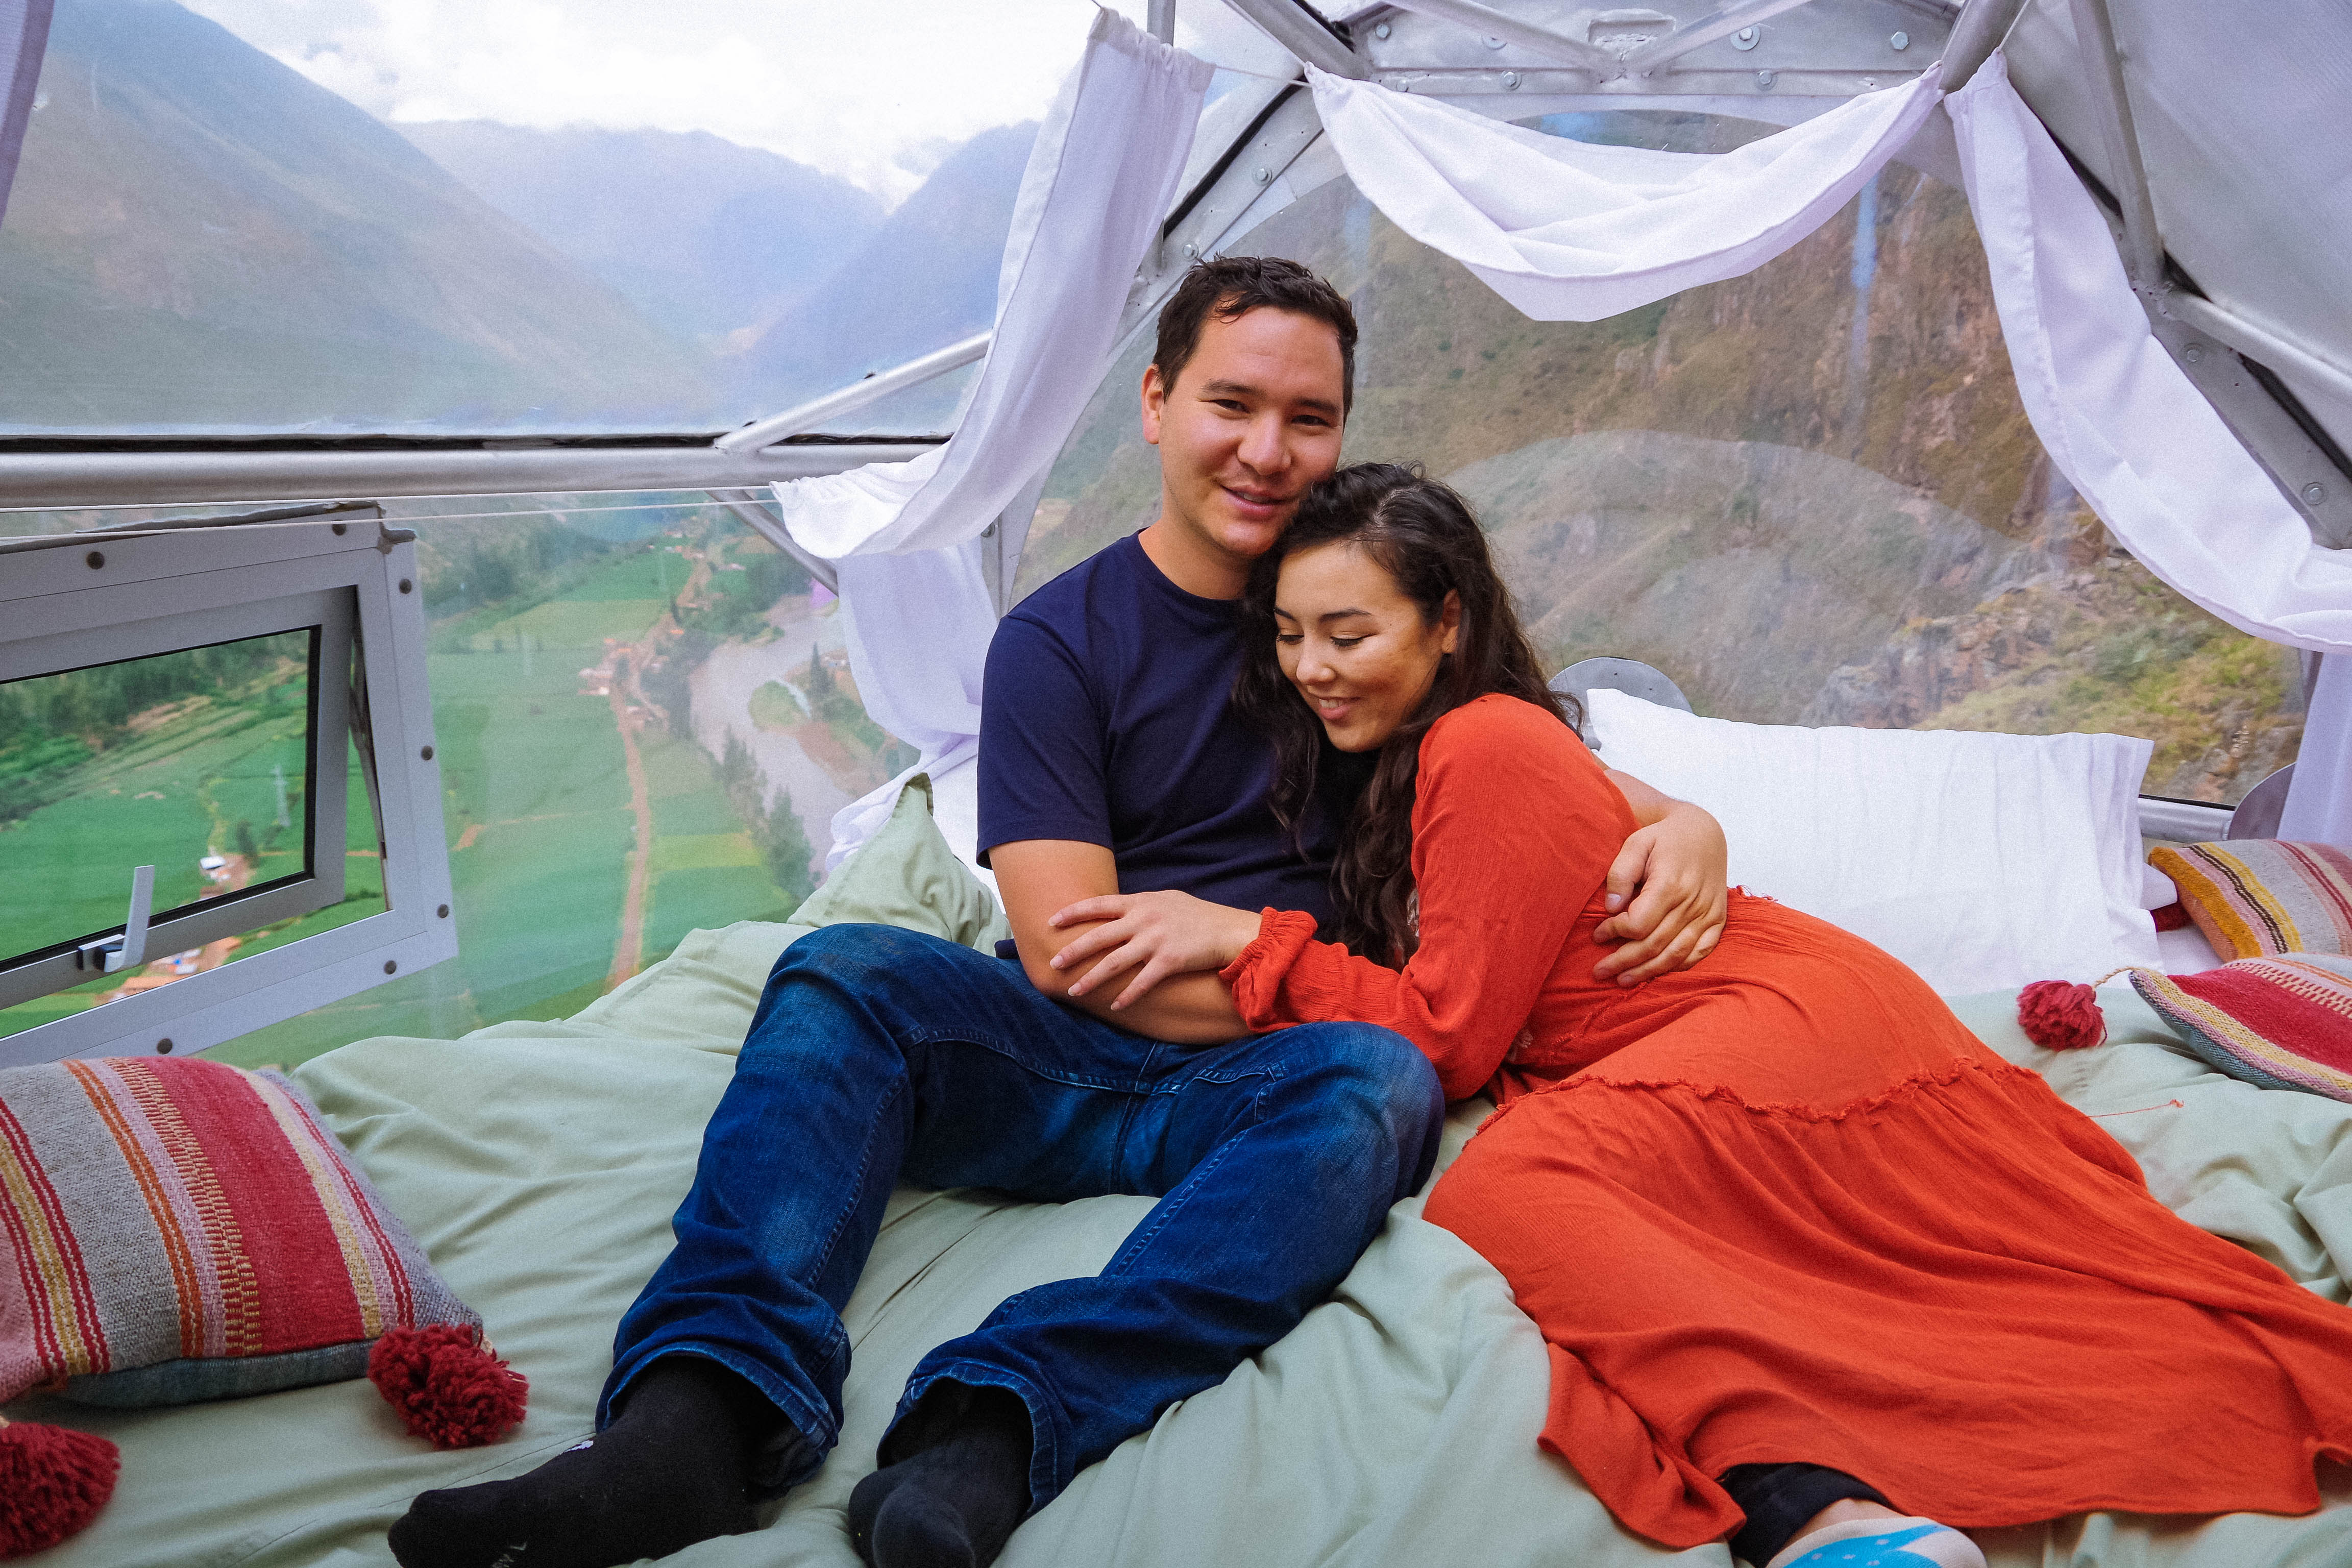
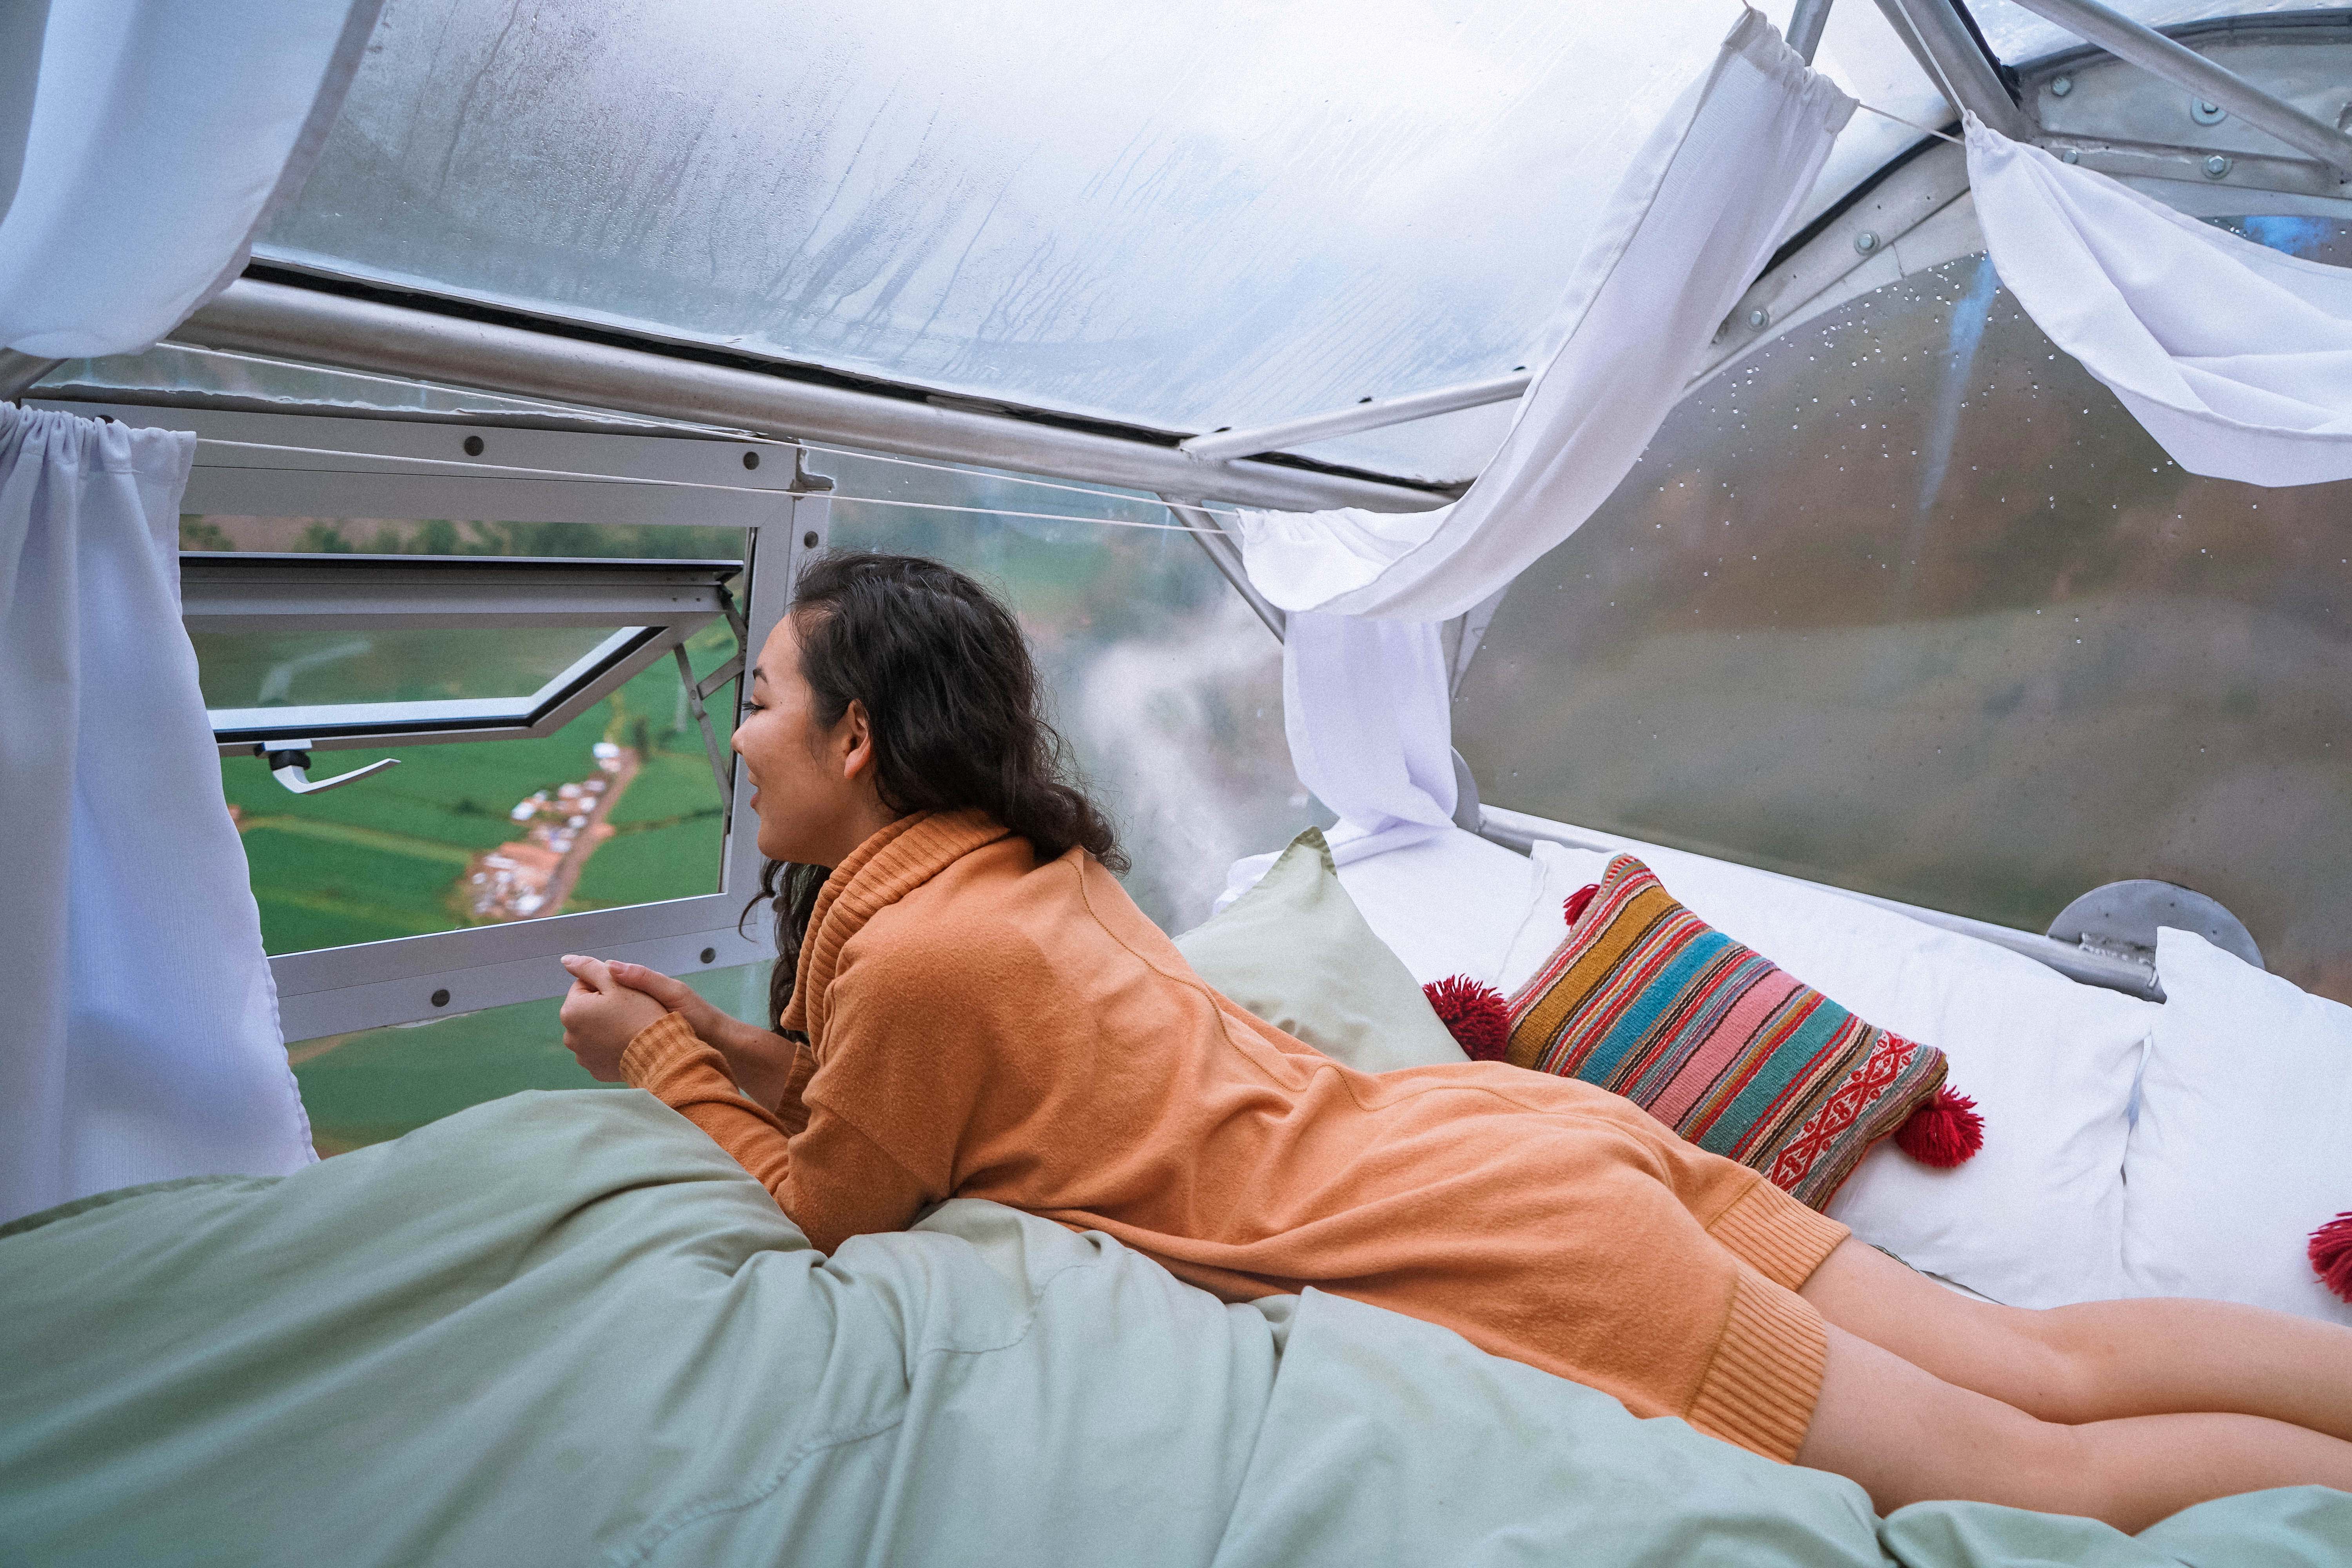
There are only three pods (each can hold 2-4 people), so reservations naturally run out quickly for this experience. We booked our sky pod six months in advance of our Peru trip, and already we snagged the last available slots! Each pod has beds, solar-powered lights, a bathroom (with a “dry toilet” system) and a 300 degree view of the valley below.

skylodge-cuddle-time-peru

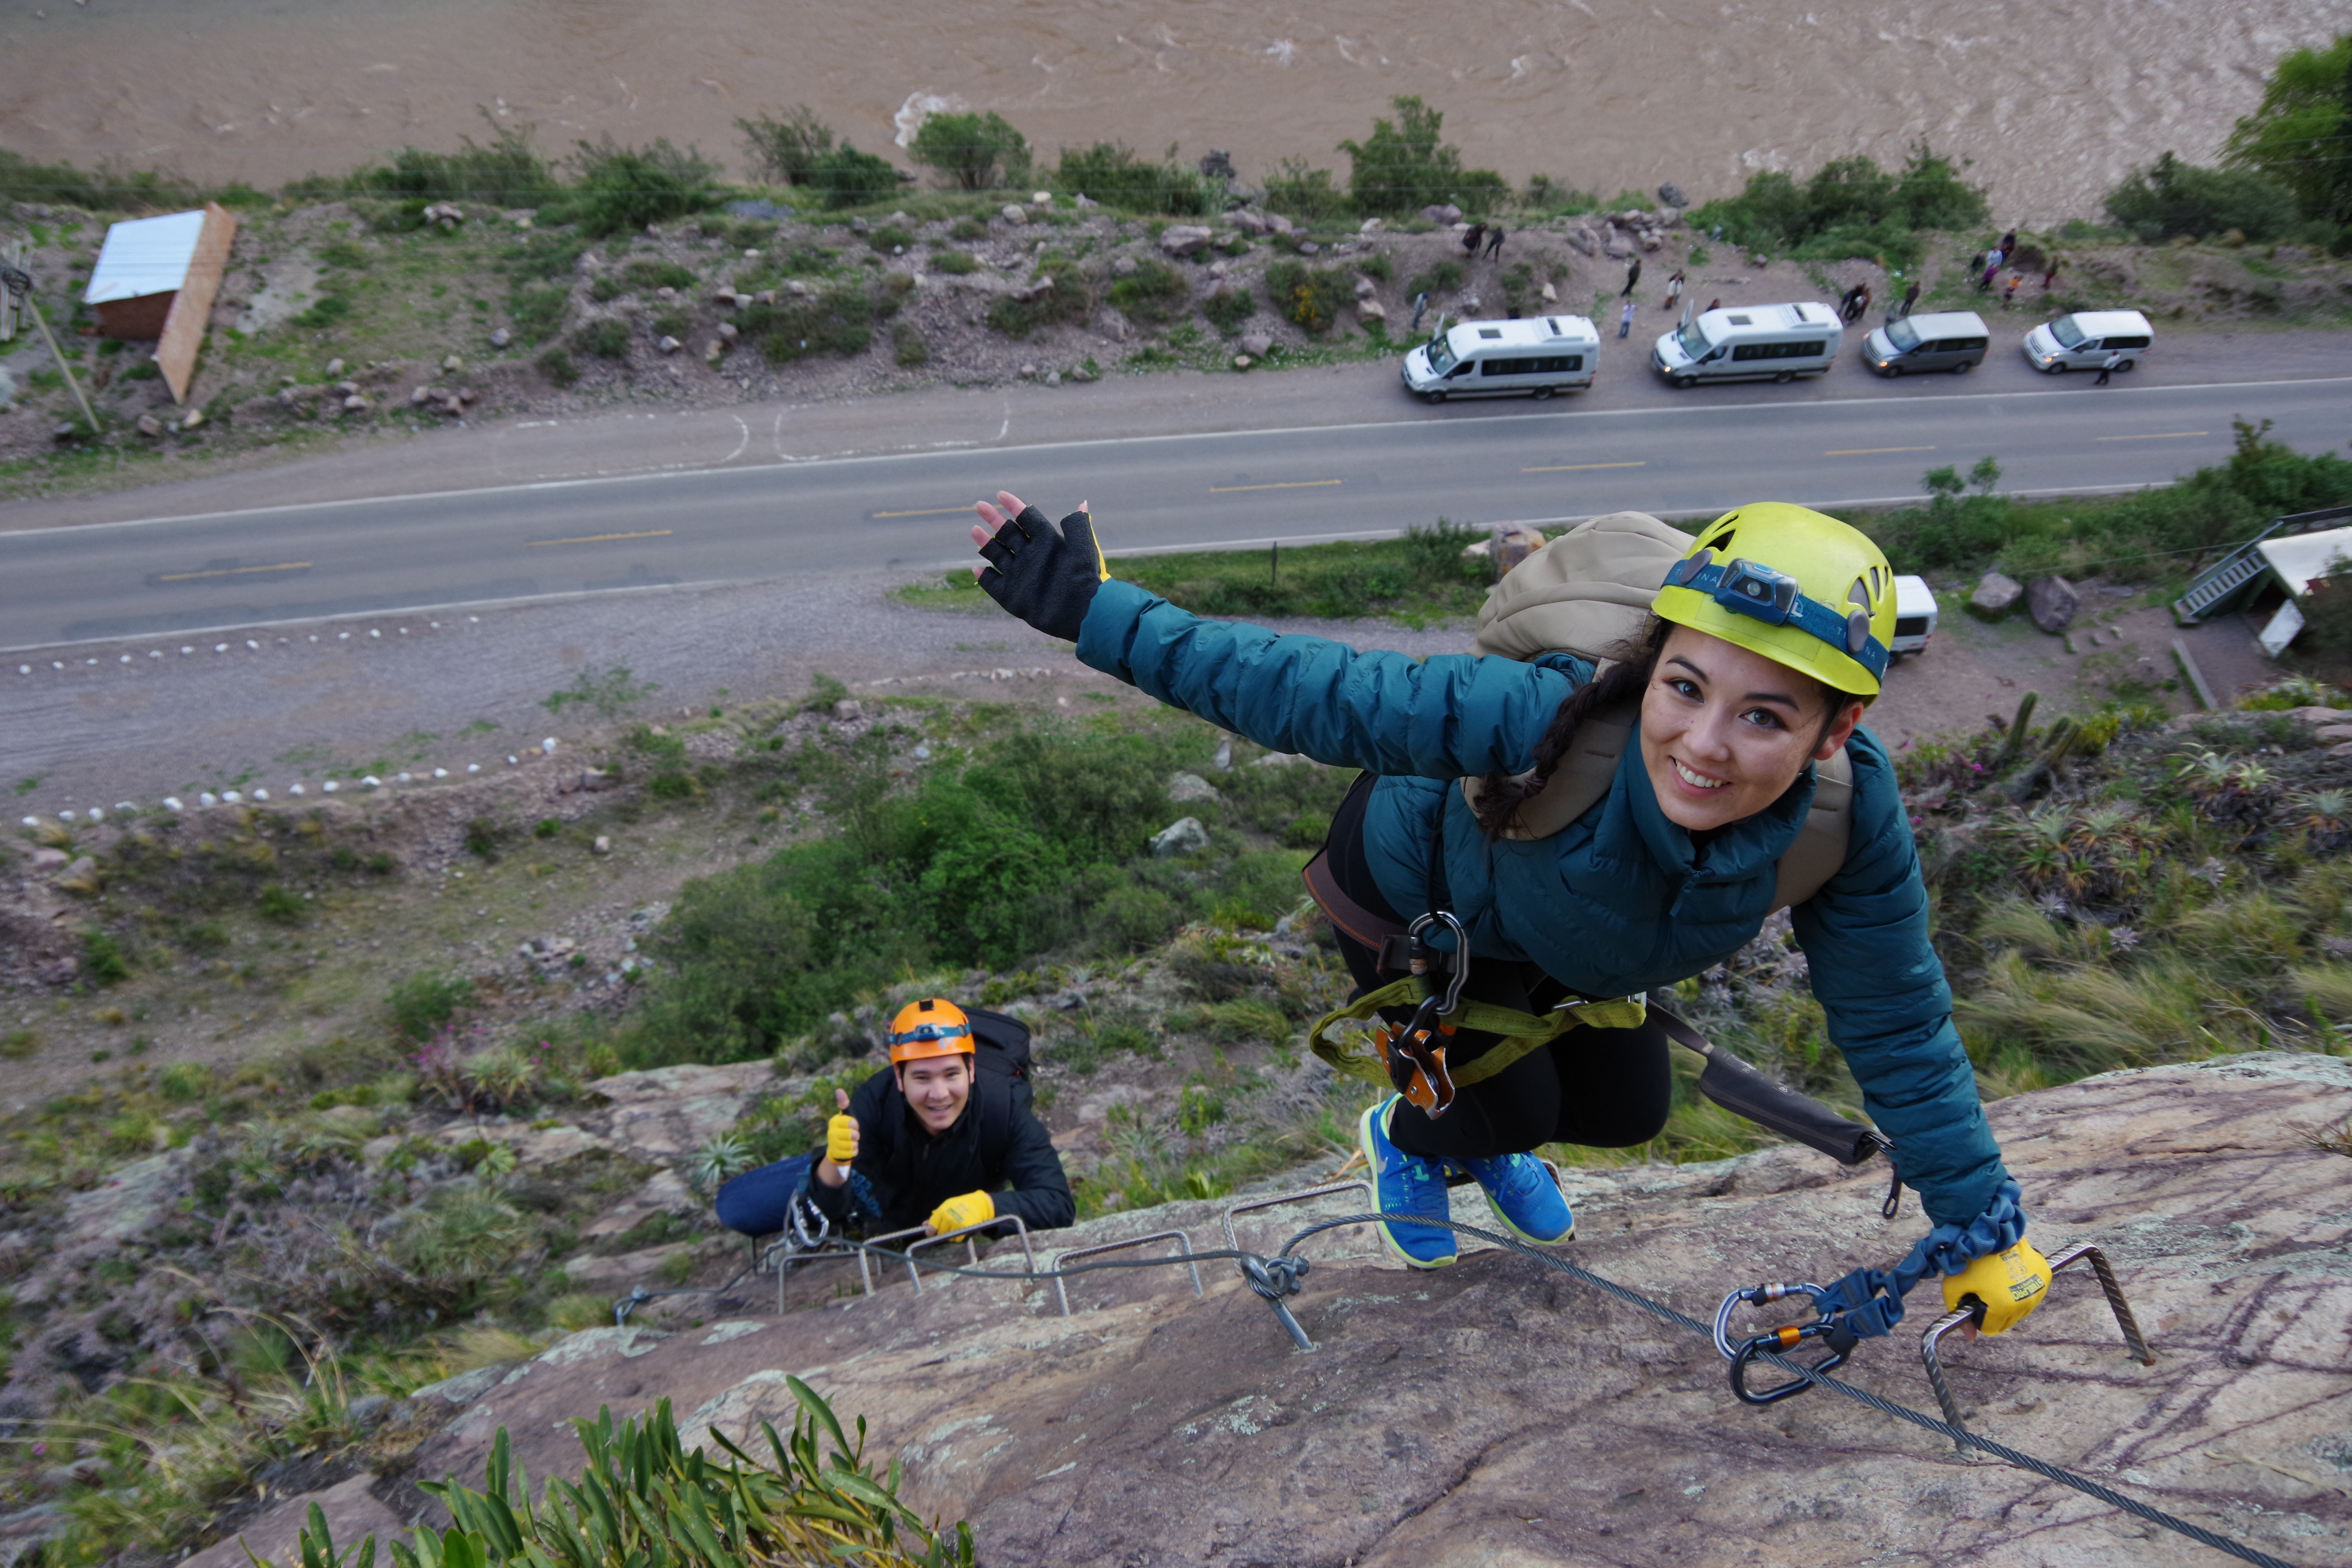
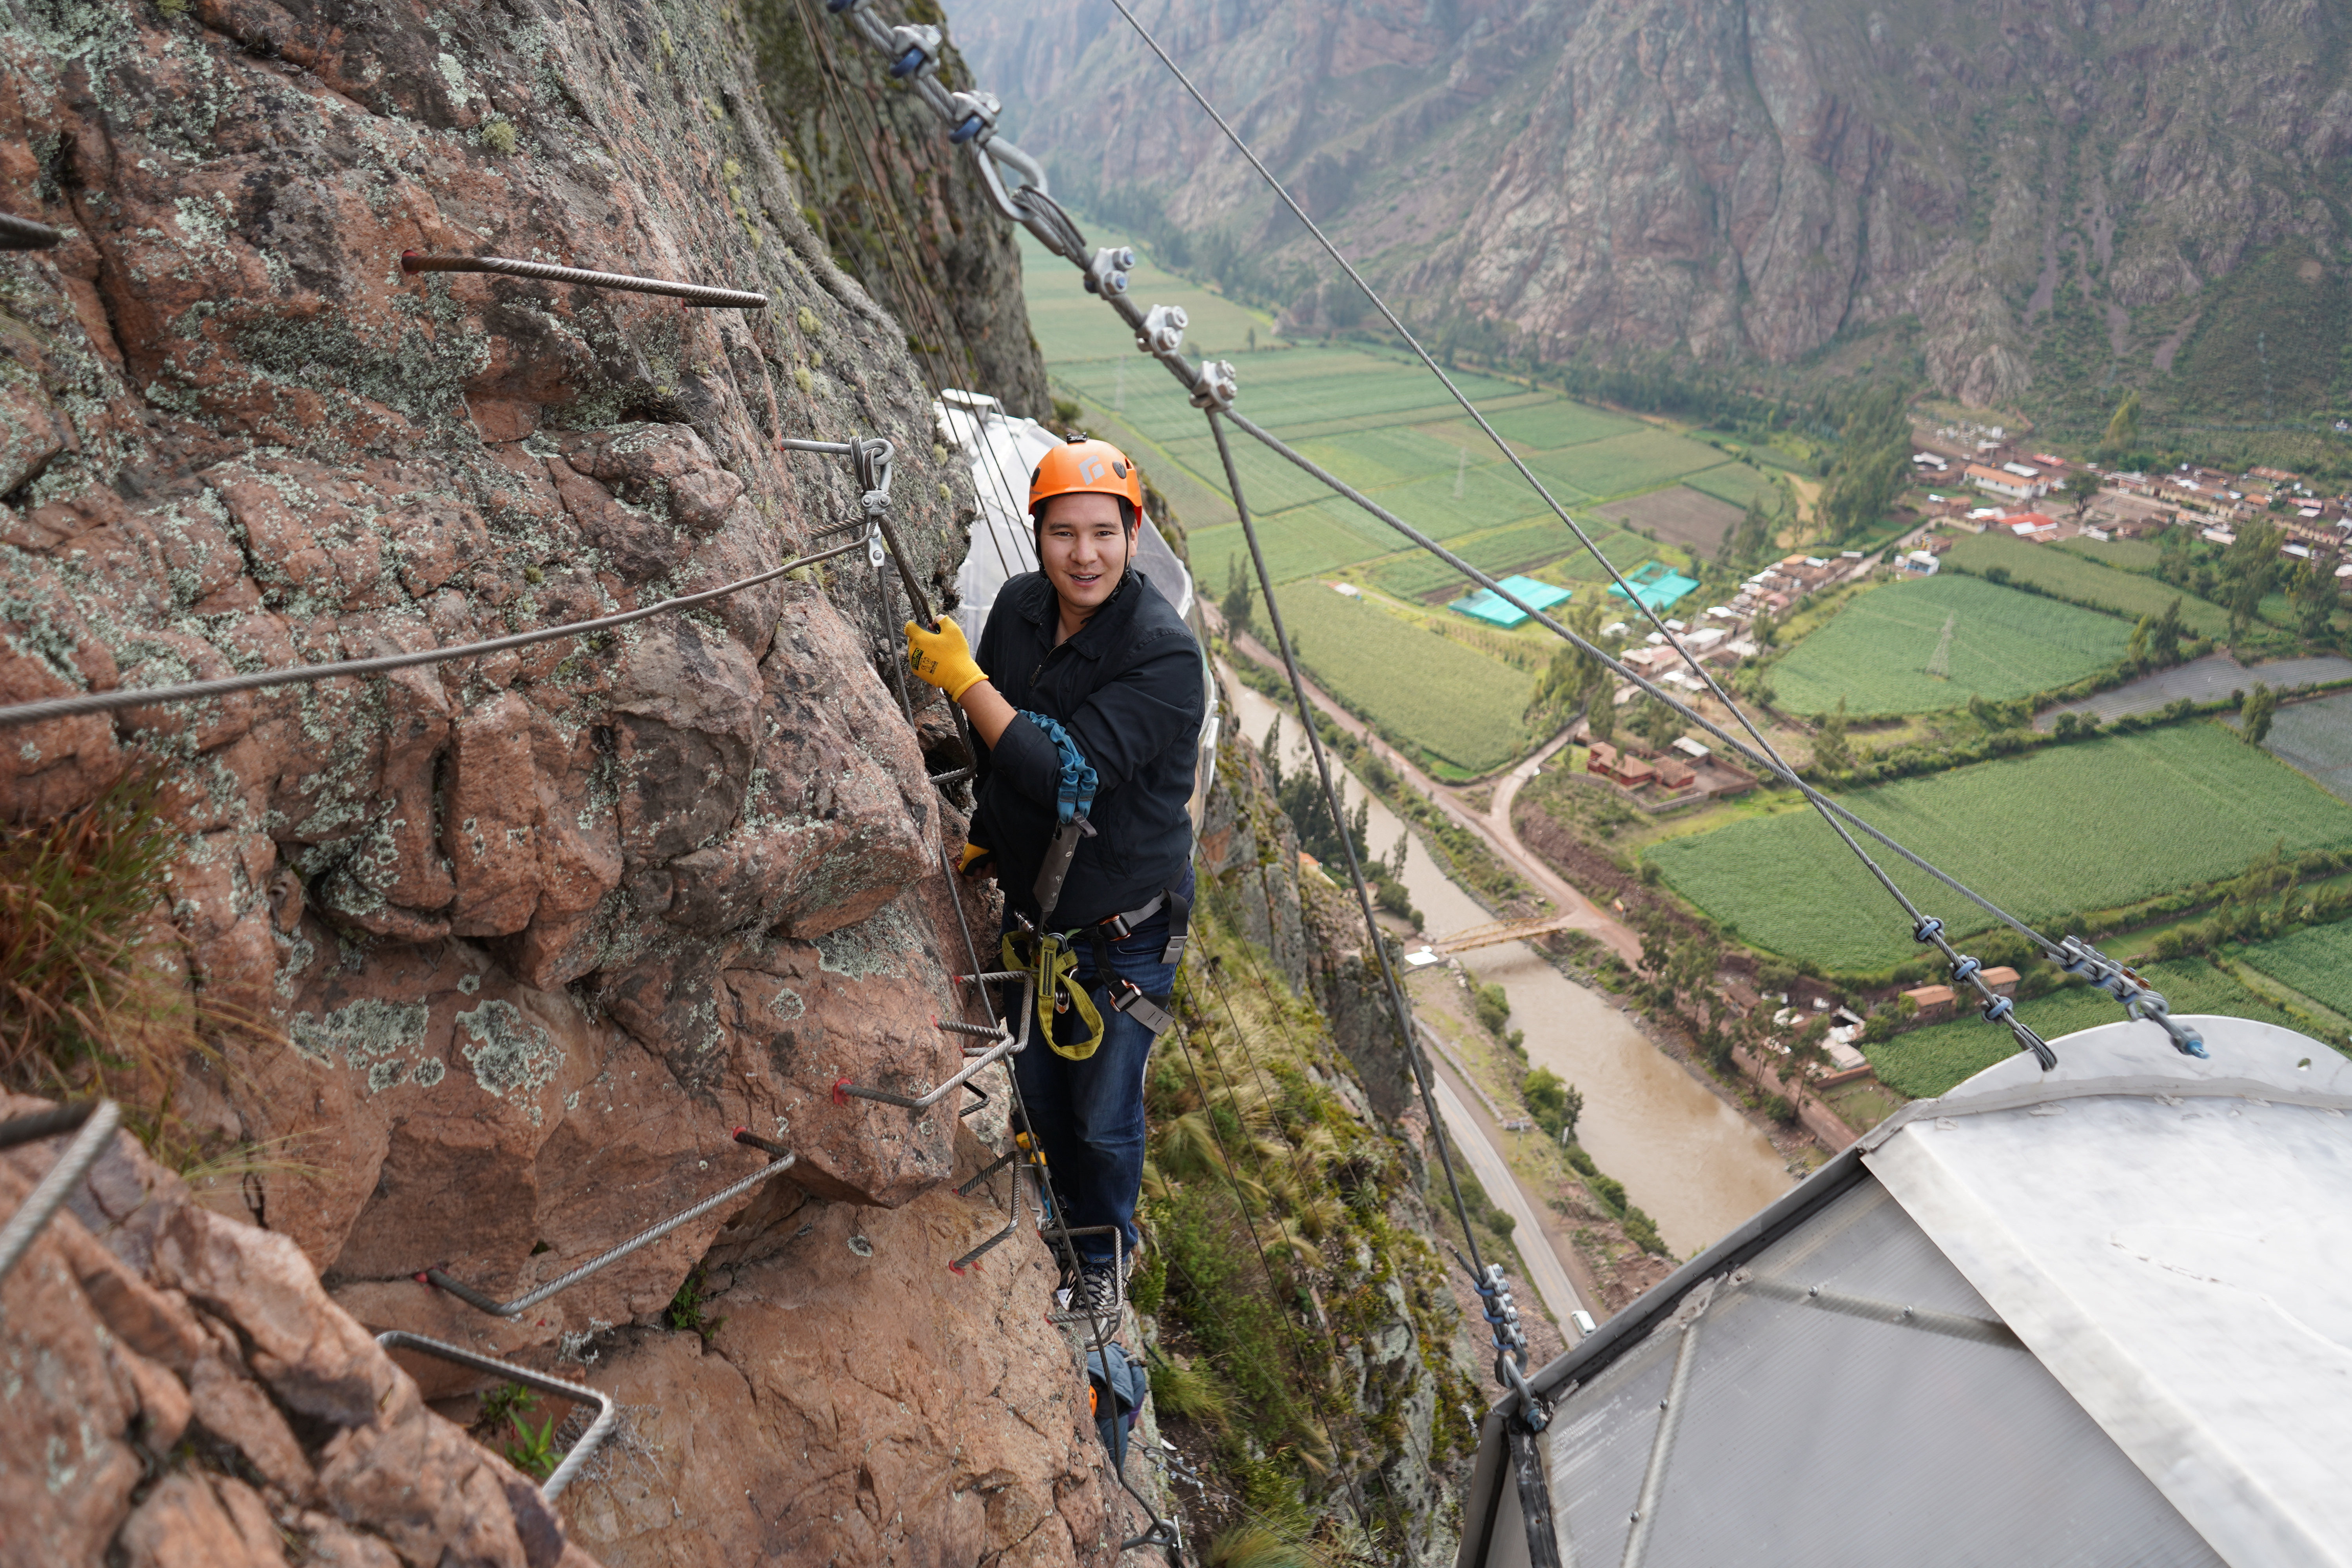
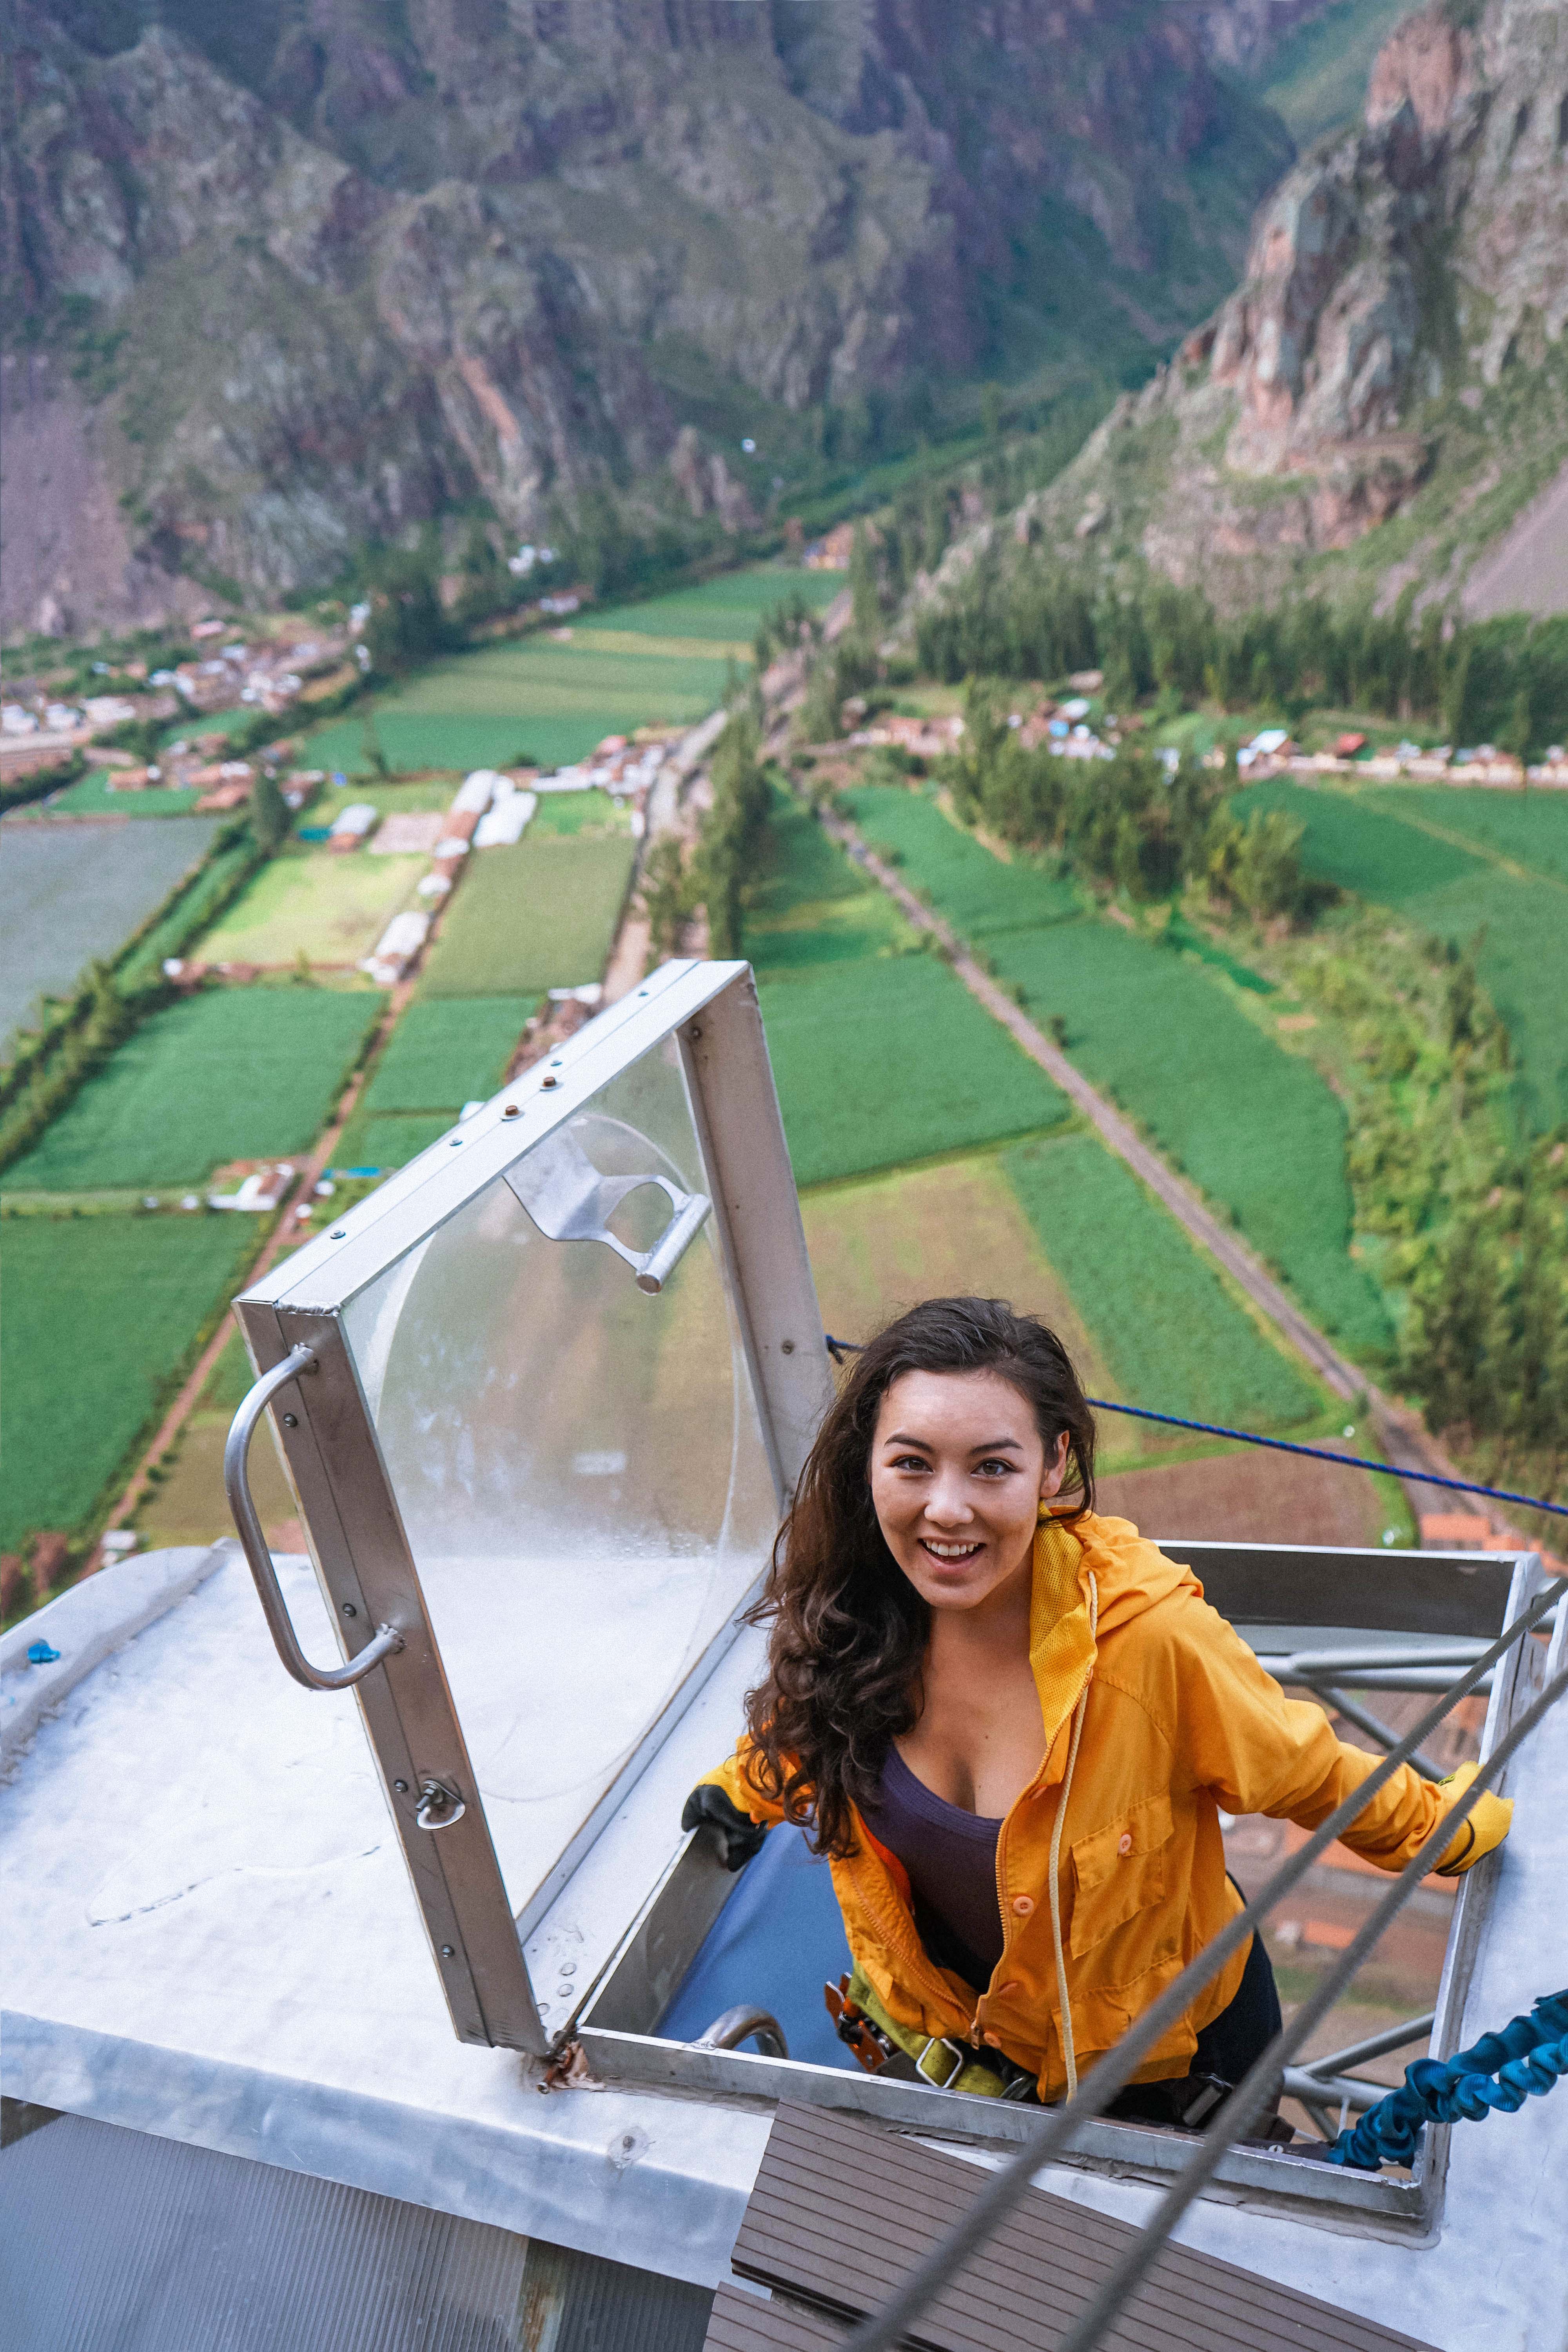
We got picked up in Cusco’s San Blas district around 2:00pm, and transported to the Sacred Valley. After a quick review of how to do Via Ferrata and getting fitted into our harnesses, we were on our way, climbing up the mountain. Random buses filled with tourists would occasionally stop below us to watch us climb, shouting at us and cheering us on.

skylodge-adventure-suites-climb-up-peru

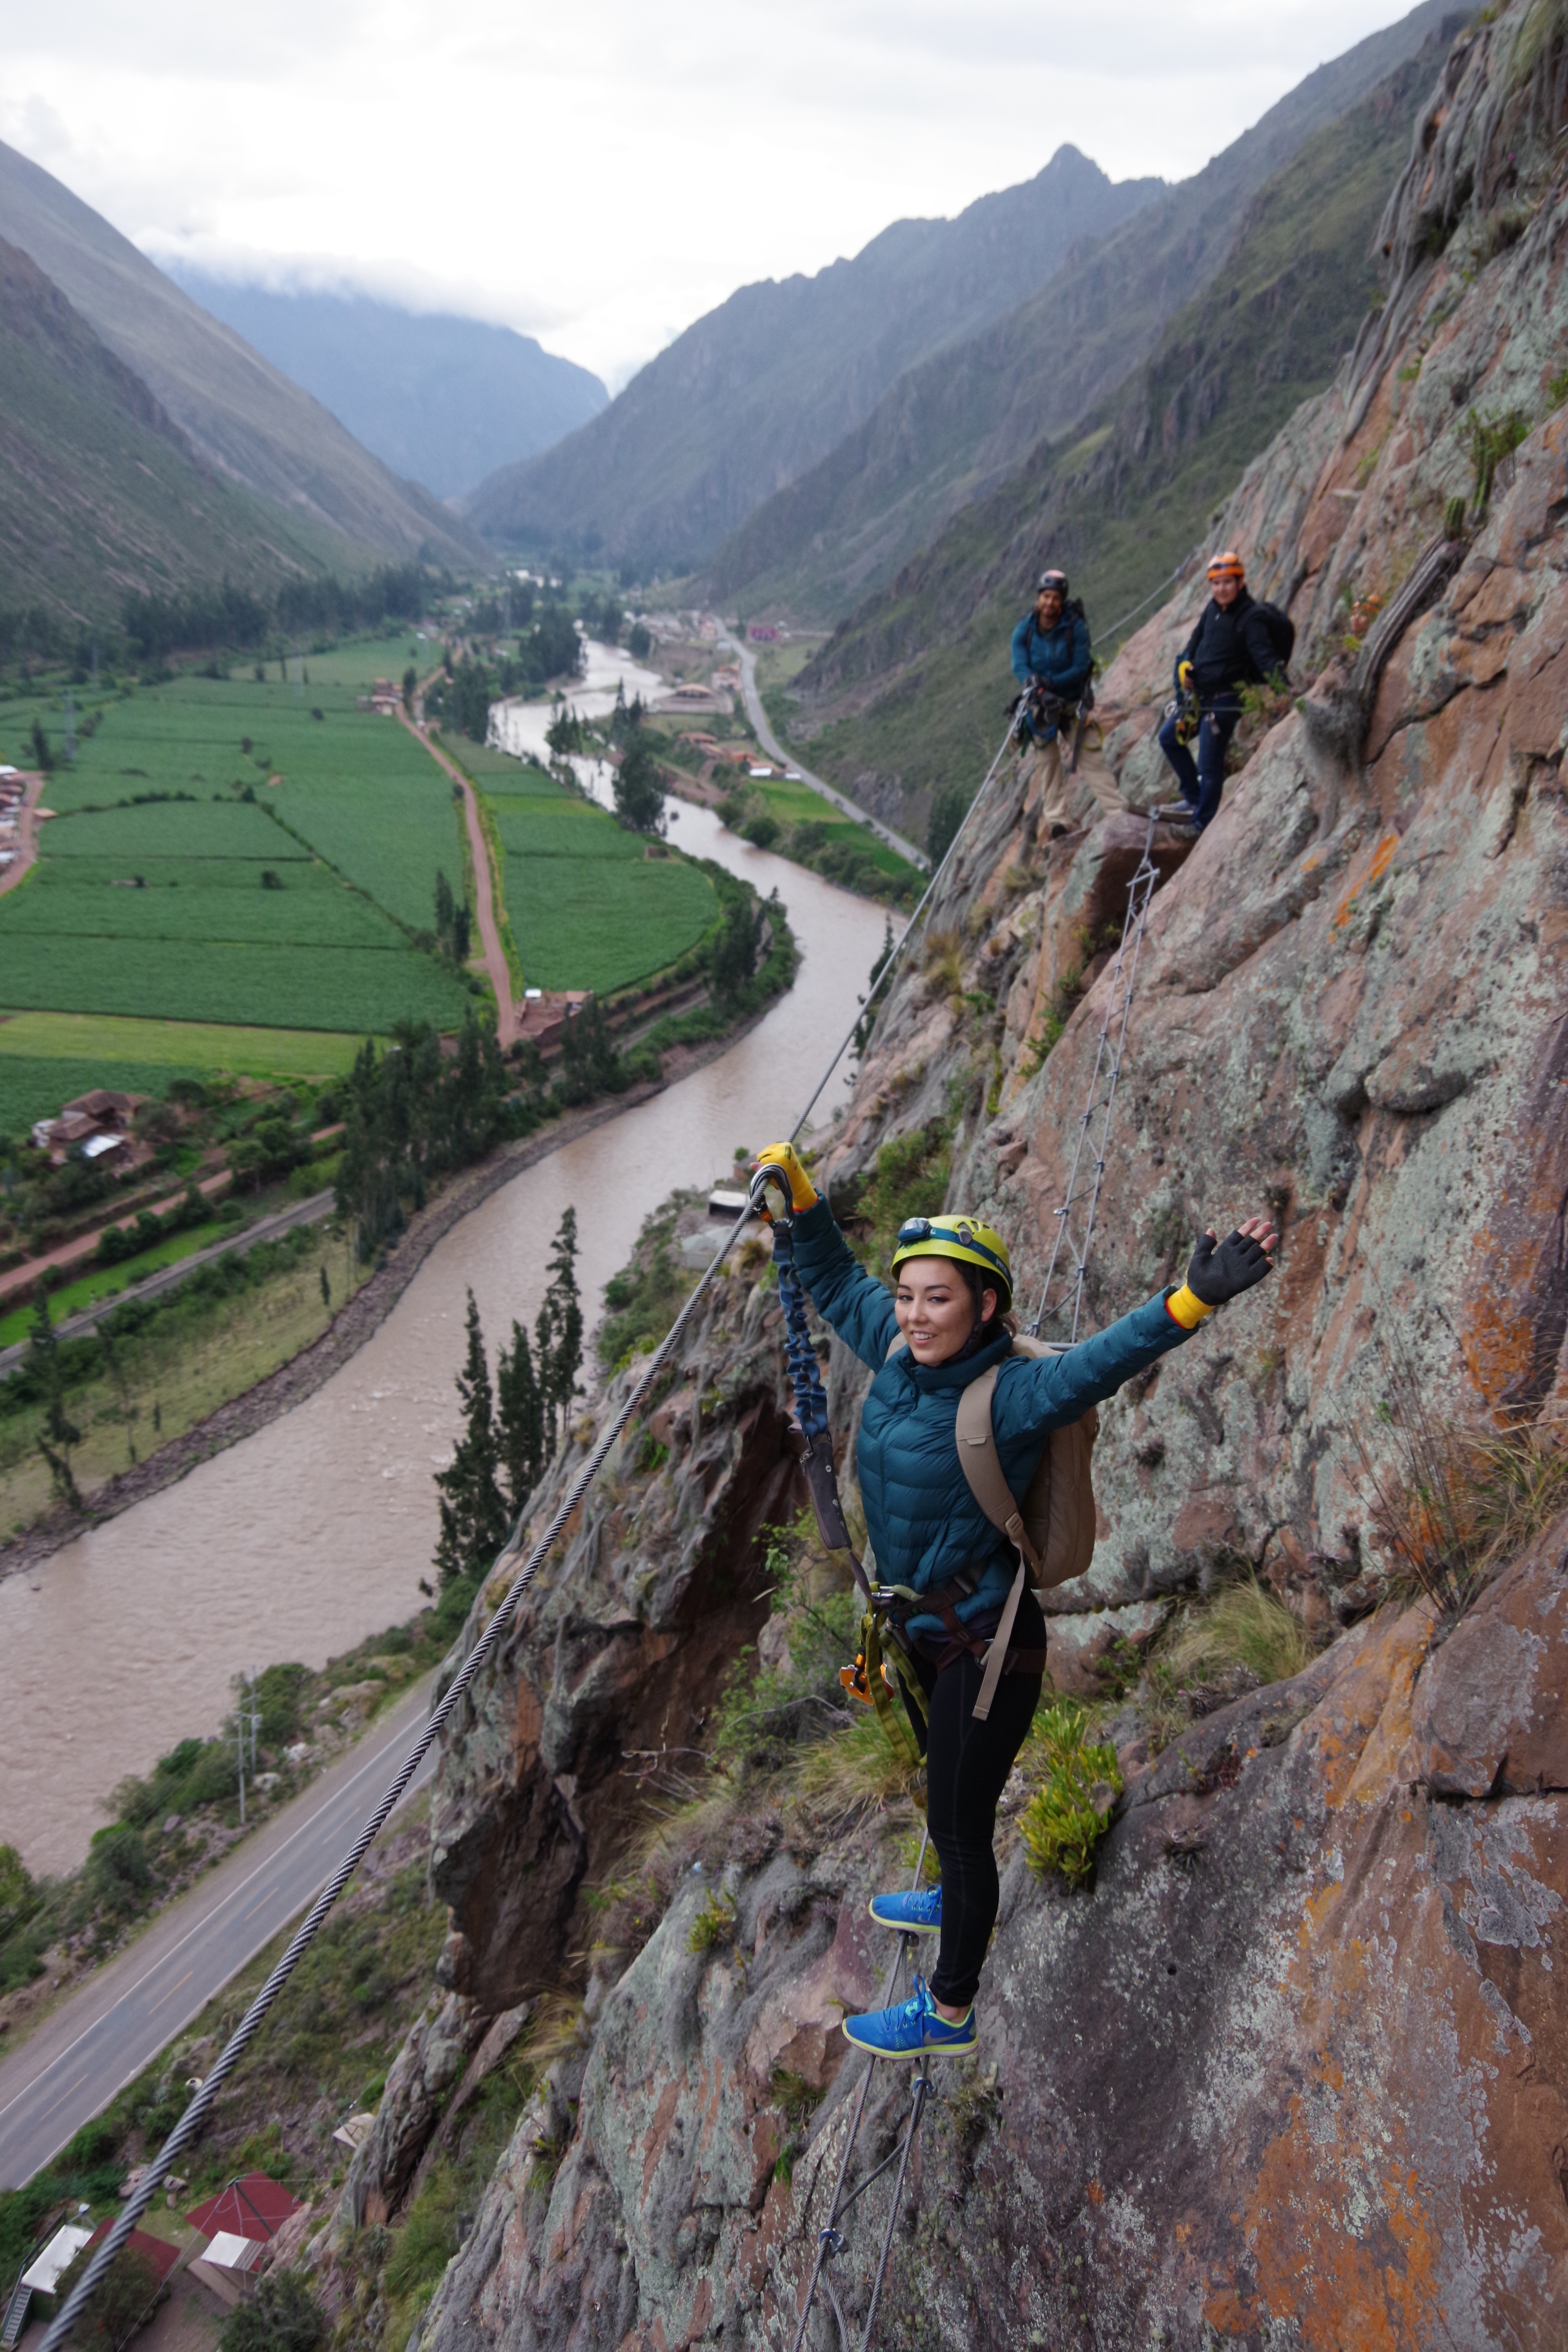
At the 300 meter point (almost 1,000 feet!), we hit a suspension “bridge” of tightrope wires. We were told to walk across—and to push AWAY from the wall (toward nothingness) as we crossed the rope. Okay, no big deal. I reached up for the wires and made a comment about possibly being too short. One of our guides then proceeded to tell us that a 6-year-old did this, so we were fine. Alrighty then.

In total, we climbed up 400 meters (1,300+ feet). But the pods that we slept in were a slight decline from the highest point we reached, which meant we slept at 300 meters up. That’s still the equivalent of climbing a 90-story building, though!

skylodge-adventure-suite-night-view.jpg

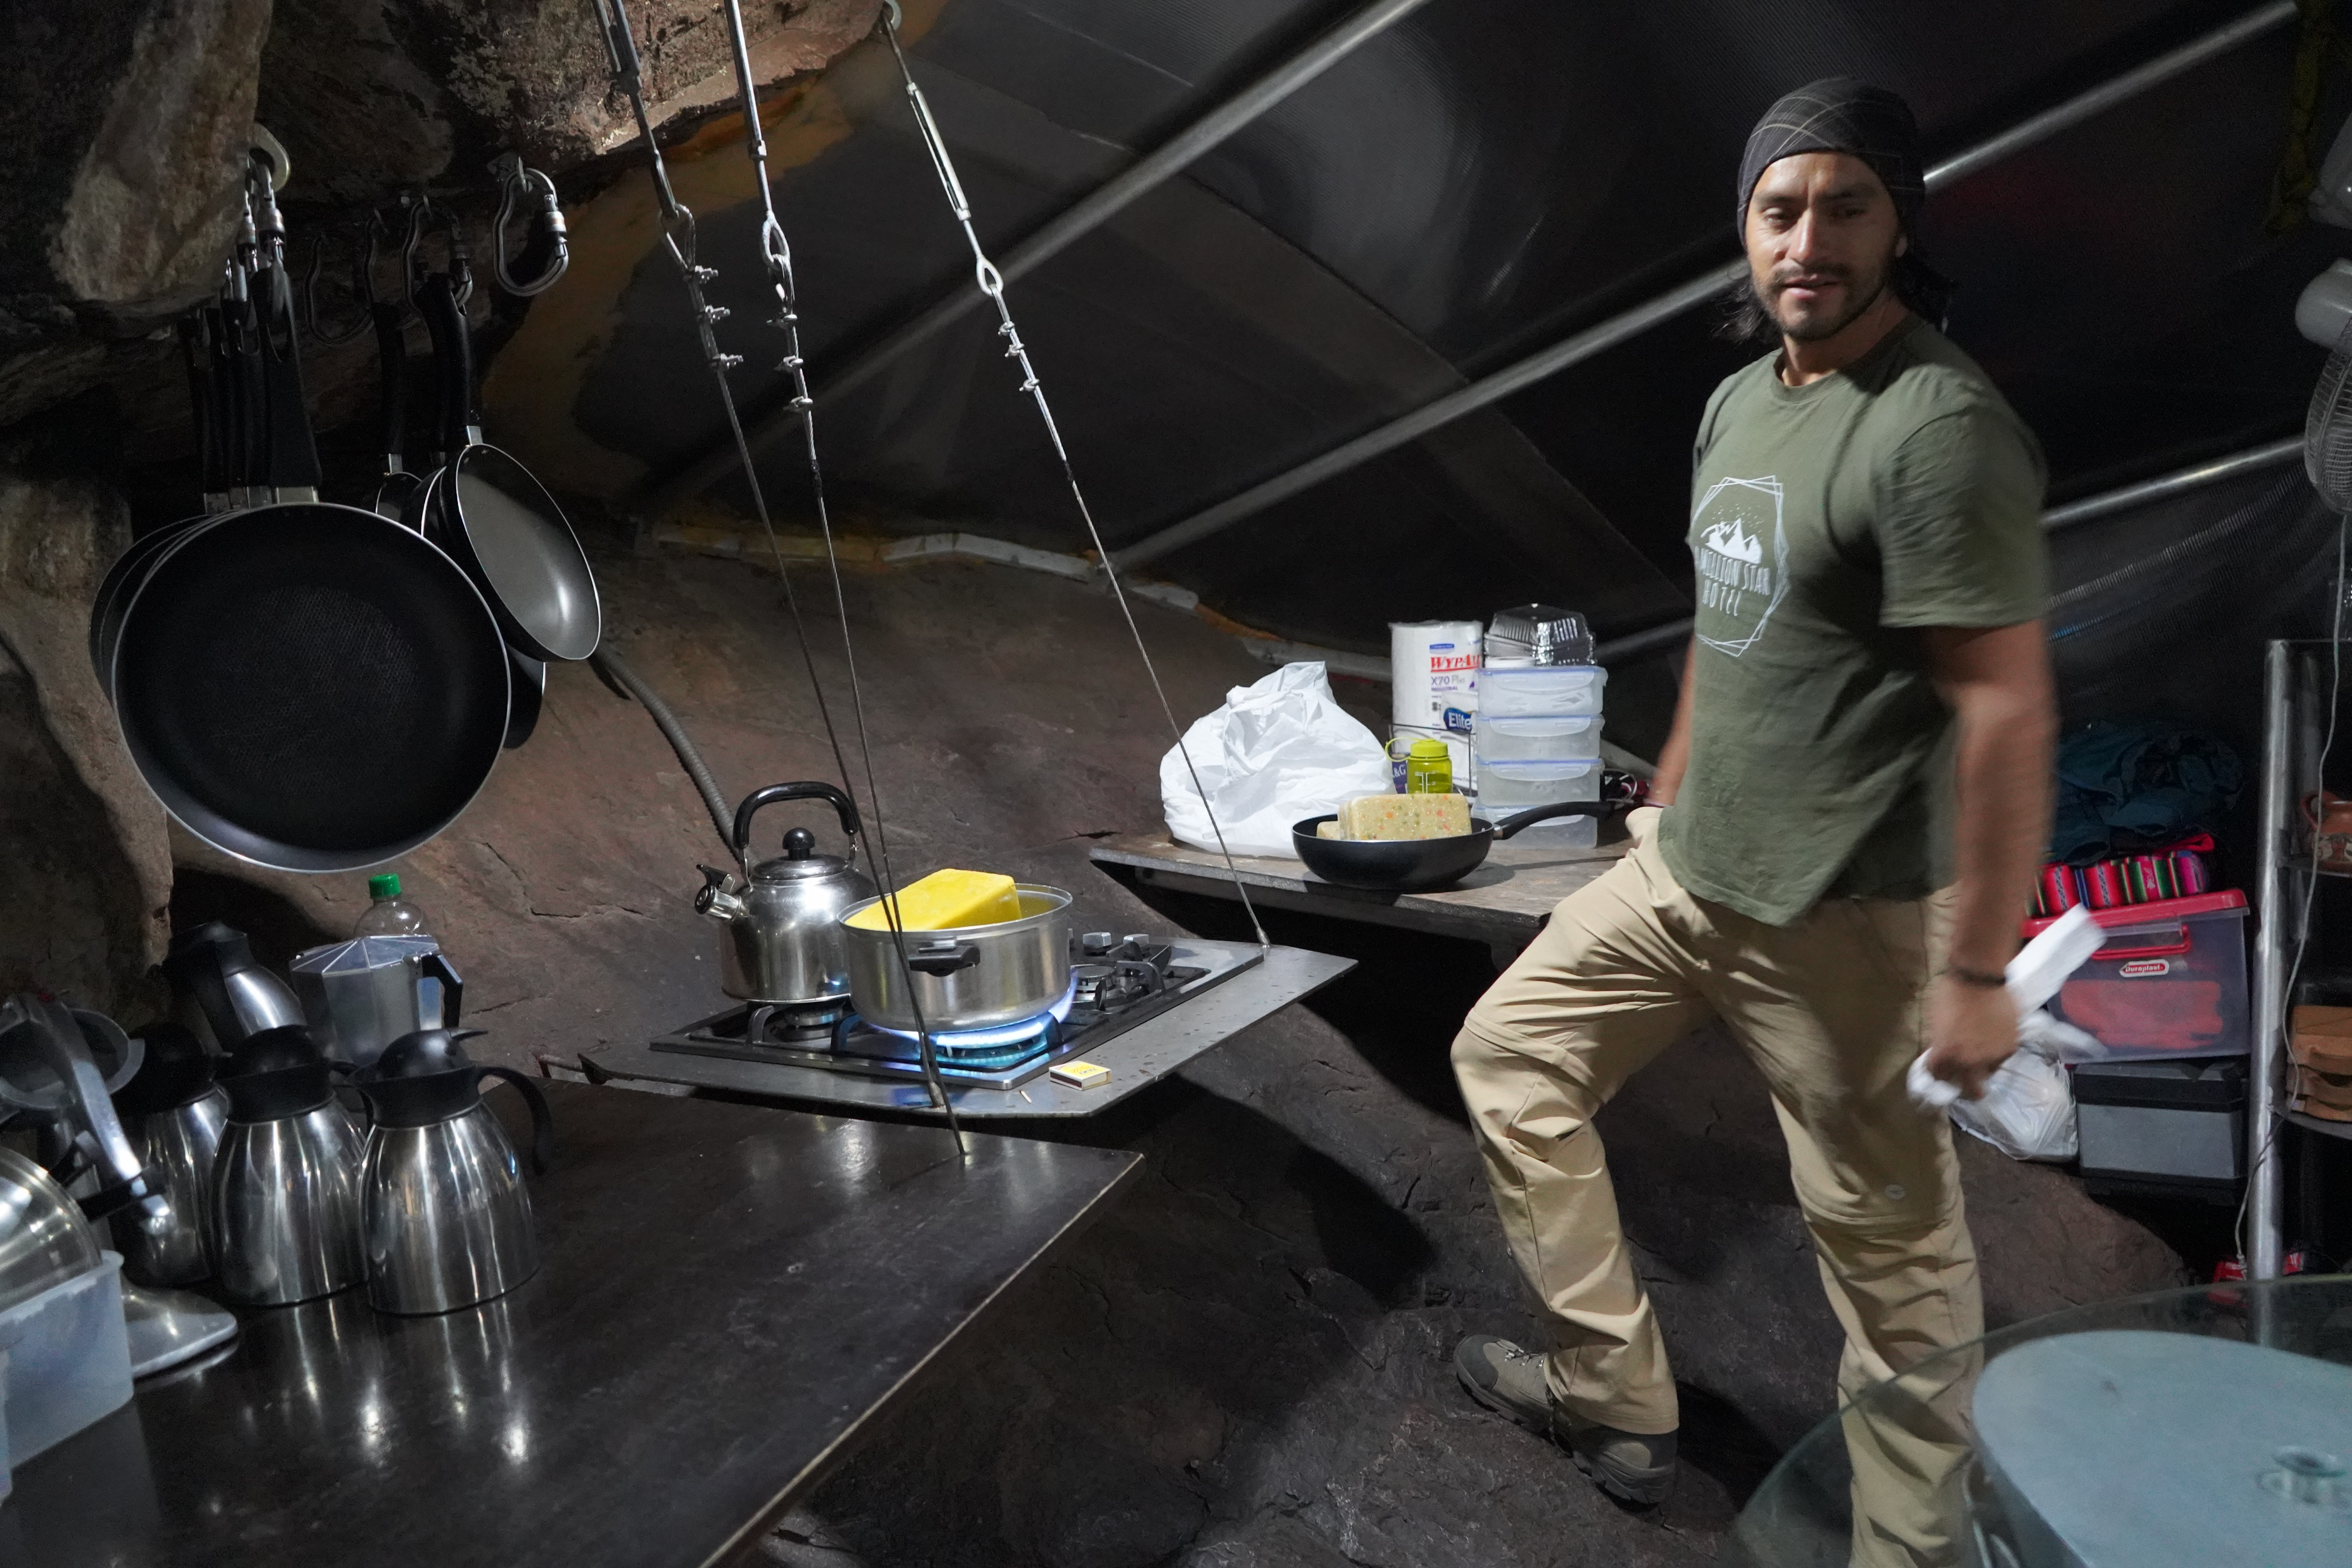
We hung up our helmets and gloves, and ate a dinner in the main communal pod that our guides prepared on a stovetop hanging off the rocks in the cliff. A truly unique thing to witness!

skylodge-dinner-cooking-peru

The food was prepared from frozen ingredients they carried in their backpacks, and we ate a squash soup, salad, a quinoa/chicken dish and dessert. They even were able to accommodate my allergy restrictions, and had a separate gluten-free banana bread that I could eat for dessert when they gave everyone else brownies! They also gave each couple (there were six of us total) a bottle of wine.

We conversed over our meal as it started to rain. After dinner, we were told we’d need to climb further to get to our rooms, and my husband and I were specifically told ours was the furthest and most difficult to get to. “Be careful, because it’s also dark and very slippery when it rains,” they said. My mind was racing, wondering why I had JUST drank wine. But we made it up to our pod without issue, climbed onto the wooden deck and then down into the room as though descending into a submarine. Our feet hit the bottom of the pod, and we were immediately excited by the adorable setup we saw before us.

skylodge-adventure-suites-bed-pod-peru.jpg

It’s hard to get to sleep here, not because it’s uncomfortable (the bed was sooo soft), but because sleep almost feels like a waste of time. Here we were, lying in a bed far above the ground and surrounded by incredible views of the valley below—what were we doing sleeping?! In hindsight, I definitely would’ve set an alarm to wake up more than an hour before breakfast so we could sit on our little patio with the pillows/blankets they provided for us and taken in the breathtaking views.

skylodge-adventure-suites-pod-view-bed.jpg

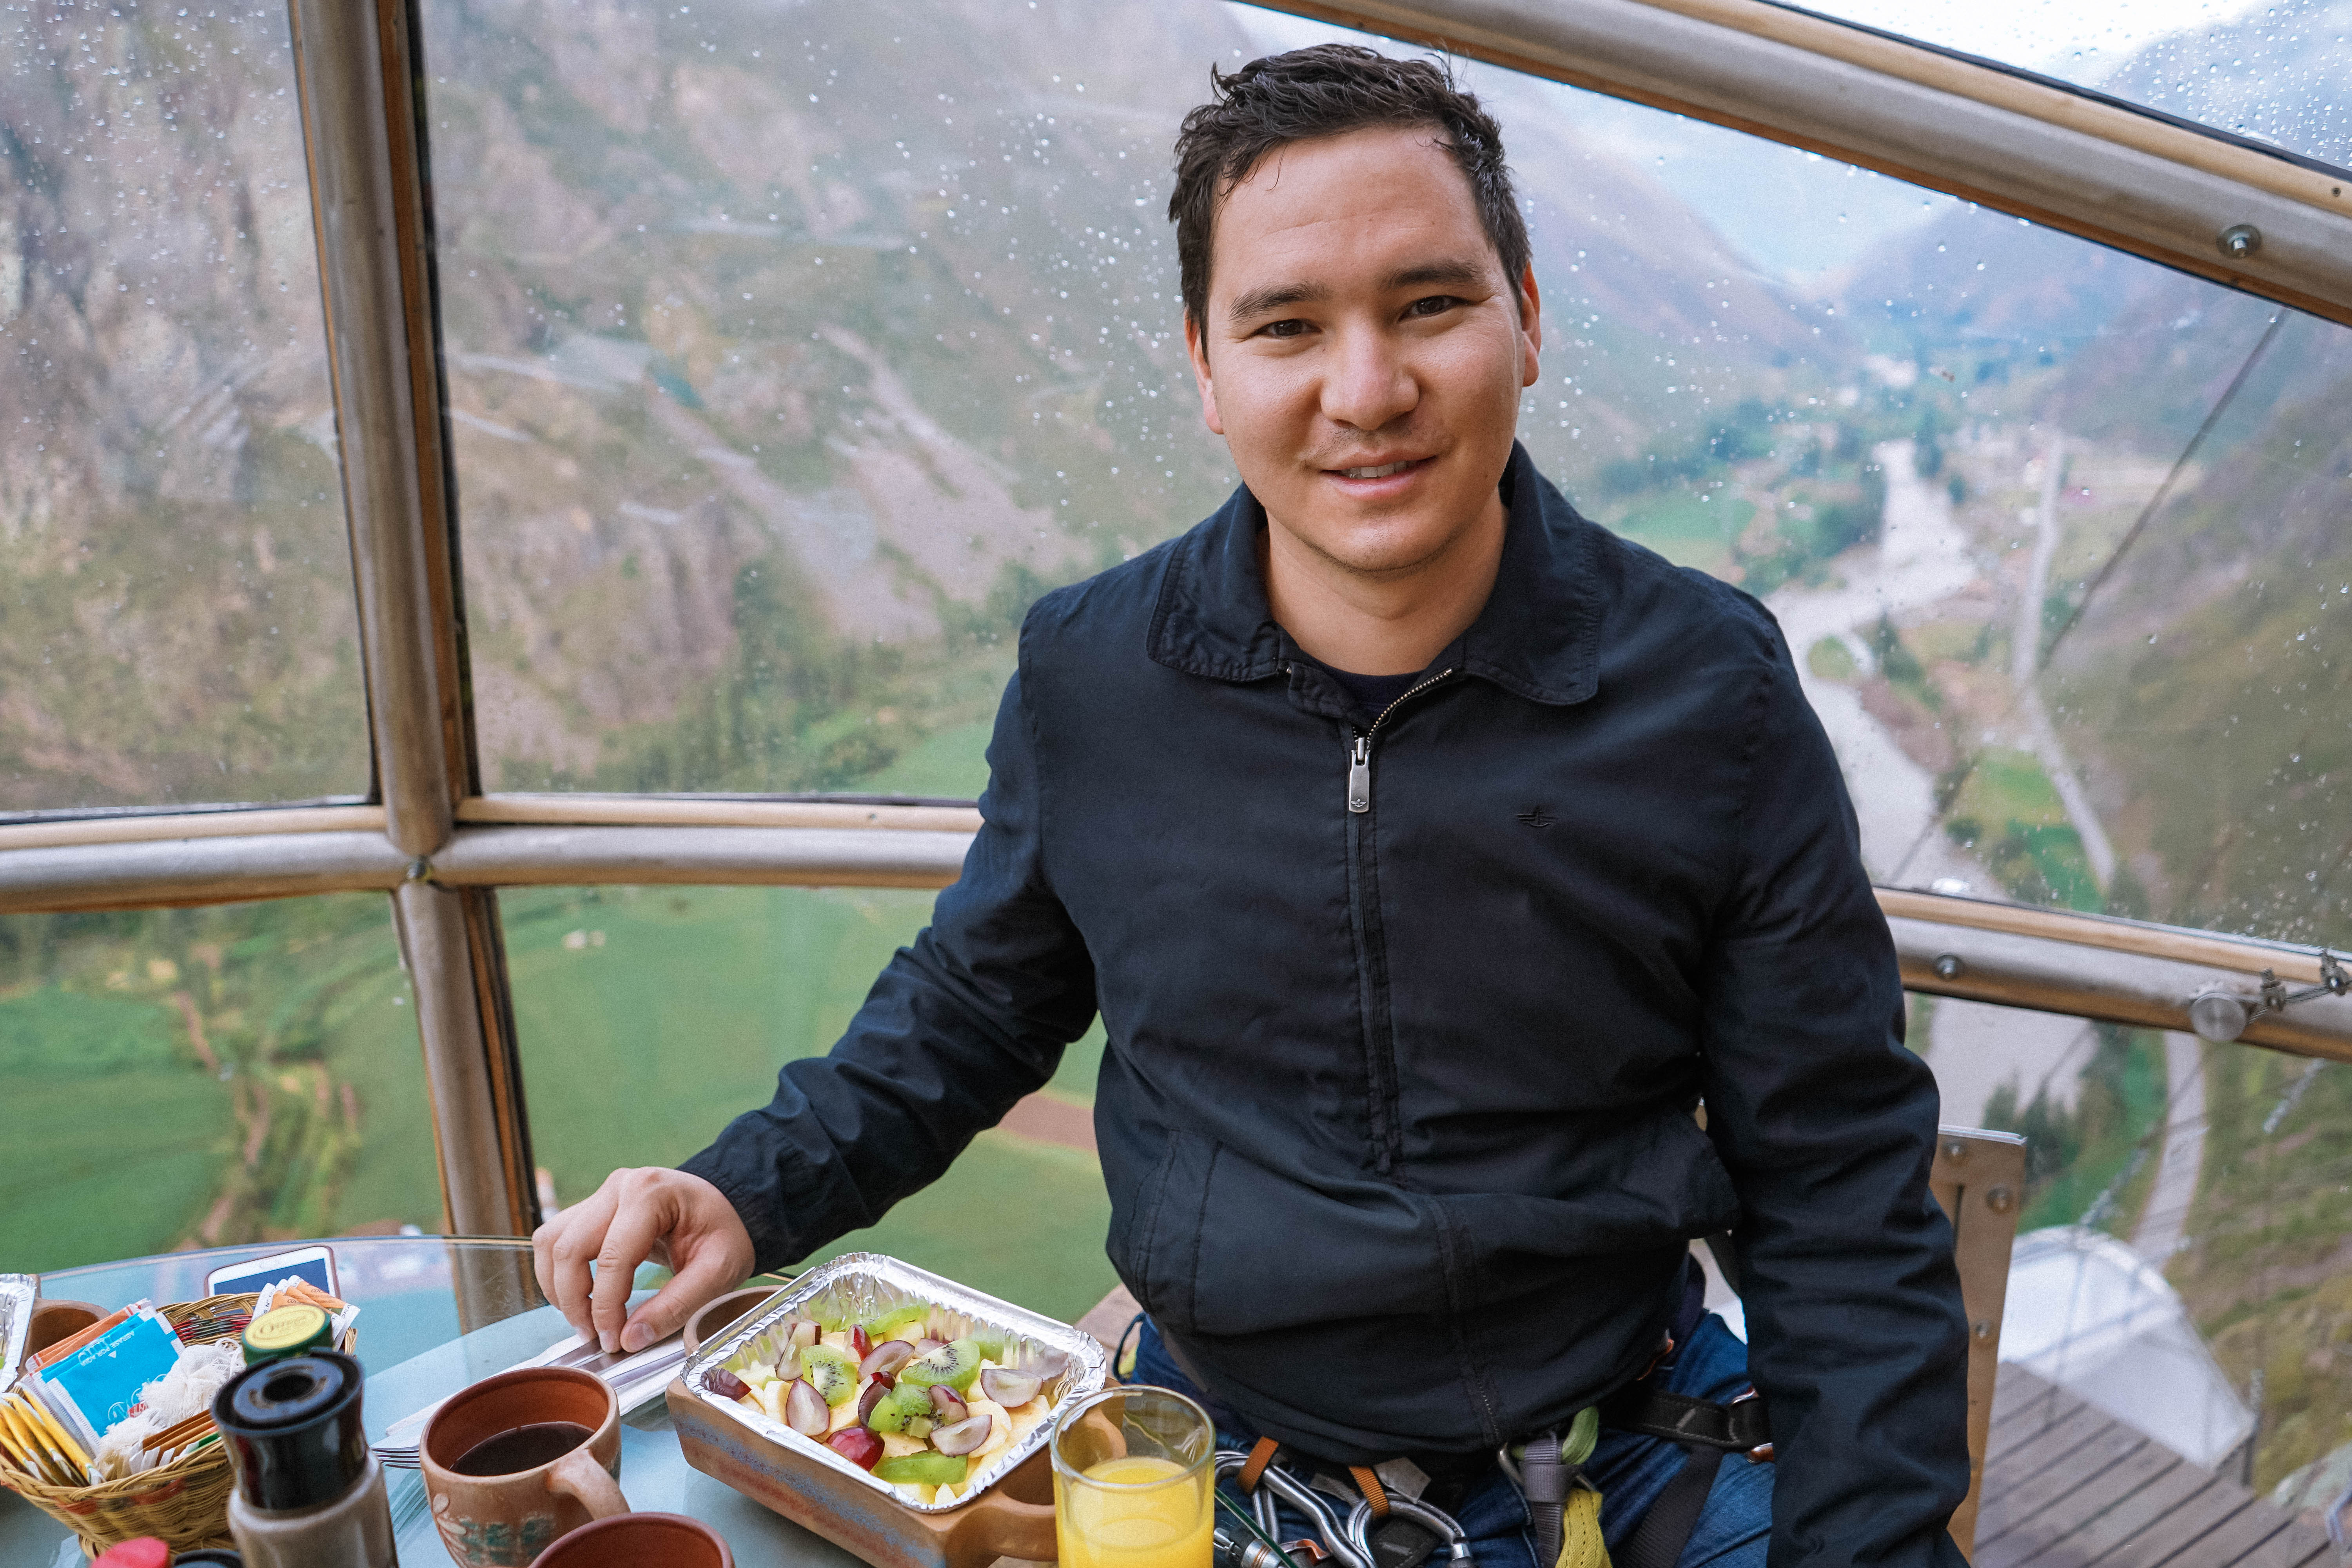
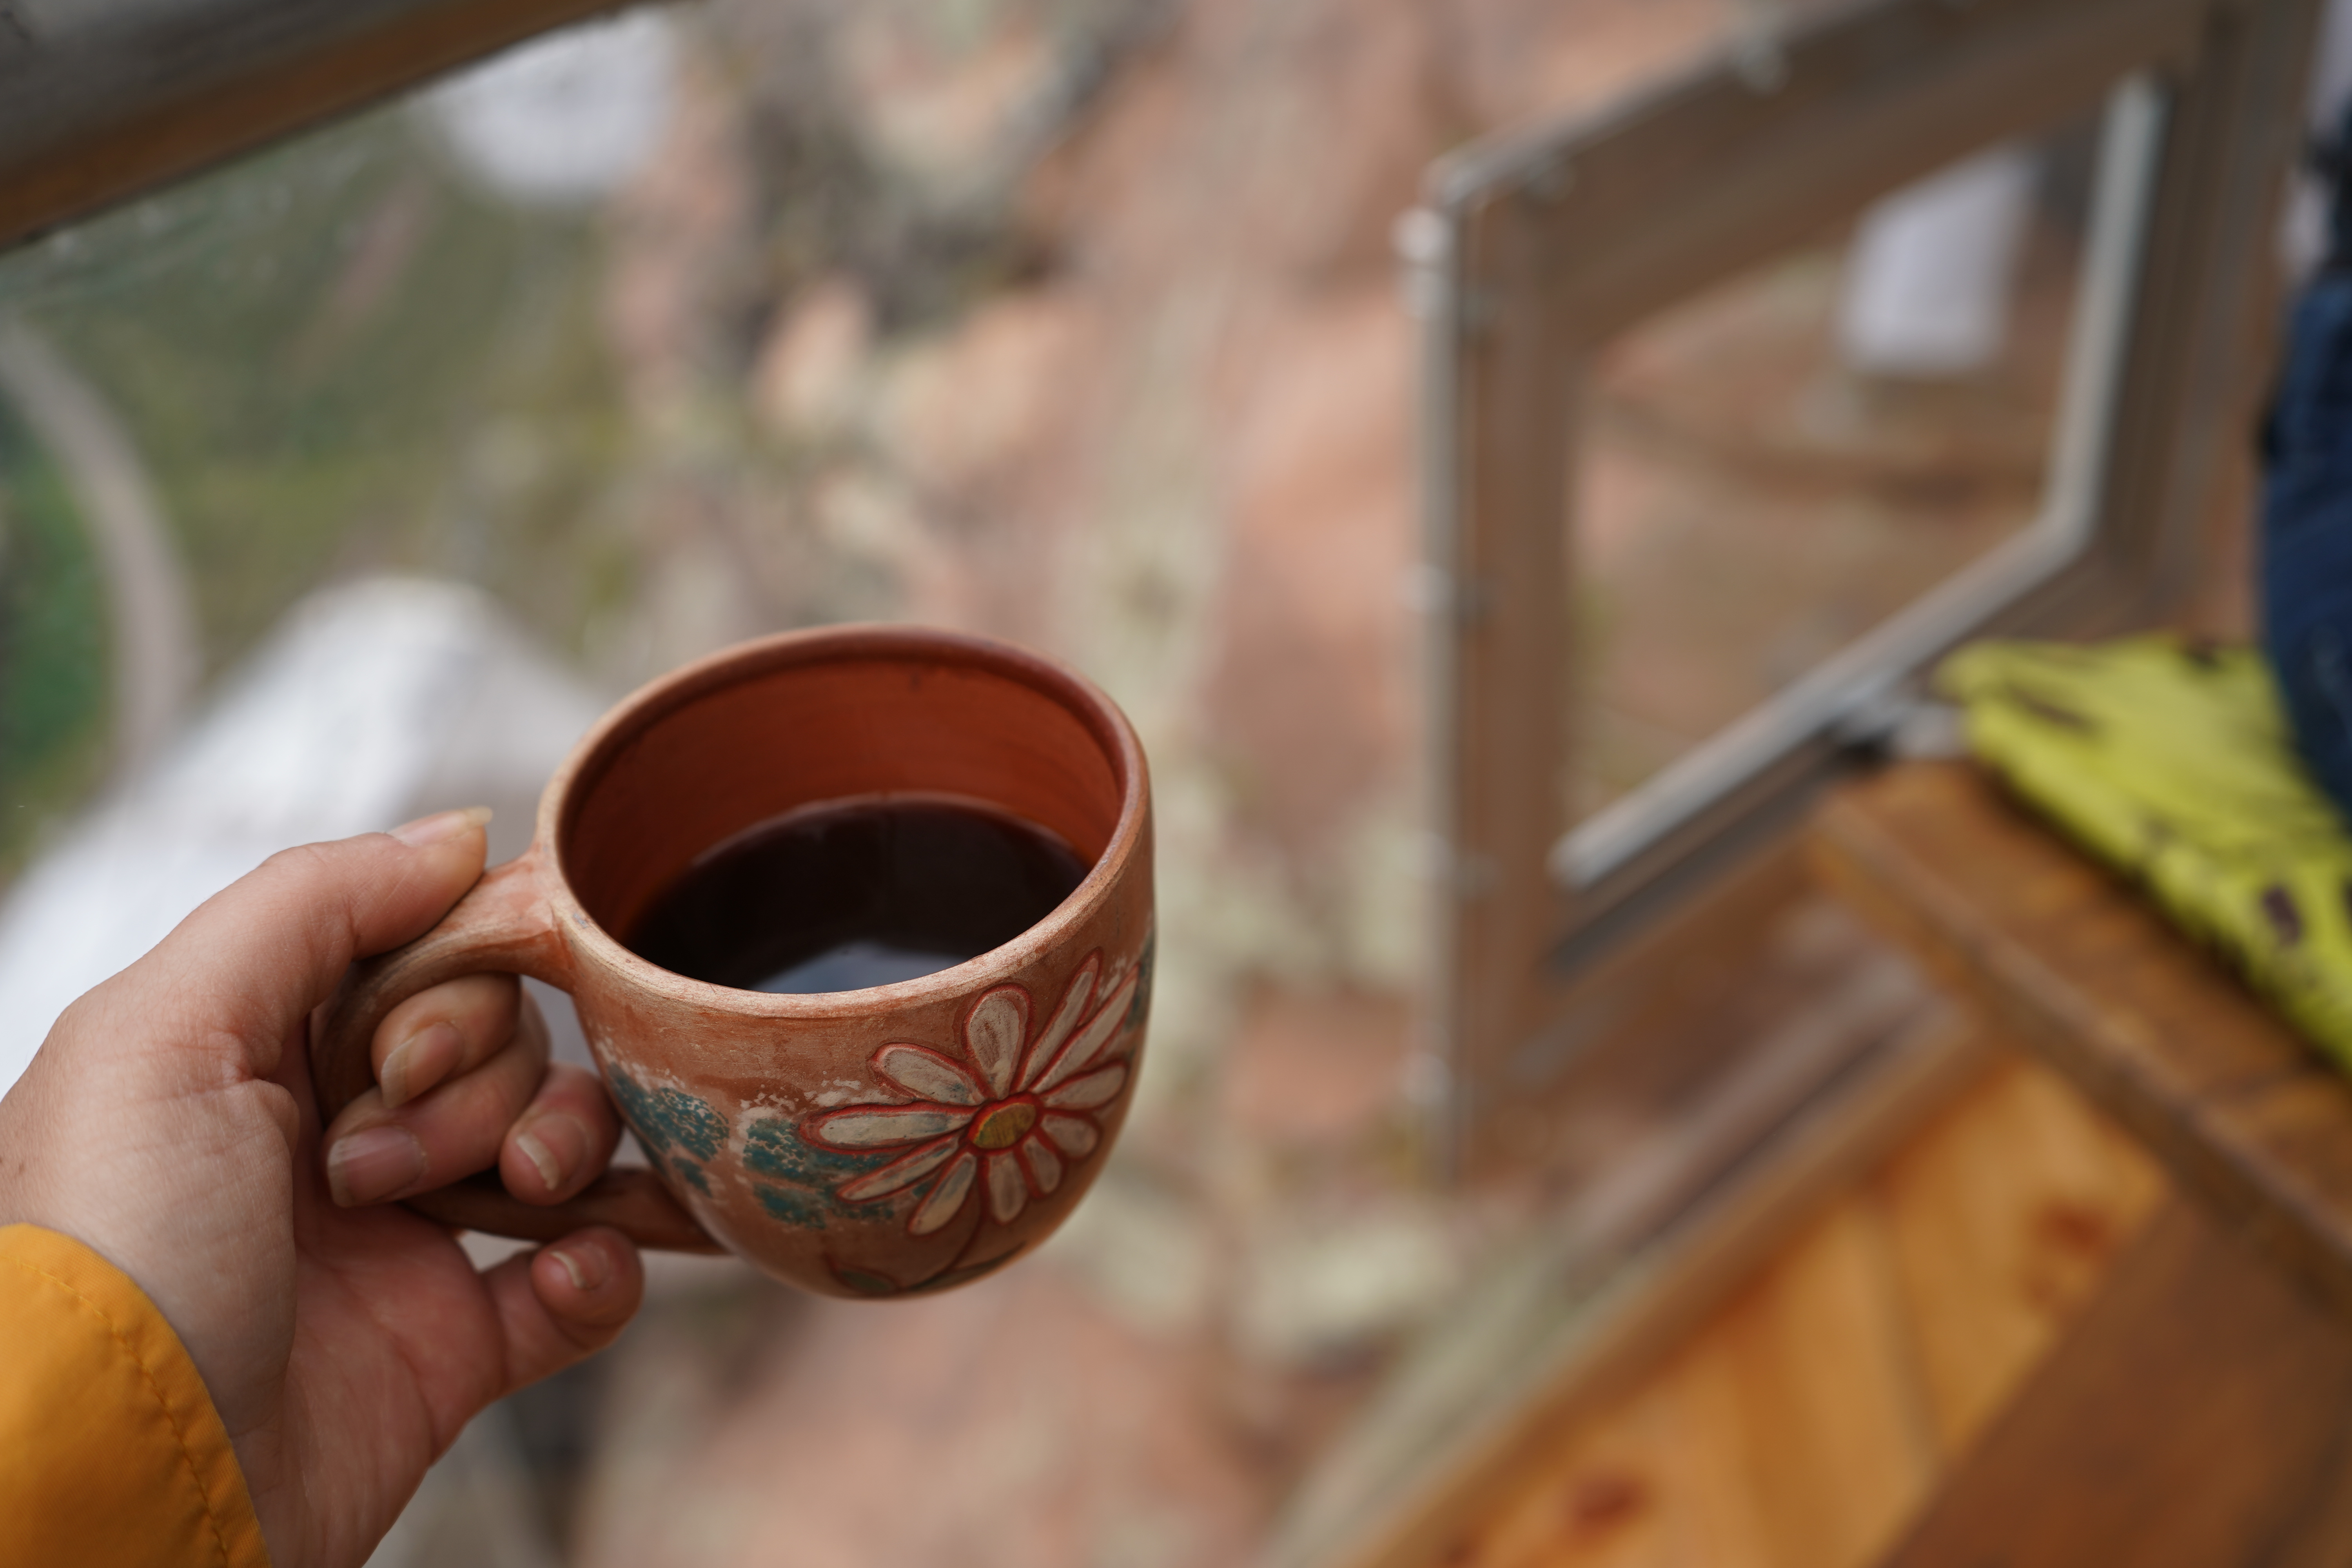
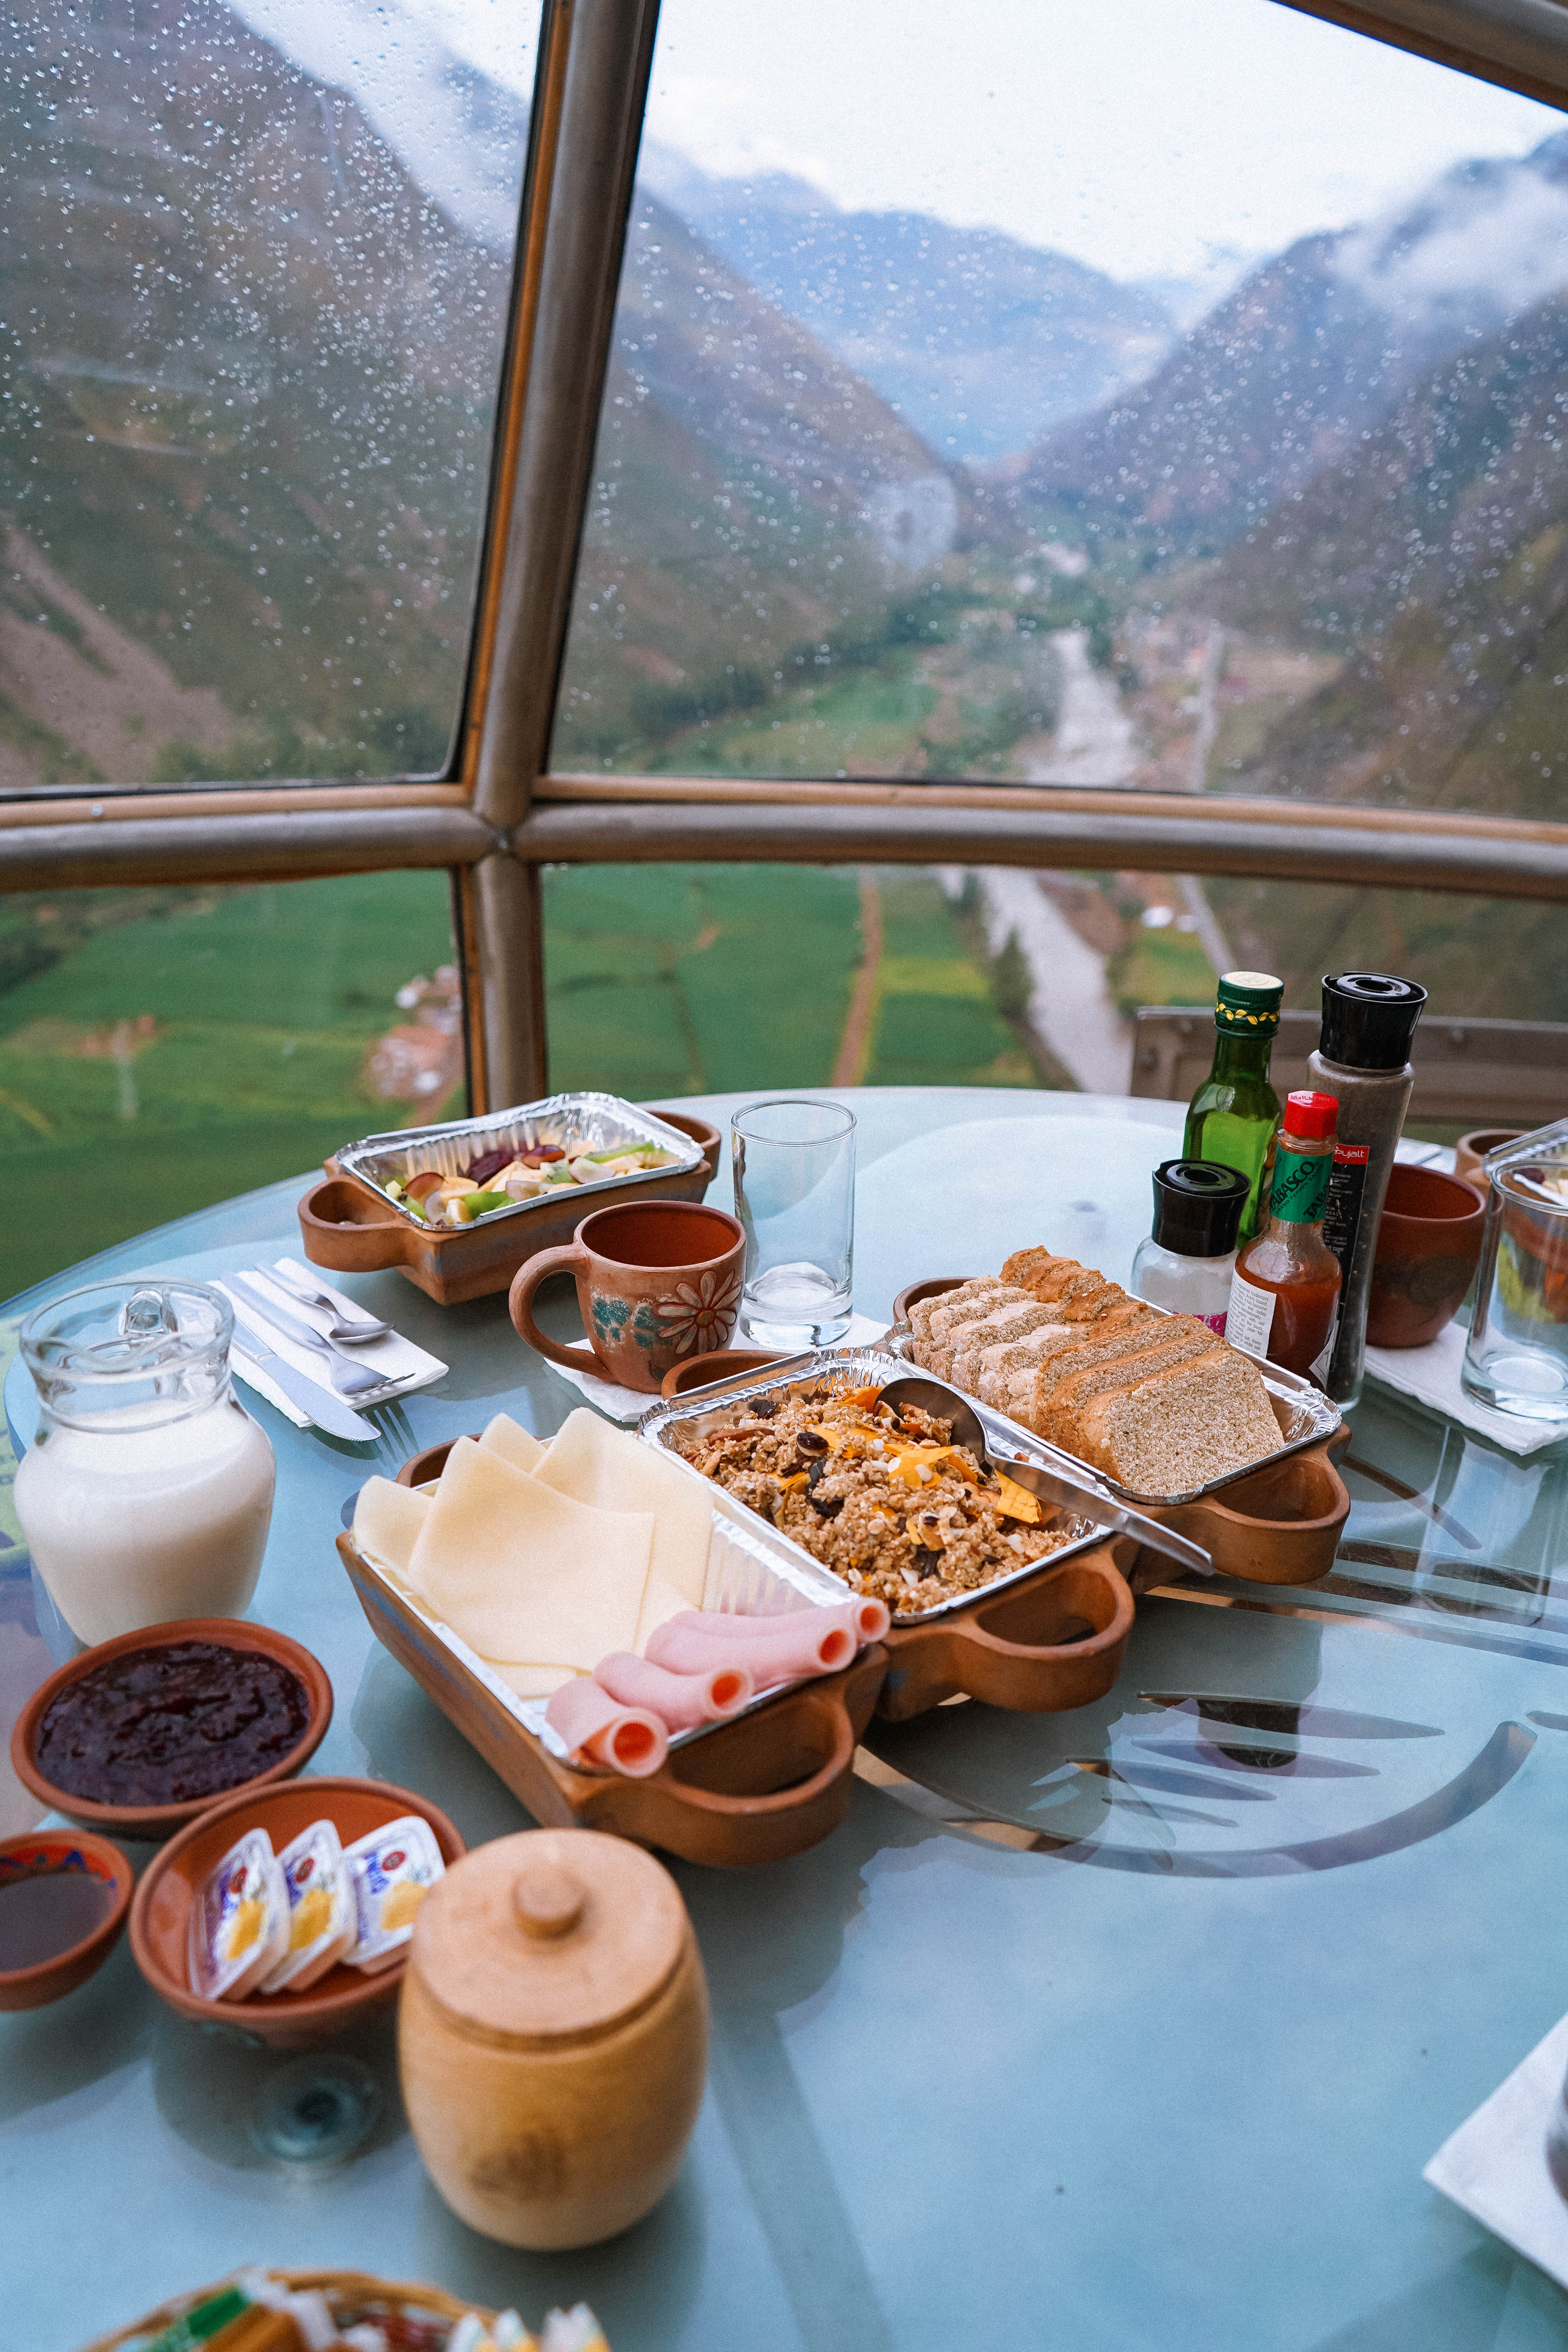
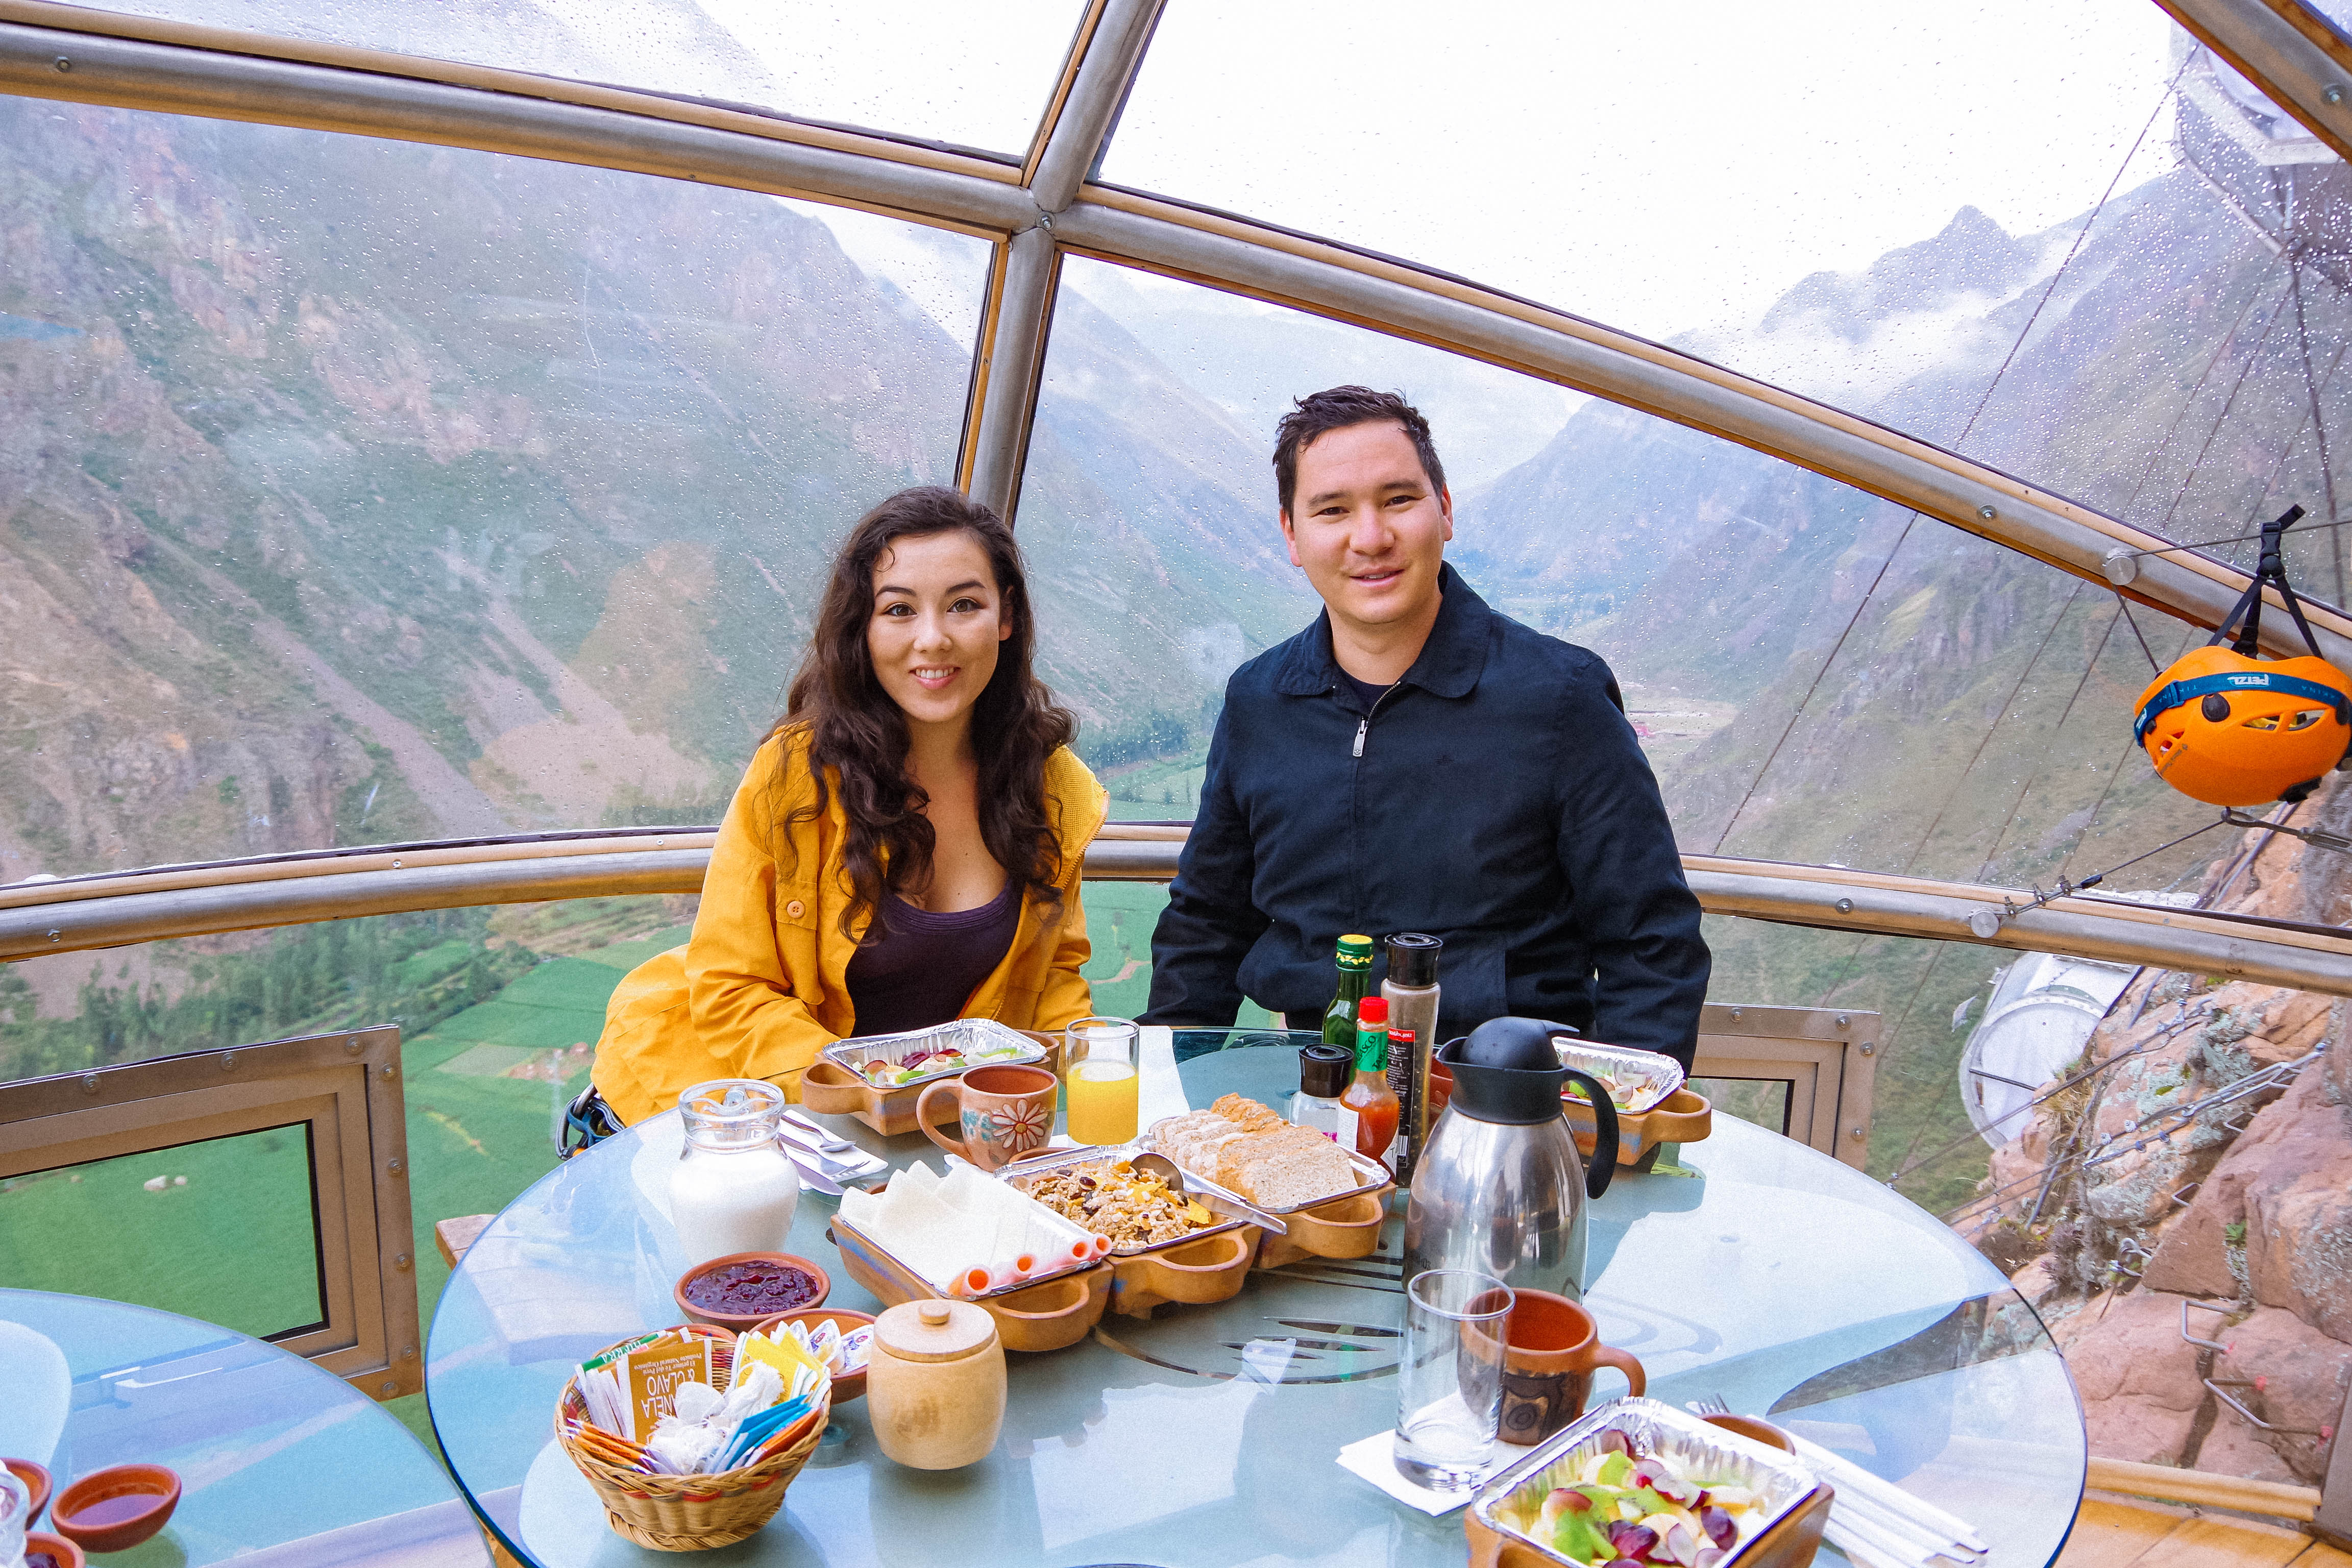
We ate our breakfast at 7:00am, which was complete with coffee, juice, eggs, granola, fruit, yogurt and luncheon meats/cheese. We then headed back to our individual pods to pack up and take some final photos in the room.

Diego, the photographer, was hanging off the side of a cliff with his camera and snapping shots from the outside looking in at us in the pod. We had a blast during this 20-minute photoshoot, and it definitely wasn’t something we could have done on our own!!!

skylodge-adventure-sites-climb-to-room

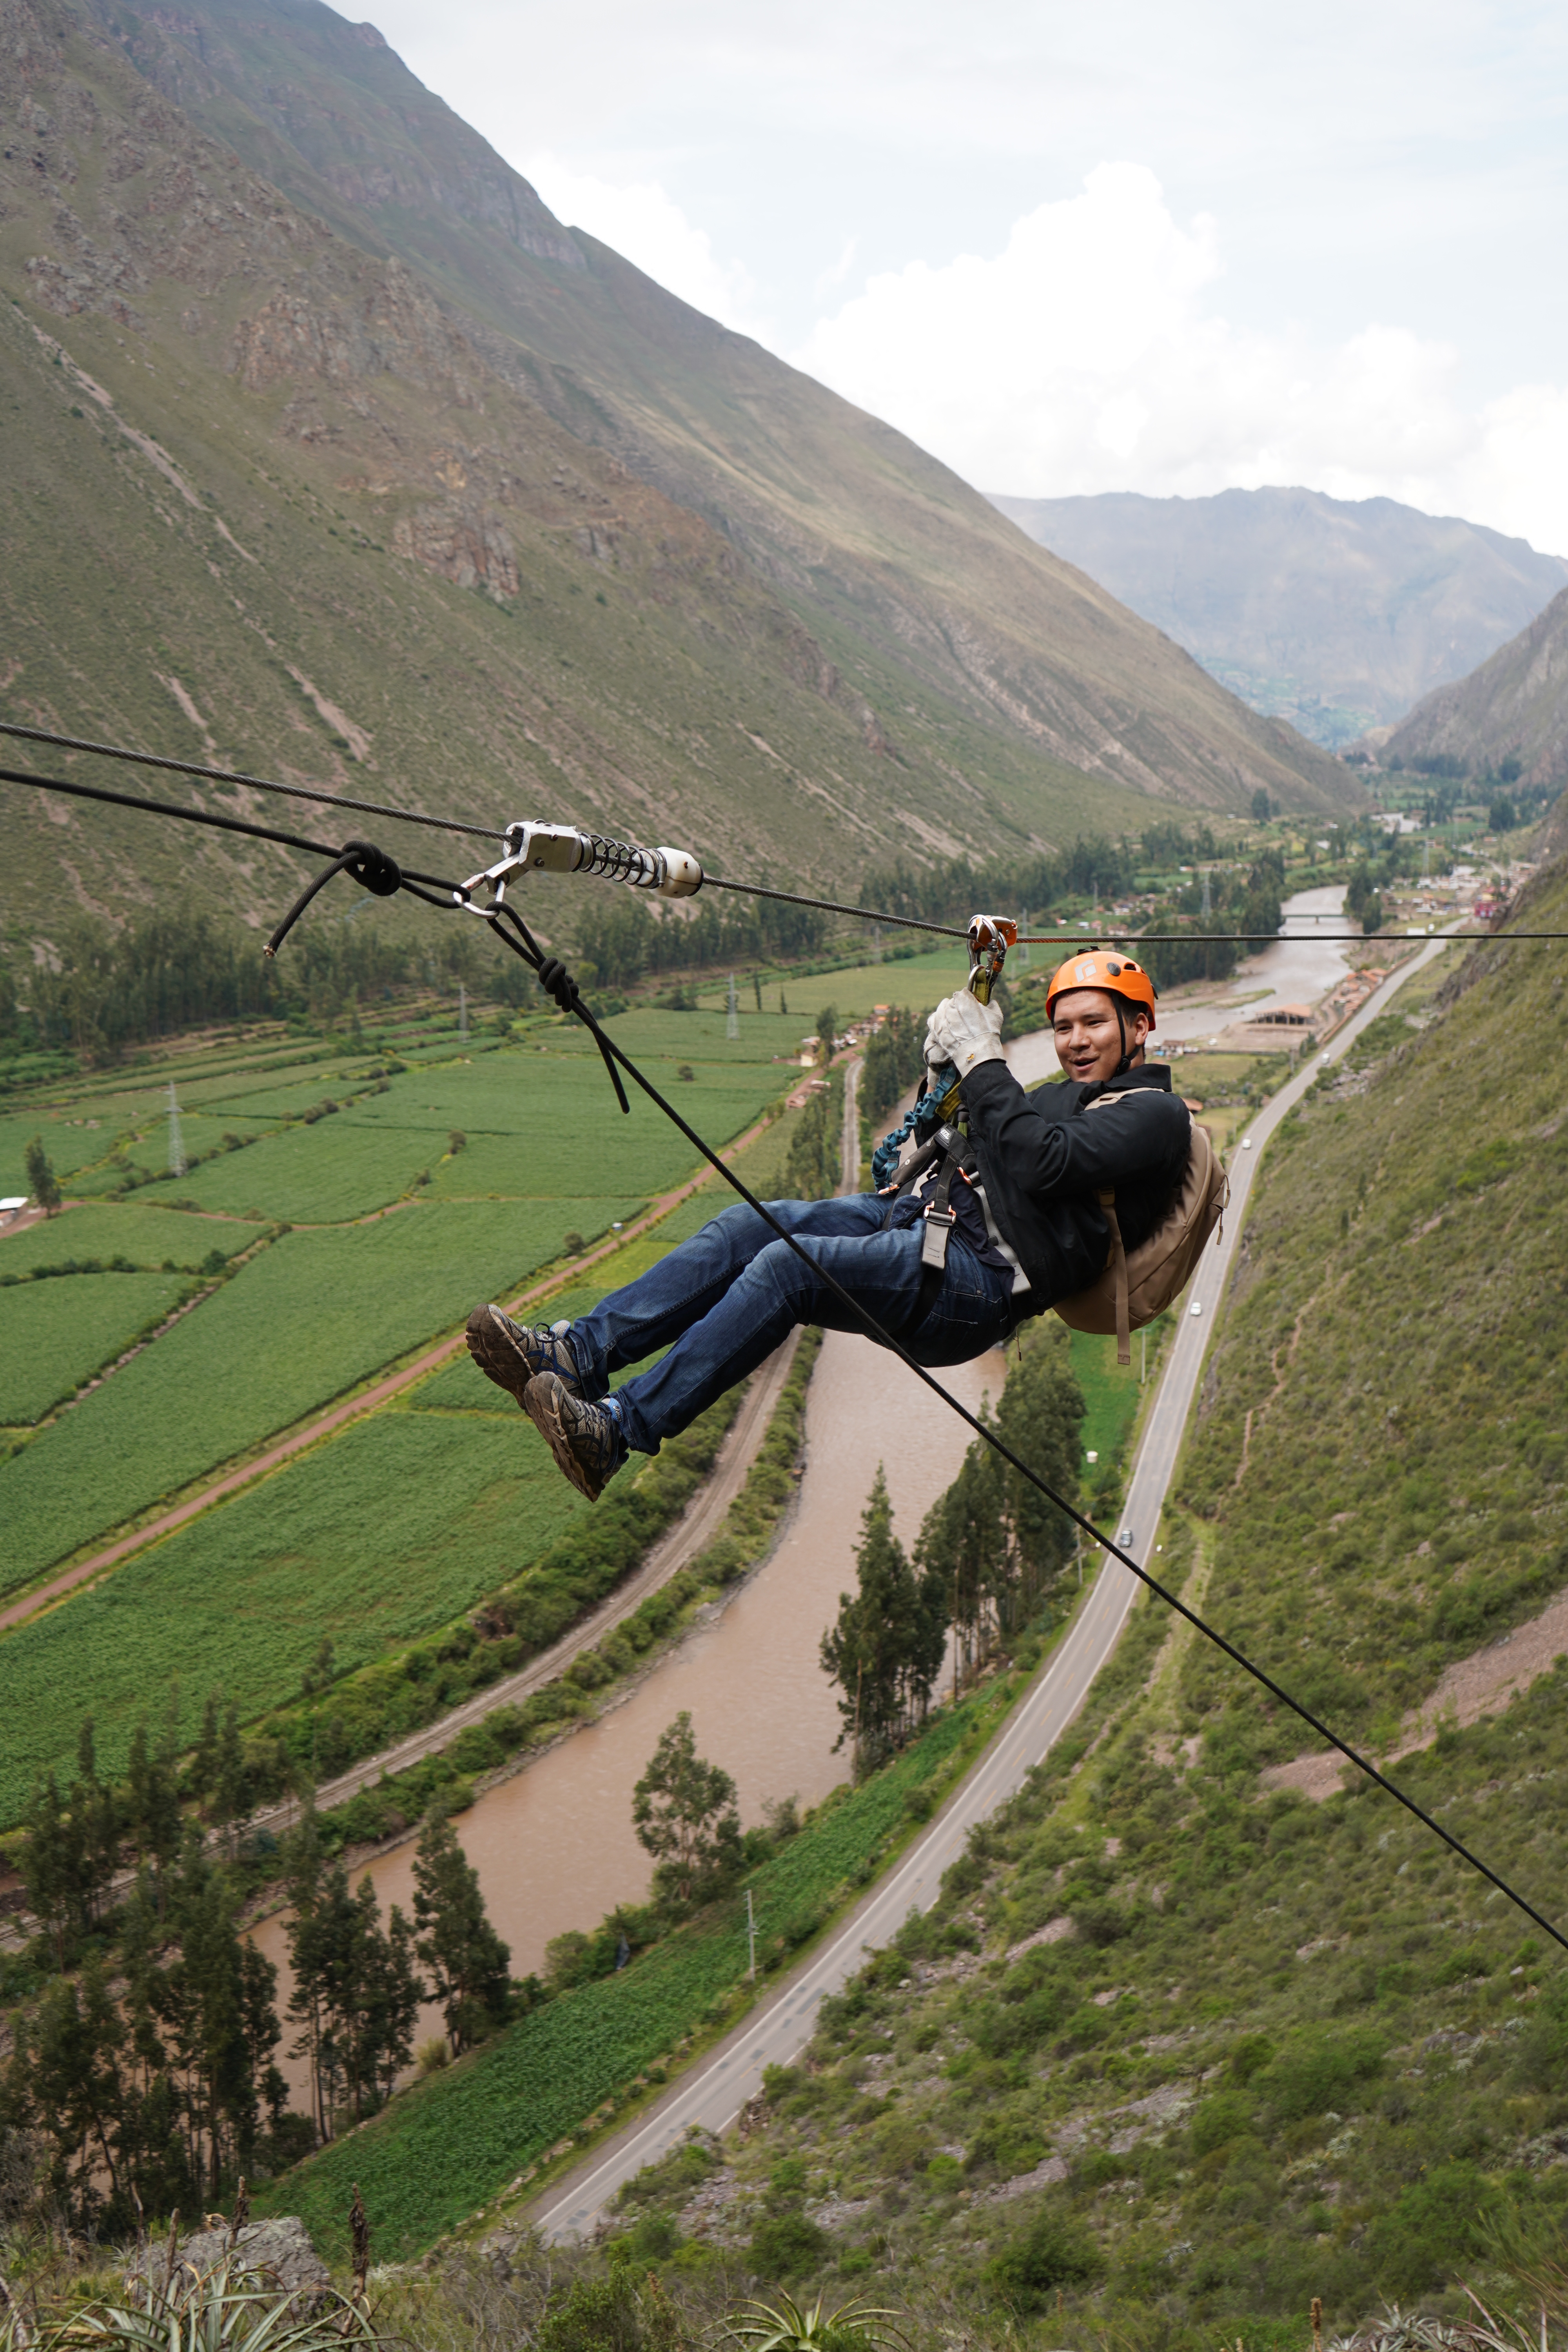
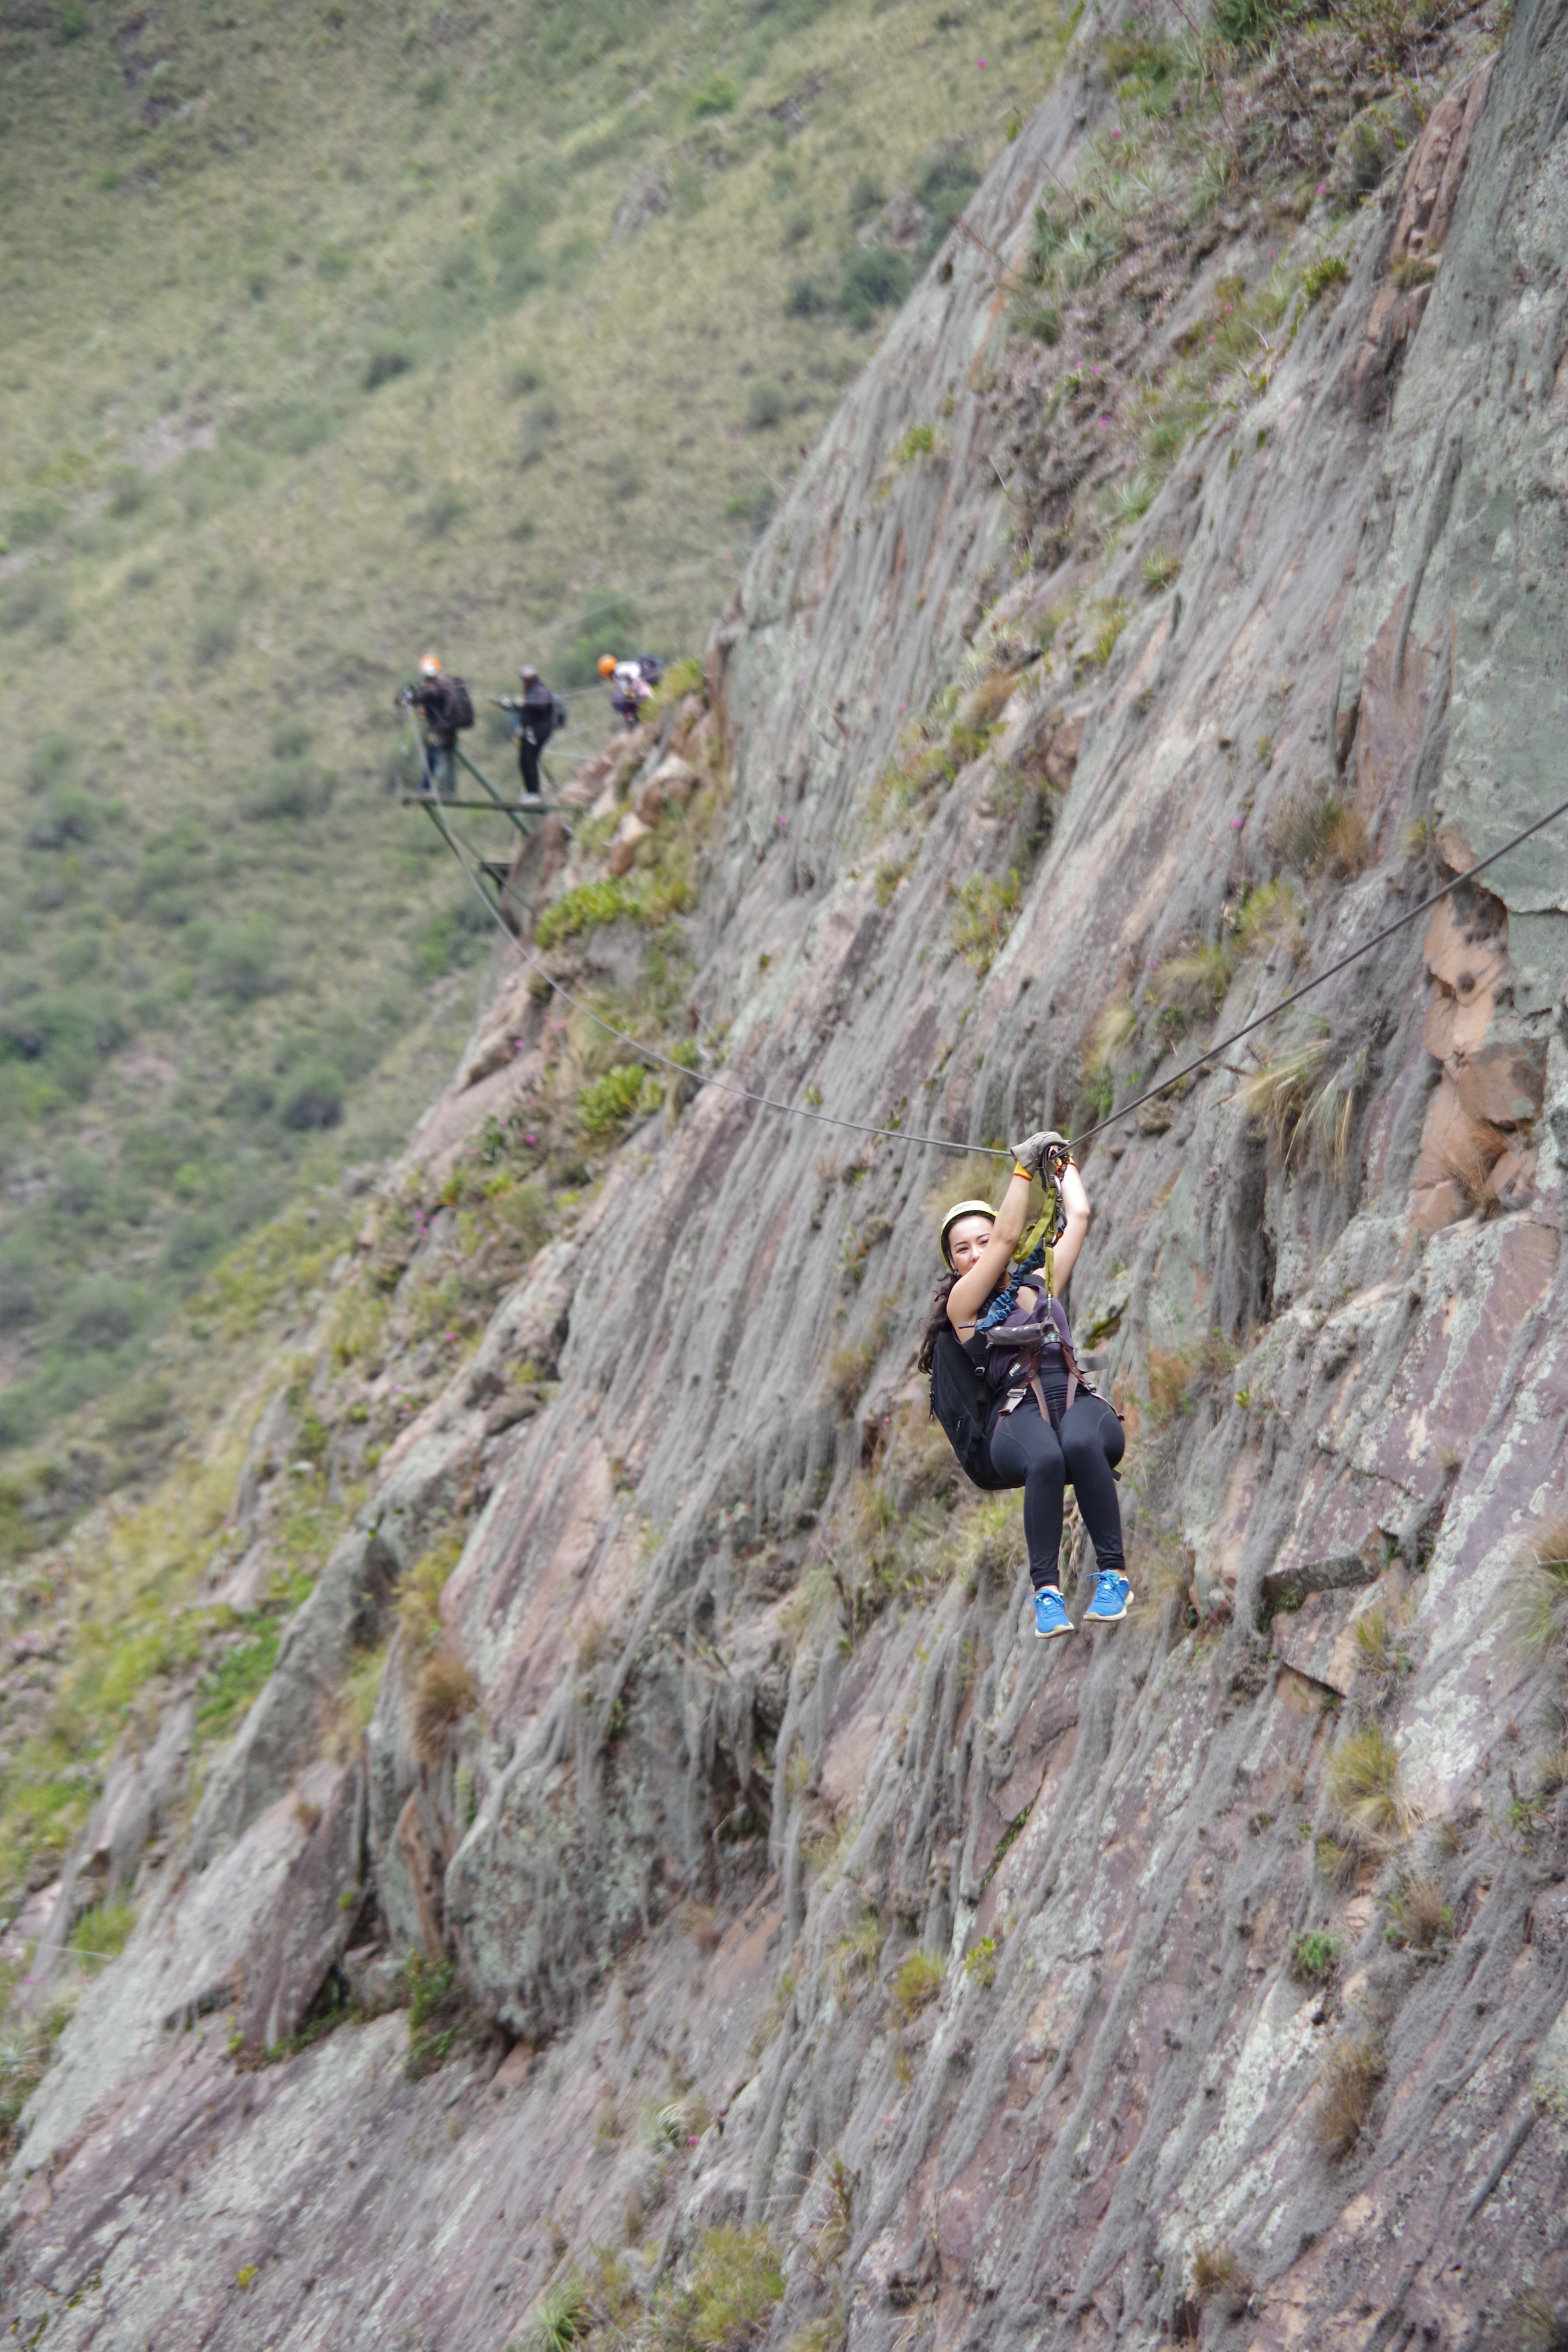
After this, everyone met up at the top pod (ours) and climbed further up the mountain to find a trail. We wandered down the first of six zipline wires, and began or zigzag descent to the ground. One of the ziplines is even 600 meters (2,000 feet) long!!!

We hit the ground, and suddenly we were back in reality and our night in the clouds was just a precious memory. We continued on our way to Ollantaytambo, and were even given snacks for our journey. All in all, this experience was the highlight of our trip—which is saying something when you consider all the amazing sights that Peru has to offer!

skylodge-adventure-suites-view-of-river-from-pod-peru

Price per person:

OVERNIGHT
Via Ferrata + Zipline + 1 night –1,475 Soles (approx. $445 USD)
Zipline + 1 night – 1,385 Soles (approx. $417 USD)
Via Ferrata + 1 night – 1,385 Soles (approx. $417 USD)

LUNCH ONLY
Via Ferrata + Zipline + Lunch – 860 Soles (approx. $260 USD)
Via Ferrata + Lunch – 770 Soles (approx. $232 USD)
Zipline + Lunch – 770 Soles (approx. $232 USD)

skylodge-breakfast-view-peru-adventure-suites

(We definitely recommend doing the overnight and both the Via Ferrata and Zipline, if you can! It’s two incredible and unique activities that my husband and I both felt made the whole experience complete.)

inside-look-skylodge-adventure-suites-peru-luxury-hotel-sacred-valley-south-america

Lifestyle

Top 10 Australia Instagram Spots

Okay, let me start off by saying I am FULLY aware I  haven’t even scratched the surface of this beautiful country. From vibrant, iconic cities and tall mountains to stunning beaches and cascading waterfalls, Australia has something for everyone. And don’t even get me started on their cute, unique animals (quokkas, anyone?)!

bondi-beach-sydney-australia-jpg

I am dying to go back to this gorgeous country and hit all the places we missed, and I know I will have many more spots to add to this list. However, from our whirlwind 10+ cities in just 10 days, these lovely photo spots became my favorites:

  1. Glass House Mountains (Sunshine Coast, Queensland)

The Glass House Mountains are a 1-hour drive north from Brisbane. They are 1,000%  worth checking out for an afternoon or even a full day trip. Not only are the mountains beautiful, but they boast rich local legends since they are in the lands of the aboriginal Jinibara and Gubbi Gubbi people. The mountains are supposedly all members of a family: Tibrogargan, Beerwah, Coonowrin, Tunbubudla, Miketeebumulgrai, Ngungun and Elimbah.


View this post on Instagram


From one tropical destination to another, I am SO excited to be leaving TOMORROW for a romantic weekend getaway with my hubby to the beautiful island of Maui. Believe it or not, I haven’t even really planned an itinerary this time! Can’t remember the last time a trip was completely R&R, and I’m beyond stoked for this. . For my fellow American peeps, how are you spending your Labor Day weekend? . (PS, if you’re ever on the Sunshine Coast, PLEASE go check out the beautiful Glass House mountains! We raced up Mount Ngungun a couple hours before a flight from Brisbane to Cairns to catch this view. Was totally worth it!) . . . . . . . . . . . #mountngungun #sunshinecoast #sunshinecoastdaily #followmeto #wearetravelgirls #girlsthatwander #ladiesgoneglobal #lovelulus #sunsetvibes #beautifuldestinations #femmetravel #teamkaptainkenny #straya #australiagram #glasshousemountains #dametraveler #citizenfemme #travelust #speechlessplaces #sidewalkerdaily #americanstyle #visitsunshinecoast #backpackwithme #travellikeagirl #ladiesgoneglobal #queensland #tropicalqueensland #iamtb #femaletravelbloggers

A post shared by Cherise | Travel Blogger (@chereneo) on


PHOTO TIP: My favorite mountain to climb is Ngungun, as the sunset view from here of Coonowrin and Beerwah is something magical. The surreal colors and framing make this spot any photographer’s dream location!

  1. Flinders Street Station (Melbourne, Victoria)

This is a quintessential spot in Melbourne, and is know for having unique architecture compared to the rest of the city (rumor has it, the plans were accidentally switched with the blueprints for Chhatrapati Shivaji Terminus in Mumbai).

PHOTO TIP: For that ethereal feel, use a tripod (or, in my case, a VERY still human—thanks, little sister!!) and a slow shutter speed while you (the subject) stay very still in the middle of the street. Bicycles, cars and buses will all look like they’re passing by while you’re standing still in time!

  1. Mossman Gorge (Tropical North Queensland)

Mossman Gorge is a beautiful little slice of the Daintree Rainforest—the oldest continuously surviving rainforest in the world (nope, it’s not the Amazon Rainforest)! Beyond boasting beautiful rivers, fauna and wildlife, it is also home to the indigenous Kuku Yalanji people, who will often share incredible stories about the region.

PHOTO TIP: More of an editing tip, but when you’re working with tropical rainforests and rivers, make sure to reduce your yellows waaayyyyyy down in the photo to make it look more lush and green!

  1. Bondi Icebergs (Sydney, New South Wales)

Did you even go to Sydney if you didn’t get this recognizable Icebergs shot? I didn’t swim in the pool, but even standing above it was a breathtaking experience.

PHOTO TIP: Try to time your trip with 1) early morning (for lesser crowds) and 2) high tide (for crashing waves), if possible! While I’m very happy with my shot from here, I wish I had gotten that iconic snap of the waves crashing over the pool!

  1. Cape Byron Bay (Byron Bay, New South Wales)

Beautiful views of Byron Bay, check. Most easterly part of continental Australia, check. What more could you want?

PHOTO TIP: Make sure to check the hours when you’re planning your visit here. You can wander up to the lighthouse at any time, but if you are driving, the parking lot closes at 6pm sharp. We tried to go here for sunset and literally had 5 minutes to hurriedly snap some photos while my dad kept the engine running and my mom distracted the guard with some lovely conversation to keep him from closing the gates!

  1. Millaa Millaa Falls (Tropical North Queensland)

Wahhh, how badly I want to return to Tropical North Queensland. I want to go to Paronella Park in daylight, I want to see platypuses (platypi…?) swimming in the creek. I want to spot tree kangaroos and drive the full waterfall circuit and frolic through Nucifora Tea Plantation. But enough about what I didn’t do.

Millaa Millaa Falls is one of the few places we made it to because it was a priority for me. The iconic symmetry of the waterfall, the ease of approaching this lovely spot that is RIGHT off the road. Definitely go here if you’re in North Queensland, but also try to make sure you have enough time to hit the other waterfalls around it (Zillie, Ellinjaa and Mungalli).

millaa-millaa-falls-sisters-australia-queensland

PHOTO TIP: If you want a shot with nobody in it, either go very early morning on a weekday in the summer, or go literally any time of day in the middle of winter. I took my photos around 4pm on a Saturday in June, and nobody was there!

  1. Sydney Opera House (Sydney, New South Wales)

Obviously, this had to make the list. “But what’s this,” I hear you ask, “Sydney Opera House isn’t #1!?!”

Shocking, I know! I think that the Opera House is, of COURSE, a must. If it’s a one-or-the-other type thing, I would probably suggest hitting Sydney Opera House above any of the next three spots I’ll mention. It’s such a quintessential destination, but because it is so well known, I feel like some of the later spots are more like hidden treasures. That said, you have to go to the Opera House if you are in Australia.

sydney-opera-house-australia-red-dress

PHOTO TIP: Wake up early (like, REALLY early—we woke up at 4:30am to get there around 6am in the middle of winter) to watch the sunrise at the Opera House. It might be cold, but it will also be entirely worthwhile to have this beautiful place all to yourself! Also, the best photo spot might not even be directly in front of it—take a stroll around the harbor to the Park Hyatt Sydney. The view of the Opera House across the water while the sun sets is PERFECT.

  1. Buderim Forest Park (Sunshine Coast, Queensland)

This might be a surprising thing to rank so high, but it holds a special place in my heart. My husband and I wandered around here in the morning before breakfast, and were amazed to have this beautiful rainforest all to ourselves. Even more amazing—it’s a 5-10 minute drive from Mooloolaba!

There are two access points to Buderim Forest Park. The lower entrance is off Lindsay Road via Harry’s Lane, which is the one we entered from. This direction has a wooden boardwalk for much of the way, but be advised that the boardwalk won’t get you all the way to Serenity Falls (which might be important to know if you have strollers or wheelchairs). The second entry point is via Quorn Close, which runs off Lindsay Road at the top of Buderim. This version is steeper, but takes you right to the waterfall!

PHOTO TIP: There’s an awesome suspension bridge right above the falls (which was lowered in by a helicopter!), which is perfect for taking photos from for an epic drone-like shot.

  1. Crawley Edge Boatshed (Perth, Western Australia)

Yes, it’s just a boatshed. So what’s the big deal?

View this post on Instagram

When the floods of life start to drown you, remember that God can carry you above the storm, and dance in the rain. . This was a crazy day in Perth, but possibly my favorite from our entire Australia trip. We had booked a ferry to Rottnest Island, but due to a crazy storm (with sideways rain and everything), all transportation to and from the island was cancelled for the day. Michael and I were determined to make the most of the day, and called an Uber to take us to Crawley Edge Boatshed—an adorable blue house on the water that I had seen on Instagram. . Our Uber driver was the friendliest person ever (like a cool uncle) and one of the highlights of our trip. He offered to turn off the meter at one point and show us around Kings Park and other cool spots! When I mentioned the boat shed, he chuckled and said that he 1) never understood why tourists took pictures here and 2) drove by this morning and saw that it was flooded. FLOODED?! Well, I don't know when we're going to return to Perth, so I cheerily said, "Let's try it, anyway!" . Cut to the boatshed, and indeed, it is flooded. The pathway to the house is submerged in water. Michael and I have a good laugh about it, and I brace myself for ruining my shoes—because of course, I'm not going to come out all this way without walking over! Our Uber driver stood there, watching in total amusement as I splashed around the water here. . Have you ever had your heart set on taking photos somewhere to the point that other people thought you were (endearingly) crazy? . . . . . . . . . #crawleyedgeboatshed #boatshed #perth #perthisok #westernaustralia #beautifuldestinations #speechlessplaces #travelgirlsgo #wearetravelgirls #sheisnotlost #sidewalkerdaily #iamtb #ladiesgoneglobal #femmetravel #bestofaustralia #straya #travelinladies #traveldreamseekers #moodygram #perthiscool #iloveperth #iloveaustralia #femaletravelbloggers #travellikeagirl #darlingescapes

A post shared by Cherise | Travel Blogger (@chereneo) on

Honestly, maybe this should be lower on the list. But I LOOOVVEE this spot simply from my memory of getting here. We went here with a super friendly local Uber driver on the day of a crazy rainstorm. “I never understand why tourists take pictures here,” he said in amusement. But all the same, he drove us over happily, and even stopped to help us take some pictures!

perth-blue-boathouse-crawley-edge-australia

PHOTO TIP: I’ve only ever seen pictures of this boatshed in low tide (aka when it’s not flooded from a crazy rainstorm), but we came when the boardwalk was actually submerged in water, and it made for some really cool reflection shots!!

  1. Rottnest Island (Western Australia)

Ah, where to begin? Legitimately, this might have been my favorite place in Australia. Just thinking about it puts a smile on my face!

Rottnest Island has a wide variety of photo ops from beautiful, white beaches to charming lighthouses and, of course, QUOKKAS. Just ALL THE QUOKKAS. What could possibly make for a better Instagram post than an adorable quokka selfie?!

PHOTO TIP: You should NOT feed or pet the quokkas, but quokkas are super curious and will probably come check you out if you lie flat on your stomach near one and wait for it to scurry on over. Hold your cell phone upside town (camera on the bottom) to capture more of the quokkas cute lil’ bodies! Alternatively, if you’re using a DSLR, hold it out in front of your face the length of your arm and switch to manual focus once it’s focused on you. This way, it won’t accidentally adjust when you’re selfie-ing and blur the adorable moment.

sydney-opera-house-sunset-view-australia-full-moon

So there you have it! Hope you make it to some of these fun spots, and also let me know YOUR favorite spots that I missed, below (because Australia is AMAZING, and of course I know I missed some great ones)!


IMG_2984

Lifestyle

10 Tips for Driving Maui’s Road to Hana

No trip to Maui is complete without embarking on the iconic drive along the Road to Hana. Boasting 59 bridges and 620 curves in just 42 miles, the Hana Highway is a precarious drive that is not for the fainthearted.

road-to-hana-twin-falls

I’m lucky that my husband is an excellent driver and didn’t bat an eye at the turns, crazy parking situations and one-car bridges! We had an amazing time doing the drive on our own, as we could go at our own pace and prioritize what we wanted to see. If you’re willing and eager to plan a DIY drive down this winding wonderland, here are some tips for you!

1. SET OUT EARLY

Even though it’s just about 42 miles (67 km) to Hana Town, it would likely take you 2-4 hours to drive without factoring in stops or your return drive! I would advise setting out as early as possible, both to beat some of the crowds and also ensure you have enough daylight to accomplish your must-do’s. We did this in September (make sure you look up sunrise/sunset times for whatever season you’re there in) and started from Paia Town around 8:00am. By the time we made it to Pipiwai Trail at the end of the day (10 miles south of Hana), we were sprinting up the path to try to get to the bamboo forest before dark…and didn’t succeed.

road-to-hana-surfboard-fence-paia-town

Plus, if you’re planning on driving back to West Maui at night, these roads are not super fun to drive when it’s pitch black and you’re going down dirt paths along steep cliffs! If we could do it again, we would likely choose to spend the night in Hana.

ALSO, I just want to mention: you might get carsick. This might be obvious, but it was something I didn’t expect and nobody mentioned to me. I got soooo dizzy around so many of the turns!

2. DOWNLOAD MAPS AND RESET YOUR ODOMETER…

You won’t have cell reception for most of the Road to Hana. So if you’re driving yourself, make sure you reset your odometer right at the beginning (there will be a sign indicating where the road starts), and have an idea of what mile markers have interesting things you want to stop at.

3. …BUT IF ALL ELSE FAILS, FOLLOW THE CROWDS!

However, if your odometer gets messed up or you forget to set and don’t know what mile markers to look for, do not fret. If a spot is worth visiting, most likely you’ll see a few cars clustered around. If you’re curious enough, just pull over and check it out—might be a waterfall, a pretty view, a botanical garden, lava tube or something else fun!

DSC_0889.jpg

4. IF YOU MISS A WATERFALL, DON’T WORRY—THERE WILL BE MORE

This might sound like weird advice, but it’s true. There are sooo many incredible waterfalls along the Hana Highway, and when we first started out, I made my husband stop (and in some cases, dramatically pop a U-turn and backtrack) at every one, but we quickly realized that it wasn’t the end of the world if we missed a couple here or there. Enjoy the journey and stop where you can, but don’t beat yourself up over anything you might miss—the adventure gets better with every mile.

road-to-hana-na'ili'ili-haele-waterfall

That said, I would like to advocate for my favorite waterfall spot: Upper Waikani Falls (aka “Three Bears Falls”) between Mile Markers 19 and 20. You’ll see them when you’re driving over a bridge, and will find there’s no parking right there—don’t panic, there’s a little dirt area just a minute or two past that you can park at and then walk back down. It’s a bit of a climb to get to them, but absolutely a worthwhile waterfall to chase!

road-to-hana-upper-waikani-falls-three-bears-falls

5. BRING A TOWEL, SWIMSUIT, CHANGE OF CLOTHES AND CHANGE OF SHOES/SANDALS

Trust me, you’ll be jumping off of waterfalls and swimming at some of the most beautiful beaches you’ve ever seen, and be in desperate need of a wardrobe change. Also, because it’s so tropical and wet, you’ll be getting muddy as you hike along paths on your stops. I brought sneakers, but never wore them and stuck to my flip flops—but on the other hand, my husband pretty much exclusively wore shoes (until we were splashing around waterfalls!). Regardless, you’d much rather have options and not have to worry about it!

road-to-hana-coconut-glens

6. STOP AND EAT THE FOOD

While it’s definitely a good idea to bring snacks for the drive, there are so many delicious stops on the Road to Hana that you won’t want to miss. Try banana bread at Aunty Sandy’s (my husband’s fav!) or at Halfway to Hana, and pop into Coconut Glen’s at Mile Marker 27 for some of the tastiest (and allergy-friendly) coconut ice cream you’ve ever had. We’ve also heard there’s an insanely good Thai place somewhere on this road, but we didn’t manage to find it. Ah well, something new for next time!


7. VIEWS, VIEWS, VIEWS

While pretty much ANY place you stop at on the Road to Hana will be breathtaking, this highway has some incredible lookout points that should not be missed. Mile Marker 18.8 has an incredible lookout point with a view of Wailua Valley, and is one of our highlights from this drive.

road-to-hana-wailua-valley-state-wayside

8. SEE THE BEACHES IN HANA

I’ve heard a lot of people tell me that the Road to Hana is more about the journey and less about Hana itself. While Hana is indeed a sleepy town of 1,200 people, it’s still not to be missed. Besides the delicious food trucks and tropical views, there’s the ever-famous Waianapanapa State Park (Black Sand Beach). And Kaihalulu Bay (Red Sand Beach) is one of the most magical Hawaiian beaches I’ve ever seen. Yes, Kaihalulu is a bit off the beaten path, but it’s 100% worth going to!


road-to-hana-red-sand-beach

9. DON’T BE AFRAID TO GO PAST HANA

Most people will do the drive, arrive in Hana, grab some food and then head back the way they came. I would say if you can, you should keep driving and head back to West Maui the other way—via the back side of Haleakala, which offers you a unique perspective of Maui that very few experience, and which takes you the same amount of time to drive as the Road to Hana. The climate is arid, resembling California in parts. And the starry sky we saw was enough to make us pull over, huddle together and gape in awe at the Milky Way before us. I’ve been in plenty of sparsely populated destinations, from the Sahara Desert to the Marquesas Islands, yet still have never seen as many stars as I did that beautiful night.

road-to-hana-pipiwai-trail

I will confess: if the Hana Highway is winding and narrow, these roads are dusty, steep and bumpy. Much of it isn’t even paved. It seems that a lot of rental car companies will have a “your own your own” policy and threaten to “void” your rental car contract if you take this pathway. We had NO idea this was a thing, and merrily took our Hyundai Sonata on this very special drive and returned the car without any problem or additional charge. But I can’t guarantee that this will be everyone’s experience!

10. BUT MOST OF ALL, TAKE IT ALL IN AND HAVE FUN!

Driving the Road to Hana is an experience unlike any other. Being disconnected from the world allows you to take in the grandeur of God’s creation and marvel at the wide variety of beautiful terrains on such a small island. This day fueled my love for waterfalls, introduced me to the glory of red sand beaches, filled my stomach with delicious coconut-y things and brought me closer to my darling husband for all his bravery and skill behind the wheel. It was exhausting, exhilarating, enlightening and ecstatic. And I would do it all over again.

DSC_0954.jpg

ADDITIONAL ROAD TO HANA TIPS

Currency: U.S. Dollar (make sure to have cash on hand!)

Languages: English (Official), Hawaiian Pidgin, many people can speak Mandarin Chinese and Japanese

Transportation: Public transit is nonexistent; rent a car or hire a van.

Food: Banana bread, anything coconut, Thai, barbecue and Hawaiian-Mexican fusion (we ate at “The Surfing Burro” food truck in Hana and really enjoyed it!).

[googlemaps https://www.google.com/maps/d/embed?mid=1ryWsUq8b4t62XKOWRevSU1OBC_MRWQkm&w=640&h=480]

Lifestyle

2.5 Days on the Big Island of Hawai’i

If you live in California, what do you do with a long weekend? Go to Hawai’i, of course!

DSC_0165-2

Jokes, most people in California don’t do this, either. But they should!! We found cheap direct flights to the Big Island from Los Angeles, and we figured, why not? If you keep saying you won’t go somewhere until you have ample time to explore it, you might never go.

DSC_0807

So we took a half day from work on a Friday, booked a flight that got us to Hawai’i by 10pm, had two full days and then left on a holiday Monday at 3:30pm to get back by 11:30pm.

DSC_0432

Was it a whirlwind? Oh yes. Was it worthwhile? Absolutely!

DSC_0292

The Big Island of Hawai’i is, well, much BIGGER than the other islands. So a car is a must. I would suggest booking a rental far in advance. We waited until last-minute, and the car was pretty expensive. But we also heard that certain rental places had run out of cars, so we were among the luckier ones!


WHERE TO STAY

We booked three different accommodations for our three different nights. Where you stay will be dependent on what you want to do. Do you want to see the volcano? Chill at the beaches? Eat local fare in Hilo?

DSC_0111.jpg

I would recommend doing a mix of everything if you can, because the island of Hawai’i has eight of the world’s 13 climates, and is one of the most ecologically diverse places in the world. Whoever told you that there’s not much to do on the Big Island was very wrong. Sure, it’s much quieter and less populated than the other islands, but where else can you go from tropical humidity to arid desert and snowy mountains to volcanic lava?

DSC_0561

The first night, we stayed at Ohi’a Park Estate, a charming Bed & Breakfast 10 minutes from Kona Airport that we really loved. The second night, we stayed at a unique Airbnb treehouse in Volcano Town’s Fern Forest. There are a variety of treehouses on Airbnb that you can find, and I would highly recommend trying it out for a unique jungle experience! After this, our last night was spent at the Inn at Kulaniapia Falls just outside of Hilo, which was such a fun experience because the inn has its own private waterfall!! Would definitely recommend all of our experiences, and it was nice to be convenient to each different part of the island given our activities.

DSC_0252

DAY 1 – KAILUA-KONA TO VOLCANO

Our first day, we woke up early (being on “mainland” time) and went down to Kailua-Kona town to explore. We grabbed a coffee at Kona Coffee Café after receiving some free samples and looked at the beautiful Mokuaikaua Church, the oldest Christian Church on the Hawaiian islands established in 1820.

DSC_0073

We then headed back to Ohi’a Park Estate for a delicious homemade breakfast by the charming couple who run the B&B.

DSC_0080.jpg

We then checked out and headed down the coast and stopped at Ali’i Garden Marketplace for “dessert,” some delicious gluten-free crepes at Whale of a Crepe! We got a Mauna Loa crepe, which included Nutella, banana and macadamia nuts.

DSC_0123-1

After this, we drove up toward Captain Cook, where we stopped at The Coffee Shack to enjoy some views and stay dry from the rain.

DSC_0170

This was seriously one of my favorite places from our trip. The coffee and smoothies are excellent, and the views are perfect. The portions are also gigantic, and I saved half of my mocha to drink the next morning. Would highly recommend stopping here!

DSC_0165

We then drove to the southernmost tip of the Unites States (yep, it really is—look at a map!) and went down to see Papakōlea Green Sand Beach. This is one of only four green sand beaches in the world, the others being Talofofo Beach (Guam), Punta Cormorant (Floreanea Island of the Galapagos) and Hornindalsvatnet (Norway). The green color is from the glassy olivine crystals in the sand.

DSC_0331

The beach is about 2.5 miles away from where you must park (tourists are not allowed to drive all the way there), so it’s either a 1-hour hike or a 20-minute ride if you pay a local $15 to take you in the back of their pickup truck. We opted to pay a local to take us there and back as we were short on time, and clung to the sides of the truck next to seven other tourists. It’s definitely a bumpy and unforgettable experience!

DSC_0327

We really enjoyed our time at this secluded beach, and while it’s really not quite as green in person as you anticipate it to be, it’s a must-do on the Big Island.

DSC_0194

After Green Sand Beach, we drove over to Punalu’u Black Sand Beach, which is far more accessible and a popular spot for sea turtles to bask in the sun. We only stopped briefly on our way to the volcano, and did chance to see three turtles out in the open!

DSC_0428

We arrived at Volcano National Park around 4:30pm, and stopped by the Information Center. Silly me, I thought that we could rent bikes from this spot to go to see the lava flow, but we were actually a good hour drive away from the other side of the volcano where you can start the trek to see the lava. It was too late for us to start out for sunset, so I called Kalapana Cultural Tours to reserve us bicycles for 4:30am the next morning for sunrise.

DSC_0460

We then checked into our treehouse Airbnb and settled in a bit before heading back to Volcano National Park to see the sunset over the Halema’uma’u crater from Jagger Museum. Watching the color gradually get vibrant and orange as the sun sets is a fun experience.

DSC_0625

We then grabbed a dinner at Thai Thai Bistro & Bar around 7pm. We had wanted to check out Ohelo Café for Hawaiian-American-Italian food, but as we did not have a reservation, the wait was going to be about an hour. There is very little to eat in Volcano Town and it will all be overpriced, so just be mindful of this when you go.


After dinner, we went back to our treehouse and slept. Until 3:30am!

DAY 2 – KALAPANA LAVA FLOW TO HILO AND THE NORTHERN VALLEY

At 3:30am the second day, we woke up and started our 1-hour drive to the Kalapana Lava Viewing area to pick up our bikes. We were a bit confused as nobody was there to meet us, and drove in circles until a helpful cop saw us and helped us find our bikes under a tent (they had a tag with our names on them, so…cool!). He then pointed out the path to us (“Go straight until you see the third gate, then leave your bikes and turn right to walk straight until you get to the lava.”)

DSC_0654

Riding bikes on a bumpy gravel road in pitch black while it’s raining is a very unique experience! Thankfully Michael brought flashlights, but only one was really working, so we shared this and biked for about 20-30 minutes until we reached what we could only assume was Gate 3. We left our bikes and started our hike toward the streams of molten red lava we saw in the distance—by climbing over sharp black volcanic rock!

DSC_0820

The hike took us about an hour and a half. We passed over some volcanic steam vents about halfway through, which initially sent me into a panic (I wondered, “Are they burning hot?” “Will we die from volcanic fumes?” “HOW DO WE GET AROUND THESE?” “I guess we’re walking on top of them OH MY GOODNESS!”). When we finally reached the lava, dawn was just starting to break. You really want to see the lava in the dark because it looks much more impressive, which is why you do this hike either at sunrise or sunset.

DSC_0712

While sunset might have given us more time with the lava in the dark, sunrise was a lot of fun because we were literally the only people out there. I changed from my sweats into a dress (no shame) for photos, and set the camera and Joby tripod up on some jagged volcanic rocks, praying it wouldn’t melt.

DSC_0659

Thanks to the rain, my DLSR camera was soggy and had water spots all over the lens that I couldn’t wipe off long enough to get a capture. Oh, also, it decided it didn’t want to change settings AT ALL for me and that I was stuck with what I had from taking photos of stars the previous night (couldn’t adjust aperture, focus, etc.).

IMG_20180218_070633.jpg

Thankfully, we managed to get some decent(ish) looking photos, but it was quite the adventure! Just goes to show that travel is unpredictable and chaotic, but utterly amazing.

IMG_20180218_071139.jpg

Being so close to the volcano was an UNFORGETTABLE experience. I still marvel that we were allowed to go all the way out with no cell service, no guide and nobody around for miles. We watched the molten lava bubble and flow, and stood close enough to reach out and touch it (if we were, you know, idiots). The area surrounding the lava was hot and we were sweating. Also, we completely lost the bottom half of our shoes. Do NOT do this hike in sandals!

DSC_0819.jpg

Once we got back after all was said and done around 9:30am, we happily sat in our car and took a breather before getting ready to drive to Hilo. We took the Kalapana Kopoho Road as a detour, because we had been told that this was one of the most beautiful roads on the Big Island. It did not disappoint! Surrounded by lush jungle, we nearly forgot about the jagged and barren volcanic rock we had just walked across.

DSC_0846

When we got to Hilo, we found a nice beach that we laid out at and stared at cute fish and sea anemones until 11am, when Pineapple’s Restaurant in Downtown Hilo opened. We parked and walked by the farmer’s market and cute shops and sat down to our first meal of the day—8+ hours after waking up.

DSC_0902

We loved this cute open-air space and were happy to find that they had a gluten-free menu for me. For appetizers, we ordered Cheesy Garlic Fries with sour cream, pineapple salsa, grilled onions and bacon (YUM) and a Big Island Onion Soup for Michael. I got Island Style Tacos for my gluten-free main course, and he got a Teriyaki Flank Steak. Oh, we also got a Mai Tai sampler (mango, lilikai, guava and hibiscus) and their signature Pineapple Pow—a frozen cocktail with Hawaiian moonshine served in a pineapple.


After our meal, we food coma’d and realized how sleepy we were, so we tried to check in early to our hotel at 1pm. We were unfortunately unable to do this, but met the adorable house cat and saw a glimpse of the waterfall. After I drank some of the complimentary Kona coffee and we signed up for waterfall rappelling the following morning (that’s right!), we got back in the car and headed up to Waipi’o Valley.

DSC_0203

The drive took about an hour from Hilo. The northern side of the island is beautiful, lush and wet. It’s also not terribly populated, but we did drive through the historic Honokaa downtown, a charming area that almost feels like you’re stepping into an old western. We bought water at a supermarket here, but wish we had more time to explore.

DSC_0982

The Waipi’o Valley Lookout is truly something to behold. Once upon a time, it was a home to Hawaiian kings. Today, it is secluded, and while the beautiful black sand beach there is accessible to the public, the valley as a whole is considered private property and off-limits to tourists.

DSC_0128

The Waipi’o Valley still grows taro and is home to horses and “a couple of dozen” locals. There are sacred sites and waterfalls that you can see if you book a horseback riding tour with a local guide. Also, Waipi’o Valley is where the final scene of the 1995 film “Waterworld” was shot!

DSC_1001.jpg

We hiked about 3 miles down (6.5 miles roundtrip) to the beach on the steepest path of its length within the United States! It was a challenge, but completely worth it once we got down to the beautiful beach. We could also see a small portion of the Kaluahine Falls on the right hand side as it had just rained.

DSC_0994.jpg

After the hike we were meant to get dinner at Merriman’s in Waimea, but were so exhausted that we cancelled our reservation and made it back to Kulaniapia just in time to have a complimentary glass of wine together and then go to sleep around 8:30pm (hey—when you’ve been up since 3:30am!).

DAY 3(ish—2.5?) – KULANIAPIA FALLS TO HILO AND WAIKOLOA BEACH

Our third and last day, we woke up around 6am to explore the grounds and see the waterfall when it was just us. After the hike, we ate a quick breakfast at the inn and got ready for our 8am waterfall rappelling tour! This was a fun and once-in-a-lifetime experience.

P2180031.jpg

After the rappelling, we lounged by the waterfall pond for a bit and waded in the refreshingly cool water.

We then packed up and drove to Hilo town for a quick lunch before our flight—AND WE GOT POKE, of course!

P2190222

The poke at Suisan Fish Market was so good. SERIOUSLY SO GOOD. The sauces weren’t gluten-free (hello soy sauce), but I took the risk to eat deliciously authentic poke AND IT WAS WORTH IT. We shared one bowl because the portions are GIGANTIC (notice a trend in Hawai’i?). After this, we grabbed coffee at a nearby Starbucks and started our drive back to the other side of the island to catch our flight.

DSC_0315

The drive from Hilo to Kailua-Kona is beautiful. We drove down Daniel K. Inouye Highway (fun fact—to date, the late Daniel Inouye held the highest-ranking political office of any Asian American as President pro tempore of the U.S. Senate for Hawai’i from 2010 until his death in 2012), seeing Mauna Kea to our right and Mauna Loa to our left—both covered in snow!

DSC_0324.jpg

We detoured to drive through Waikoloa Village thinking it might be cute, but realized that it’s really just a golf resort and continued down to Waikoloa Beach where we sat out for a bit enjoying the pretty white sand and palm trees.

DSC_0361.jpg

We then continued on to the airport, where we arrived with enough time to enjoy mai tais in the airport before catching our flight home at 3:30pm!

ISLAND OF HAWAI’I TRAVEL TIPS

Currency: U.S. Dollar

Languages: English (Official), Hawaiian Pidgin, many people can speak Mandarin Chinese and Japanese

Transportation: Public transit is almost nonexistent here, so renting a car is a necessity. If you do not drive, I would perhaps suggest going with a tour group that will take you around.

Food: Where to begin!! Obviously eat ALL THE POKE, tropical fruits (e.g. pineapple, coconut, papaya, etc.) and shave ice. Also notable is Kahlua pork, other forms of fresh fish, loco moco and try Kona coffee (I honestly wasn’t a super fan of Kona coffee, but you’ve still gotta try it, right?).

Research: Definitely do your research ahead of time to see what areas you want to prioritize and also check what the lava flow looks like. If it’s your first time there and you don’t mind a little physical exertion, I’d say that you MUST see the lava flow. A very helpful website to check out is Love Big Island, which has tips on the volcanos, hiking, areas, foods and more!

Other: This island doesn’t stay open too late, so I would recommend sticking to an earlier schedule to hit all the fun nature things Hawai’i has to offer. There were things we would have loved to do but didn’t have time to, like snorkeling and swimming with manta rays (this is a very popular night time expedition) to taking a helicopter ride over the island and seeing the Hawai’i Tropical Botanical Gardens. All in all, we loved our time here and would definitely return—but think we got a decent amount of things done to tide us over until then!

[googlemaps https://www.google.com/maps/d/u/0/embed?mid=1tbYjImBBq0kgQLiM_rNFtzlxuzS-OmAI&w=640&h=480]

Lifestyle

3 Days in Paris

At long last, finally a blog post about my favorite landlocked city in the world!  (Yes, I know that’s oddly specific.)

DSC_0171

We went to Paris as the last stop in our 2-week whirlwind honeymoon of 12 cities, eight flights and six ferries.  What better place to end a honeymoon than in the city of love?  It was my third time in Paris, but my husband’s first, so we had to make the most of our time there!

DSC_0907

Which meant seeing all your quintessential Paris city sites, PLUS Versailles and Disneyland Paris!

DSC_0975

Wednesday Night (Day 0.5)

We arrived in Paris around 4pm on a Wednesday, and lucky for us, the sun doesn’t set during the summer until almost 10pm.

DSC_0707

We stayed in an adorable Airbnb in central Paris that I would ABSOLUTELY recommend!  It was much cheaper than a hotel, but very cute and central.  Being near Châtelet-les-Halles, it was a straight shot via RER lines to the Charles de Gaulle Airport, Disneyland Paris and Château de Versailles.

We checked into our Airbnb and then took public transit to Montmartre, home of Sacré-Cœur Basilica.  It was a beautiful evening to walk around!

DSC_0740

The only thing I regret is not properly checking hours of operation ahead of time.  We were able to walk around Sacré-Cœur, which was our objective, but couldn’t climb up to the observation part because it had just closed.  Regardless, the view of Paris was lovely from the hill, and the church is just so beautiful.


We then walked to dinner at a charming bistro called “Chez Michel.”  It was probably the most authentic French food we had on our brief trip, and everything from the pate to the famous Paris-Brest was delicious.


They also brought us a variety of complimentary dishes—champagne, sea snails and strawberry dessert.  Because we were on our honeymoon!


We then strolled around and explored until we retired to our Airbnb in order to wake up early for Notre Dame and Disneyland!!!

DSC_0951

Thursday (Day 1.5)

We walked from our Airbnb the next morning to Notre-Dame Cathedral, a must on anyone’s Paris list.

18986222_10155449873624874_807567869_o

The cathedral opened at 7am, but silly us, we didn’t check what time the tower observation decks opened!  So once again we didn’t get a high vantage point of Paris/the Eiffel Tower.  However, it was still worth it to be there early in the morning before other people were.


After this, we took the RER A line straight to Disneyland Paris.  We did research ahead of time to see what was unique to these parks.


We had such a blast!  We only spent a half day between the two parks, but we planned our time out carefully.  I won’t take too long detailing our trip, but here are the highlights I would recommend:

WALT DISNEY STUDIOS PARK

DSC_0977

  • RIDE: Crush’s Coaster – Line up for this one when the park opens as there are no fast passes for it. This is a unique “roller coaster” that simulates riding a current in a shell.  It’s righteous, dude!
  • RIDE: Ratatouille: The Adventure – Get a Fastpass for this one and journey along with Rémy as you shrink down to his size and follow him in the kitchen in a 4D experience.
  • RESTAURANT: Bistrot Chez Rémy – You MUST go here!! We made reservations two months in advance, and it was totally worth it. Sit down and enjoy a meal prepared by “Rémy” as you take in the darling décor set up so that you feel the size of a rat.  Every set meal comes with ratatouille—of course!

Also, fun story–I was obsessively photographing the 25th Anniversary chocolate that came with my espresso. A puzzled server noticed and asked me, “You are photographing the chocolate?” Embarrassed, I said, “I like chocolate.” He disappeared and then brought me MORE CHOCOLATE!

DISNEYLAND PARIS

DSC_0986

  • RIDE: Star Wars Hyperspace Mountain – This is very different from the other Space Mountain rides at the other Disney theme parks. It’s more thrilling and intense, and the Star Wars aspect of it is taken seriously.
  • RIDE: Phantom Manor – If you ever wished the Haunted Mansion was a little creepier and actually had a narrative, this ride is for you.
  • ATTRACTION: Dragon – There’s a dragon under the Sleeping Beauty castle (which in itself you should walk through, because it’s so charming and magical)!!

After this, we grabbed some refreshing iced coffee in Disney Village (Paris’ Downtown Disney) and spent the remainder of the evening walking around Paris and exploring Le Marais and the general area around our hotel.

We turned in early because the next day we woke up at dawn!

Friday (Day 2.5)

I’m lucky to have such a kind and patient husband.  He cheerfully allowed me to wake him up at 5am so we could get to the Place du Trocadéro by 6am for sunrise pictures!  We had a magical time taking in the views and having the place to ourselves—save for a few other couples who were actually getting professional engagement pictures done.


In comparison, we were no professionals—I kept setting my camera up on random ledges or piling our bags and hats underneath it (I had no tripod!), and then running into the frame for shots! I can only imagine how silly we must have looked to everyone else.

But got some magical shots—one of which has been printed and hung above our bed. <3

DSC_0067

After this, we continued on to Versailles Palace.  To avoid lines, we had purchased in advance a guided tour: The Private Apartments of the Kings.  I would HIGHLY recommend doing this!

For 7€ extra a person, we got a guided English tour through the Kings Quarters—areas of the palace that the general public doesn’t get to enter!

This included Louis XV’s bedchamber, clock room, clothes cabinet, the dogs’ room (yes, for the king’s favorite dogs), private chambers, library (which a door hidden in a bookshelf!!) and many other fascinating areas.

I so badly wanted to sing songs from the “Beauty and the Beast” soundtrack while walking throughout the palace.  Chateau de Chambord may have been the original inspiration for the 1991 film’s castle, but Château de Versailles had so many charming and grand things that reminded me a great deal of the movie, too!

We were able to skip all the long lines and learned a great deal of fascinating information.  Also, at the end of the tour, our guide opened a secret wall that allowed us to get back into the Hall of Mirrors—which was incredibly crowded by this point!

We continued wandering around, and grabbed Ladurée macarons before heading outside to sit out and gaze at the gardens.

We could only make a tiny dent in exploring the grounds!  They’re so vast and beautiful, but we were there on a particularly hot and humid day.  After we had gotten our fill of seeing the mazes and fountains, we headed out to Rue de Satory outside the palace to find lunch.


Once we had eaten and rested, we went back to our Airbnb and plotted our next moves.  First up—find crepes.  Second up—go to our early dinner we were able to reserve at Bistroy Les Papilles!
18986672_10155449838694874_183319013_o
I would highly recommend this restaurant to anyone visiting Paris.  The food quality is amazing for the price you pay.  It’s a 4-course meal for 38€/person, plus extra for a bottle of wine.  There is no flexibility whatsoever with the meal, and you can’t know in advance what you’ll get—you arrive, sit down, and the chef comes out and explains the menu.

We had a DELICIOUS deconstructed mushroom soup (broth was poured on top of the ingredients), homemade chicken pesto, cheeses (naturally) and mango panna cotta.  Safe to say we were very stuffed at the end—and very pleased!

Walking back to our Airbnb, we stopped at Le Cavaeu de la Huchette—an underground jazz club.  I didn’t get any pictures due to how dark it was, but this was one of the highlights of our trip for my husband!

Saturday morning (Day 3)

At long last, our last half day in Paris.  Our flight was departing at 3:20pm, so we woke up early to go explore the Champs-Élysées.  While we didn’t go inside the Louvre, we enjoyed exploring the grounds when they were completely empty.

We then grabbed breakfast and hot chocolate at Angelina.  Delicious, quintessentially French and very rich!  It was a little pricey, but the experience was so lovely.

After this, we walked down to the Arc de Triomphe de l’Étoile.  I took my husband because this is a must for anyone visiting Paris for their first time.  Gazing out over the city and staring at the romantically moody Eiffel Tower, it was a fitting way for us to say goodbye to Paris.

DSC_0013-2

Conclusion

And there you have it!!   Of course, we wished we had more time to spend in Paris and there were many things we had on our list that we didn’t get to do.  But if you want to see a wide variety of Paris and still get in Versailles and Disneyland Paris, this is how we did it.  I can undoubtedly say that we will return very soon to the City of Love.


PARIS TRAVEL TIPS

Currency: Euro

Languages: French (some people speak English, but try to learn a little bit of French to be polite!  Even starting a sentence with, “Pardon, parlez-vous anglais?” can go a long way)

Transportation: The public transit system in Paris is incredibly easy to use. We purchased a 3-day Navigo pass at the airport from a help counter (which includes the RER lines, metro, buses), and it was perfect for us.  I strongly recommend getting this all taken care of at the airport or lining up at an official ticket counter for help—I regret to say one of my first trips to Paris I was scammed by someone offering to “help” me at Gare du Nord station when I was trying to figure it out myself at a ticket booth.  Always be safe!!

Food: Pretty much everything is delicious in Paris, but you would be remiss to not get pastries, local cheeses, foie gras, duck confit, wine and crepes…yum!

[googlemaps https://www.google.com/maps/d/u/0/embed?mid=1lL2FdmnGRyC8u6jVsts-hmVlxWQ&w=640&h=480]

Lifestyle

A Day in Rhodes, Greece

Hi Everyone!!!

This post is reaaallllly overdue, but I want to tell you all about this beautiful and thoroughly underrated Greek island that quickly became one of my favorites.

DSC_0210

First off, we really did not have enough time there, but we made the most of the time we did have.  This was our first island stop on our whirlwind honeymoon, and we loved every moment of it.

BACKGROUND
A bit of history—Rhodes is technically part of Greece but is located closer to mainland Turkey, and therefore has a lot of Turkish influence.  You’ll likely find that people speak Greek and English, but also speak Turkish and sometimes Italian and German due to the rich history of cultures.  Basically, they’re pretty cool.

DSC_0916

Rhodes’ nickname is “The Island of the Knights,” due to the medieval Catholic Hospitallers (or the Knights of Rhodes) that were based there.  The Medieval Old Town of the City of Rhodes is a World Heritage site, and Rhodes was also home the Colossus of Rhodes—one of the Seven Wonders of the Ancient World.

DSC_0063

Rhodes is the largest island in the Dodecanese chain, and as such I would highly recommend getting an international driver’s license and renting a car.  Many of the sites we were interested in were 1+ hour away from each other, and buses are fairly frequent but often shut down operation early in the evening.  To avoid the trouble (and frequent stops), we decided to get ourselves around.

OUR ITINERARY

We arrived around 9:45am to the Rhodes International Airport.  We quickly got our rental car and then drove ourselves about 45 minutes to Rhodes Town, where we stayed at a small hostel called “Hotel Anastasia” which was run by an adorable couple and situated in the middle of Rhodes Old Town.

DSC_0017

While the location was convenient, figuring out parking gave us a headache—there are signs and colored curbs, but we weren’t sure what any of it meant and as a few locals told us, the locals didn’t care much about following parking rules, so it left us confused about what to do.  After unsuccessfully trying to street park, some helpful locals pointed us in the direction of a paid parking lot across the street from “Parko Therme,” right next to the Palace of the Grand Master Knights.  It wasn’t too expensive, and we could leave our car there overnight, which was fine with us.  I’ve heard people say there is free parking near Mandraki Harbor, but we didn’t stumble upon it ourselves.

Once we were settled, parked and the owners generously let us check in early, we set out on foot to explore the Old Town!

DSC_0222

The Palace of the Grand Master of the Knights of Rhodes (or simply the Kastello) is a medieval fortress and one of the few Gothic structures in all of Greece.  It was built in the 7th Century as a Byzantine citadel, but would later be occupied by the Knights Hospitallers.  Even after that, it would become a holiday home for King Victor Emmanuel III of Italy, and Italian architects would restore the castle.

Once you get inside the palace, your breath is taken away.  Cobblestone, grand arches and stone mosaics as far as the eye can see.  I would advise to get here early in the day before it gets too crowded and kitschy with the souvenir carts and fast food places trapping tourists (honestly, the worst meal we had in all of Greece was inside here).


It’s a grand, beautiful place to explore and you will want to spend a decent amount of time walking around and willing yourself to believe you didn’t step back in time.

After we were done exploring, we hopped into our car and drove out to Lindos Town (30 miles/48 km), while making sure to stop at beaches along the way.  Even with our beach stops, this drive took us about an hour (while a bus would take 1h 30m).

DSC_0276

Our beach hopping was certainly a highlight, because many of these areas were completely unspoiled and breathtaking in the shadow of the mountains.  We also found quite a few mountain goats—one even tried to jump in our car with us!!!

Whereas Rhodes Town feels medieval and Gothic, Lindos Town has a truly Greek charm with white-washed houses, donkeys, cats galore and—oh yeah—its own Acropolis.

DSC_0333

Once we reached Lindos, we parked in a free parking lot just outside the town and walked in.  The town of Lindos, although steep, is tiny and is strictly traversed by foot or donkey.  To save the poor donkeys some grief (and to also get ourselves into better shape), we opted to walk around.  Most other tourists did the same.

We hiked up the long path to the Acropolis, and let me tell you—it did NOT disappoint!!  Truly, this was one of the highlights of our honeymoon.  The first thing we came across when we entered was an ancient fortress of the Knights of St. John (14th Century).  Once we climbed up the fortress, our eyes were greeted by the beautiful Doric Temple of Athena Lindia—which dates back to 300 B.C.

DSC_0682

While the Athens Acropolis is truly remarkable and a must-see in your lifetime, I would actually say that I enjoyed this Acropolis just as much if not MORE.

DSC_0446DSC_0471DSC_0459

We were able to walk freely throughout this Acropolis, stand under pillars, take in the sights in awe and look out AS THE ACROPOLIS IS SURROUNDED BY WATER.  Seriously.  You get amazing views of Lindos Town, but also of the beautiful Aegean Sea and a beautiful heart-shaped bay.

DSC_0482
It was a thunderstorm-y day, and I was very lucky to capture this LIGHTNING BOLT shot!

The bay, known as St. Paul’s Bay, is supposedly where the Apostle Paul shipwrecked in 51 A.D.  it is said that Paul was caught in a storm, and a lightning bolt split a rock in two—opening up this bay and providing him with safe haven to land.  He then went on to preach Christianity to the local Rhodians.

An icon (and some believe it was a coin) of Paul was unearthed in this bay in 1920, which led to a small church being built in 1951 to commemorate his visit.

After our visit to the breathtaking Acropolis, we walked back to the town and got in our car again to go down to St. Paul’s Bay to a restaurant called “Tambakio.”  It’s a little off the beaten path, but I would highly recommend going here!

DSC_0739DSC_0737

You are literally situated in the bay and it is a wonderful place to watch the sunset over the Acropolis.

What’s more—“Tambakio” means “tannery,” and a tannery is what Pauls’ church was built over.  They’re very proud of the history, and have placemats to tell the story about it!

The tiny beach restaurant was also one of our favorite meals.  We were one of two couples there, and at times it felt like we had the entire place to ourselves.  The seafood is fresh and delicious, the prices are good and the seating areas are all on the sandy beach.  Eating dinner while the ocean waves gently lapped against the shore was nothing short of romantic.

DSC_0756

After dinner, we hopped in our car once again and made one last stop before driving back to Rhodes Town—at Lindos Ice Bar!  I had been to an ice bar in Barcelona, and my husband was fascinated by the concept and thrilled to check it out.

DSC_0763

The location is the only longstanding ice bar in Greece, and is certainly an experience to remember.  we paid 12€ for entry, which included a parka, gloves and a drink.  Once inside, we chose cocktails in cups made of ice (premade) and huddled together while enjoying the chairs and structures made of ice.

Couldn’t stay inside too long, but really enjoyed the experience!

DSC_0770

After that, we made the drive back to Rhodes Town and slept in eager anticipation of our next day—which was a day trip out to Symi Island.  You can read all about that here!

We also had time early that morning to see the windmills of Rhodes and grab a quick coffee before our tour boat left the next morning at, funnily enough, a Starbucks right in Mandraki Harbor.

DSC_0874

And then after we came back from the day trip, we had just enough time to head over to Tamam Restaurant for dinner.  This meal was another delicious highlight, and I would highly recommend it as well.

And that’s it!  The next day we had to wake up around 4am to get to the airport in time to make our  6:40am flight through Athens to Santorini.  We left, bleary-eyed but bushy-tailed and quite happy with our Rhodian experiences.

IMG_4867

RHODES ISLAND TRAVEL TIPS

Currency: EUR (Euro)

Languages: Greek (official), Turkish, many people speak English, Italian and German

Transportation: Rental Cars, Buses, Taxis

Food: As in any coastal region, fresh seafood is always an excellent choice!  In addition to that, any traditional Greek foods (particularly Souvlaki, Gyro and SAGANAKI) will be tasty—especially if they have a Turkish fusion flavor to them.  Also, Italian food is surprisingly good here!

*NOTE: I have a gluten allergy and actually wasn’t feeling too good during the evening.  This was really my fault, though, as I was being too shy to ask questions about what was in certain meals.  Plenty of places in Rhodes seem to cater to gluten allergies if you ask them—in particular, Tamam is good about accommodating!

[googlemaps https://www.google.com/maps/d/u/0/embed?mid=1o6TIWuiMAbYo2PDp9yr_8yRO42c&w=640&h=480]